Section 3: Operation
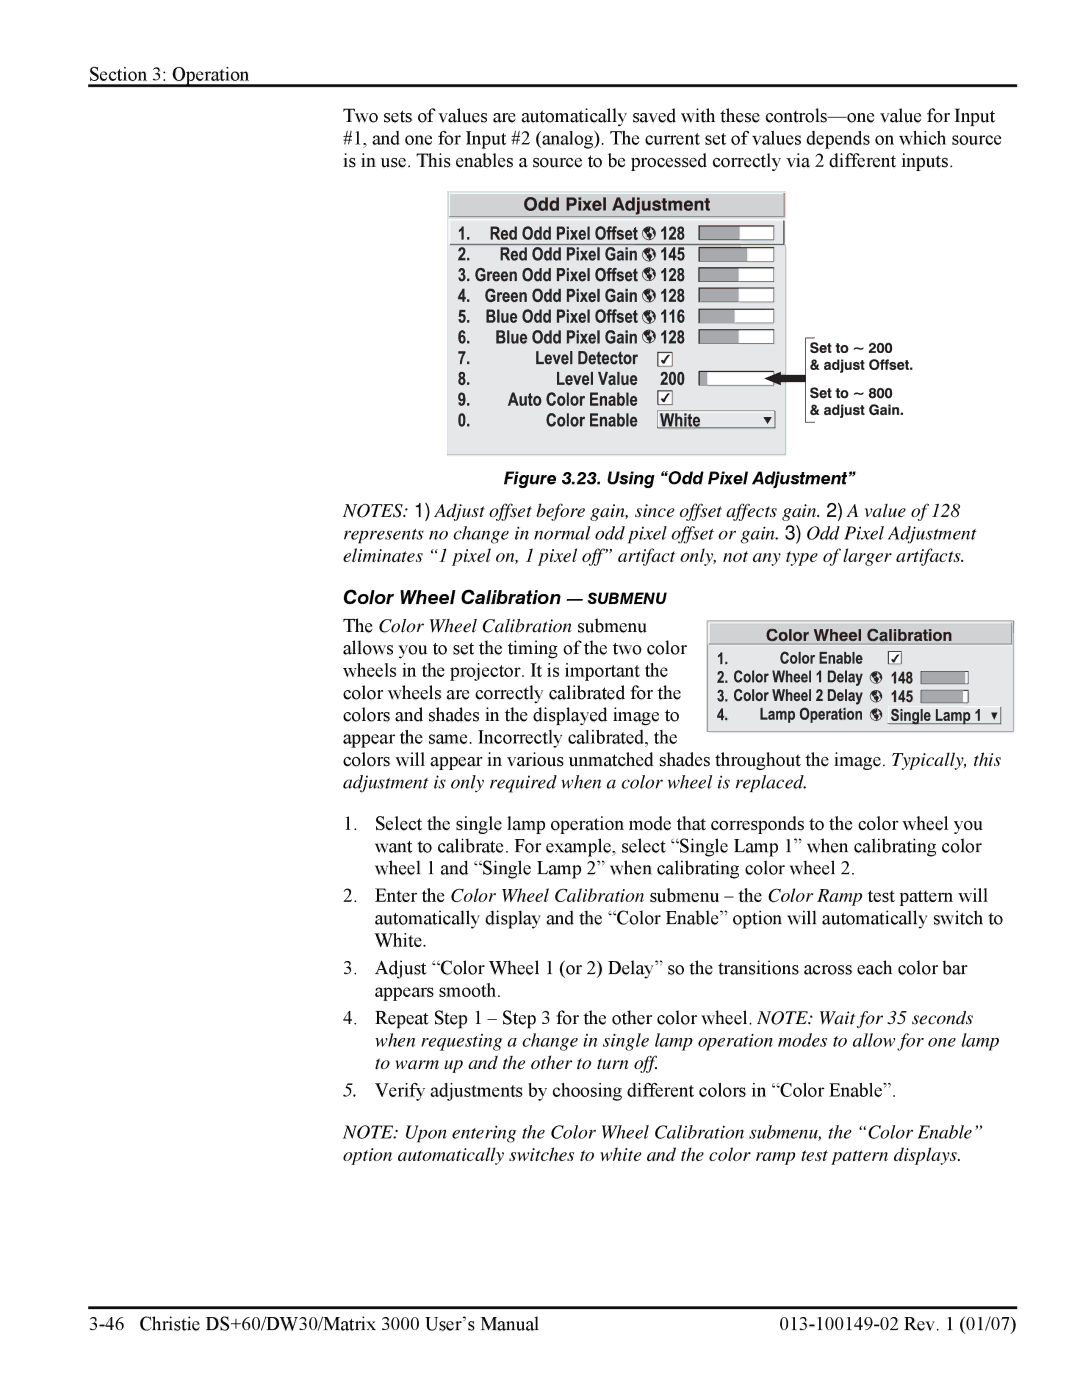
Two sets of values are automatically saved with these
Figure 3.23. Using “Odd Pixel Adjustment”
NOTES: 1) Adjust offset before gain, since offset affects gain. 2) A value of 128 represents no change in normal odd pixel offset or gain. 3) Odd Pixel Adjustment eliminates “1 pixel on, 1 pixel off” artifact only, not any type of larger artifacts.
Color Wheel Calibration — SUBMENU
The Color Wheel Calibration submenu
allows you to set the timing of the two color wheels in the projector. It is important the color wheels are correctly calibrated for the colors and shades in the displayed image to appear the same. Incorrectly calibrated, the
colors will appear in various unmatched shades throughout the image. Typically, this adjustment is only required when a color wheel is replaced.
1.Select the single lamp operation mode that corresponds to the color wheel you want to calibrate. For example, select “Single Lamp 1” when calibrating color wheel 1 and “Single Lamp 2” when calibrating color wheel 2.
2.Enter the Color Wheel Calibration submenu – the Color Ramp test pattern will automatically display and the “Color Enable” option will automatically switch to White.
3.Adjust “Color Wheel 1 (or 2) Delay” so the transitions across each color bar appears smooth.
4.Repeat Step 1 – Step 3 for the other color wheel. NOTE: Wait for 35 seconds when requesting a change in single lamp operation modes to allow for one lamp to warm up and the other to turn off.
5.Verify adjustments by choosing different colors in “Color Enable”.
NOTE: Upon entering the Color Wheel Calibration submenu, the “Color Enable” option automatically switches to white and the color ramp test pattern displays.
