IP Phone Administrator Guide
Global SIP Settings
Phones |
|
|
|
|
|
|
|
|
|
|
| IP Phone UI |
|
| |
|
|
|
|
|
| ||
|
|
|
|
|
|
| |
|
|
|
|
|
|
| |
|
| Step |
| Action |
|
| |
|
|
|
|
|
| ||
|
|
|
|
|
|
|
|
|
|
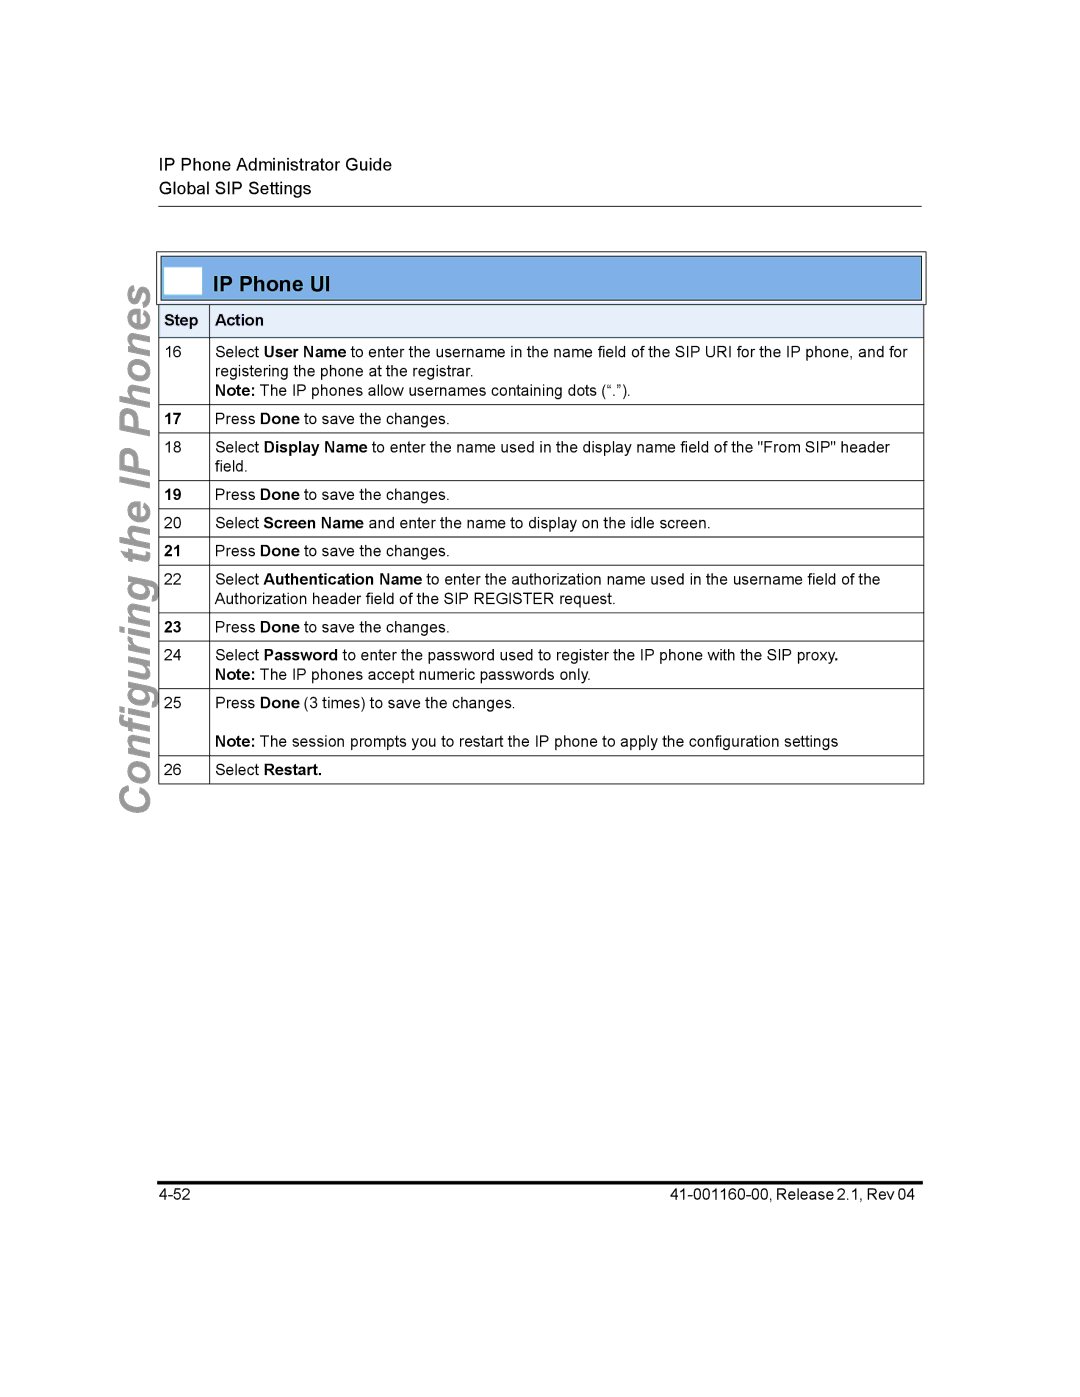
| 16 |
| Select User Name to enter the username in the name field of the SIP URI for the IP phone, and for |
|
|
|
|
|
|
| registering the phone at the registrar. |
|
|
|
|
|
|
| Note: The IP phones allow usernames containing dots (“.”). |
|
|
|
|
| 17 |
| Press Done to save the changes. |
|
|
IP |
|
|
|
|
|
| |
| 18 |
| Select Display Name to enter the name used in the display name field of the "From SIP" header |
|
| ||
|
|
| field. |
|
| ||
|
|
|
|
|
|
| |
|
|
|
|
|
|
|
|
the |
| 19 |
| Press Done to save the changes. |
|
| |
|
|
|
|
|
| ||
| 20 |
| Select Screen Name and enter the name to display on the idle screen. |
|
| ||
|
|
|
|
|
| ||
|
|
|
|
|
|
|
|
Configuring |
| 21 |
| Press Done to save the changes. |
|
| |
|
|
|
|
|
| ||
| 22 |
| Select Authentication Name to enter the authorization name used in the username field of the |
|
| ||
|
|
| Authorization header field of the SIP REGISTER request. |
|
| ||
|
|
|
|
|
|
| |
|
|
|
|
|
|
|
|
|
|
| 23 |
| Press Done to save the changes. |
|
|
|
|
|
|
|
|
|
|
|
|
| 24 |
| Select Password to enter the password used to register the IP phone with the SIP proxy. |
|
|
|
|
|
|
| Note: The IP phones accept numeric passwords only. |
|
|
|
|
| 25 |
| Press Done (3 times) to save the changes. |
|
|
|
|
|
|
| Note: The session prompts you to restart the IP phone to apply the configuration settings |
|
|
|
|
|
|
|
|
|
|
|
|
| 26 |
| Select Restart. |
|
|
|
|
|
|
|
|
|
|