Section 7 COPIER MANAGEMENT
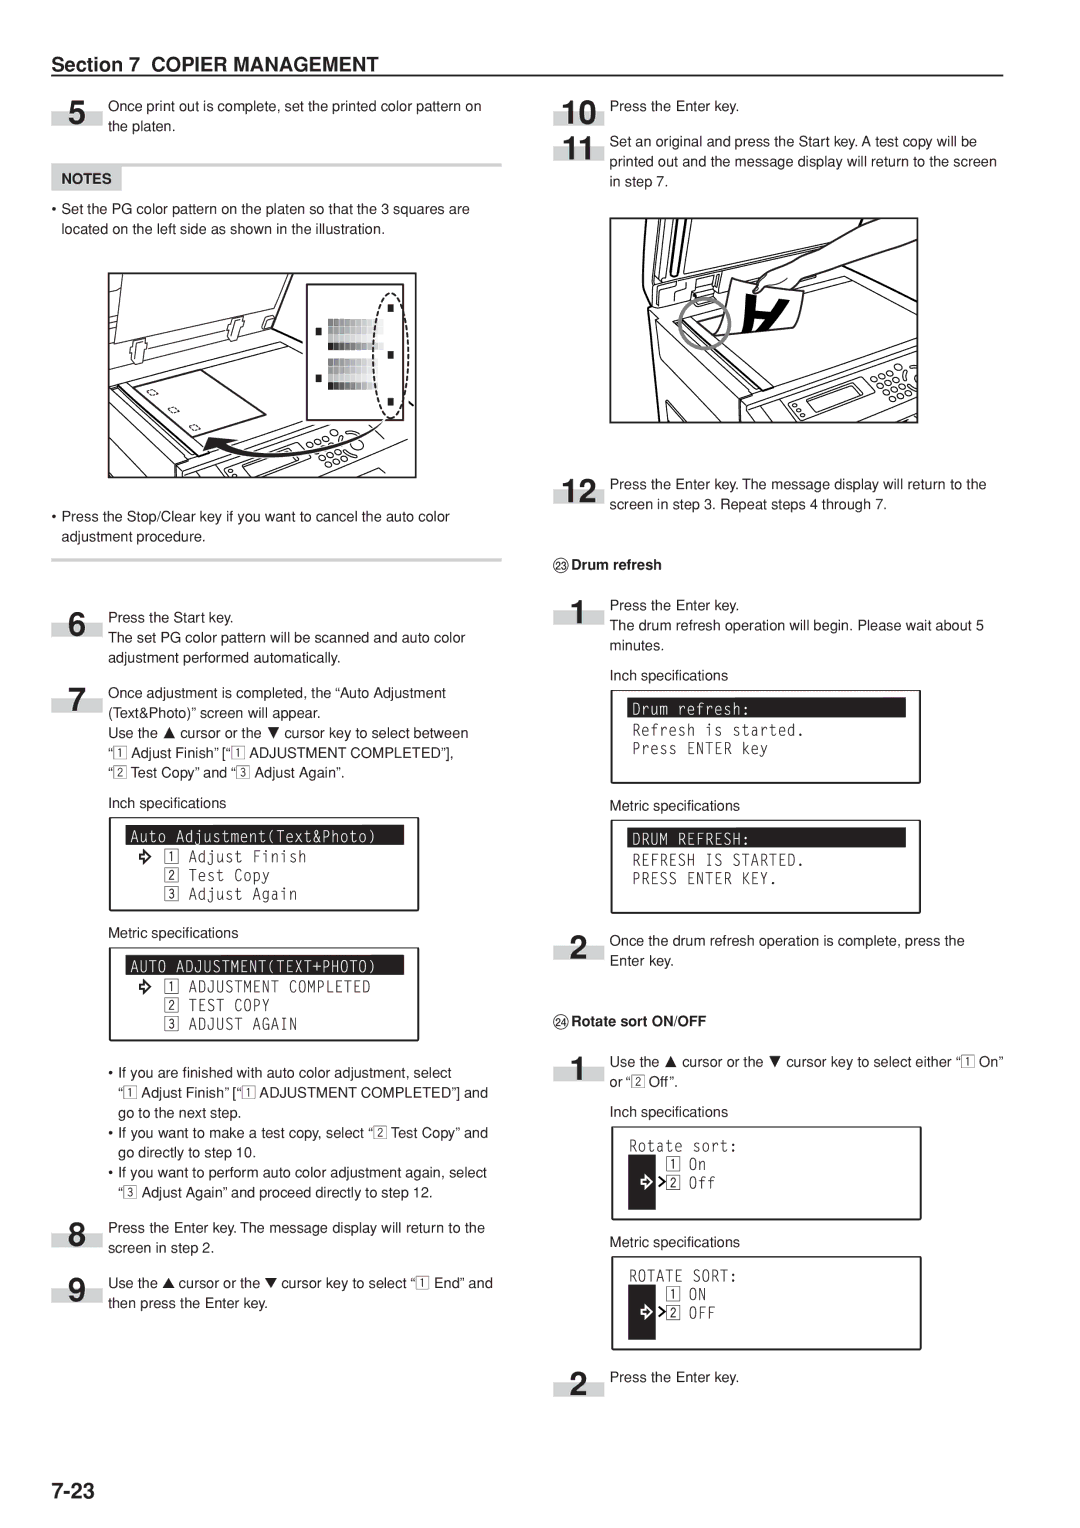
5 | Once print out is complete, set the printed color pattern on |
the platen. |
NOTES
•Set the PG color pattern on the platen so that the 3 squares are located on the left side as shown in the illustration.
•Press the Stop/Clear key if you want to cancel the auto color adjustment procedure.
6 | Press the Start key. | |
The set PG color pattern will be scanned and auto color | ||
| ||
| adjustment performed automatically. | |
| Once adjustment is completed, the “Auto Adjustment | |
7 | (Text&Photo)” screen will appear. | |
|
Use the M cursor or the N cursor key to select between “z Adjust Finish” [“z ADJUSTMENT COMPLETED”], “x Test Copy” and “c Adjust Again”.
Inch specifications
Metric specifications
• If you are finished with auto color adjustment, select
“z Adjust Finish” [“z ADJUSTMENT COMPLETED”] and go to the next step.
| • If you want to make a test copy, select “x Test Copy” and |
| go directly to step 10. |
| • If you want to perform auto color adjustment again, select |
| “c Adjust Again” and proceed directly to step 12. |
| Press the Enter key. The message display will return to the |
8 | screen in step 2. |
| |
| Use the ▲ cursor or the ▼ cursor key to select “z End” and |
9 | then press the Enter key. |
|
10 | Press the Enter key. |
11 | Set an original and press the Start key. A test copy will be |
printed out and the message display will return to the screen |
in step 7.
12 Press the Enter key. The message display will return to the screen in step 3. Repeat steps 4 through 7.
‹Drum refresh
1Press the Enter key.
The drum refresh operation will begin. Please wait about 5 minutes.
Inch specifications
Metric specifications
2 | Once the drum refresh operation is complete, press the |
Enter key. |
›Rotate sort ON/OFF
1Use the M cursor or the N cursor key to select either “z On” or “x Off”.
Inch specifications
Metric specifications
2 Press the Enter key.