Section 6 FUNCTIONS
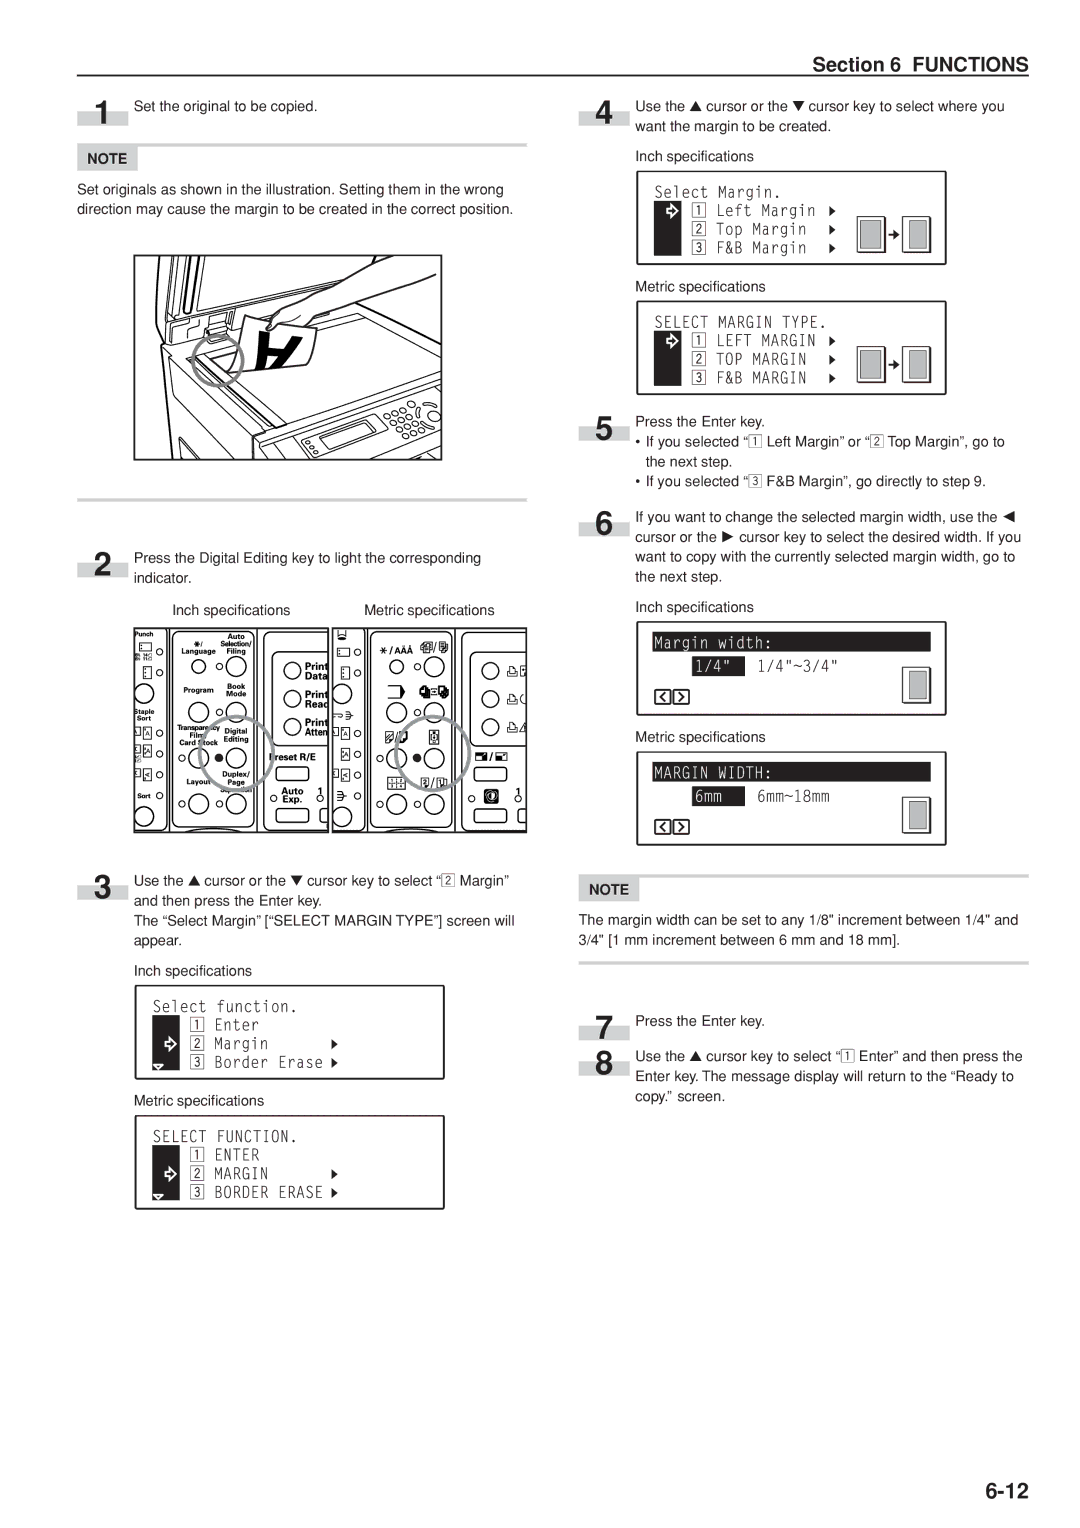
1 Set the original to be copied.
NOTE
Set originals as shown in the illustration. Setting them in the wrong direction may cause the margin to be created in the correct position.
|
| Press the Digital Editing key to light the corresponding | ||||
2 |
| indicator. |
|
|
|
|
|
|
|
|
| ||
|
| Inch specifications |
| Metric specifications | ||
|
|
|
|
|
|
|
|
|
|
|
|
|
|
|
|
|
|
|
|
|
|
|
|
|
|
|
|
|
|
|
|
|
|
|
|
|
|
|
|
|
|
|
|
|
|
|
|
|
3 | Use the ▲ cursor or the ▼ cursor key to select “x Margin” |
and then press the Enter key. |
The “Select Margin” [“SELECT MARGIN TYPE”] screen will appear.
Inch specifications
Metric specifications
4 | Use the ▲ cursor or the ▼ cursor key to select where you |
want the margin to be created. |
Inch specifications
Metric specifications
| Press the Enter key. |
5 | • If you selected “z Left Margin” or “x Top Margin”, go to |
| |
| the next step. |
| • If you selected “c F&B Margin”, go directly to step 9. |
| If you want to change the selected margin width, use the O |
6 | cursor or the P cursor key to select the desired width. If you |
|
want to copy with the currently selected margin width, go to the next step.
Inch specifications
Metric specifications
NOTE
The margin width can be set to any 1/8" increment between 1/4" and 3/4" [1 mm increment between 6 mm and 18 mm].
7 | Press the Enter key. | |
8 | Use the ▲ cursor key to select “z Enter” and then press the | |
Enter key. The message display will return to the “Ready to | ||
|
copy.” screen.