Section 6 FUNCTIONS
2
3
4
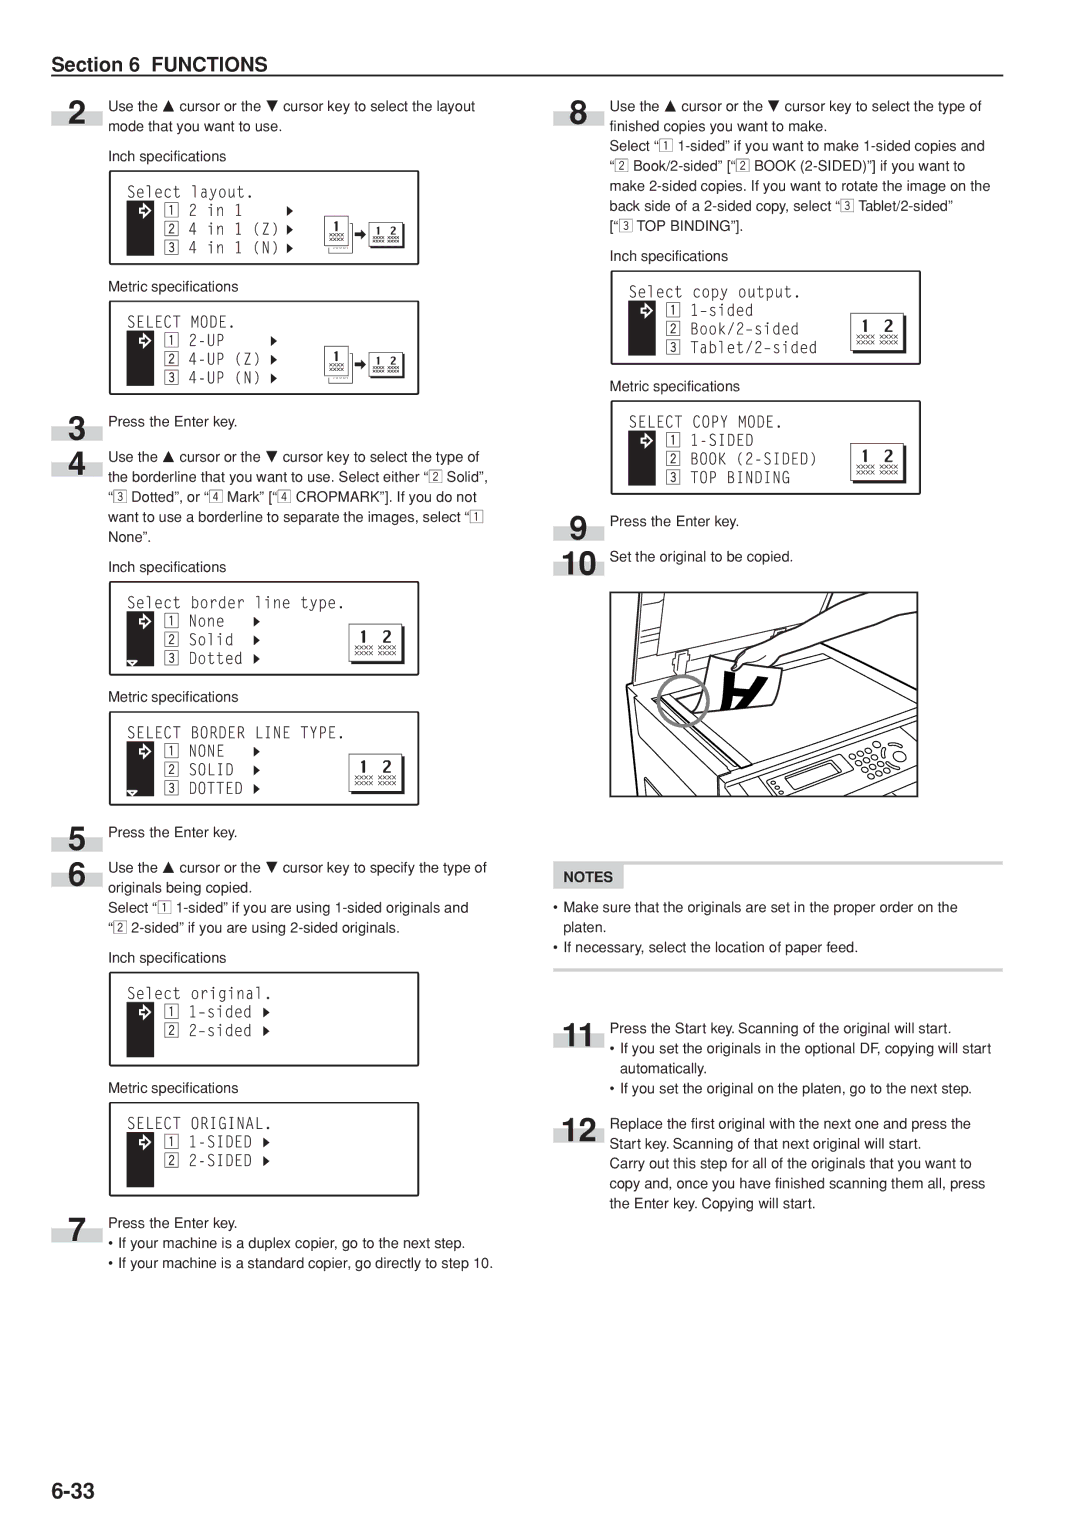
Use the M cursor or the N cursor key to select the layout mode that you want to use.
Inch specifications
Metric specifications
Press the Enter key.
Use the M cursor or the N cursor key to select the type of the borderline that you want to use. Select either “x Solid”, “c Dotted”, or “v Mark” [“v CROPMARK”]. If you do not want to use a borderline to separate the images, select “z None”.
Inch specifications
Metric specifications
8
9
10
Use the M cursor or the N cursor key to select the type of finished copies you want to make.
Select “z
[“c TOP BINDING”].
Inch specifications
Metric specifications
Press the Enter key.
Set the original to be copied.
5
6
7
Press the Enter key.
Use the M cursor or the N cursor key to specify the type of originals being copied.
Select “z
Inch specifications
Metric specifications
Press the Enter key.
•If your machine is a duplex copier, go to the next step.
•If your machine is a standard copier, go directly to step 10.
NOTES
•Make sure that the originals are set in the proper order on the platen.
•If necessary, select the location of paper feed.
| Press the Start key. Scanning of the original will start. | |
11 | ||
• If you set the originals in the optional DF, copying will start | ||
| ||
| automatically. | |
| • If you set the original on the platen, go to the next step. | |
| Replace the first original with the next one and press the | |
12 | ||
Start key. Scanning of that next original will start. | ||
|
Carry out this step for all of the originals that you want to copy and, once you have finished scanning them all, press the Enter key. Copying will start.