Chapter 6. Creating a Dedicated Map
|
| Table | Connections |
|
| ||
|
|
|
|
|
|
|
|
Name | ATLAS 800 PLUS |
| DS0s |
| Name | ATLAS 800 | DS0s |
|
|
|
|
|
| PLUS Port |
|
|
|
|
|
|
|
|
|
Controller T1 |
|
| V.35 - A | Quad V.35 | N/A | ||
Data | Slot 0 Port 1 |
| RBS Off |
|
| Slot 2/Port 1 |
|
|
|
|
|
|
|
|
|
Controller T1 |
|
| V.35 - B | Quad V.35 | N/A | ||
Data | Slot 0/Port 2 |
| RBS Off |
|
| Slot 2/Port 2 |
|
|
|
|
|
|
|
|
|
Quad T1/PRI |
|
| V.35 - C | Quad V.35 | N/A | ||
Data | Slot 1/Port 1 |
| RBS Off |
|
| Slot 2/Port 3 |
|
|
|
|
|
|
|
|
|
Controller T1 |
|
| Quad T1/PRI | ||||
Voice | Slot 0/Port 1 |
| RBS On |
|
| DSX | RBS On |
|
|
| Slot 1/Port 2 | ||||
|
|
|
|
|
|
| |
|
|
|
|
|
|
|
|
Controller T1 |
|
| Quad T1/PRI | ||||
Voice | Slot 0/Port 2 |
| RBS On |
|
| DSX | RBS On |
|
|
| Slot 1/Port 2 | ||||
|
|
|
|
|
|
| |
|
|
|
|
|
|
|
|
Quad T1/PRI |
|
| Quad/PRI DSX | ||||
Voice | Slot 1/Port 1 |
| RBS On |
|
| Slot 1/Port 2 | RBS On |
|
|
|
|
|
|
|
|
Configure the Ports
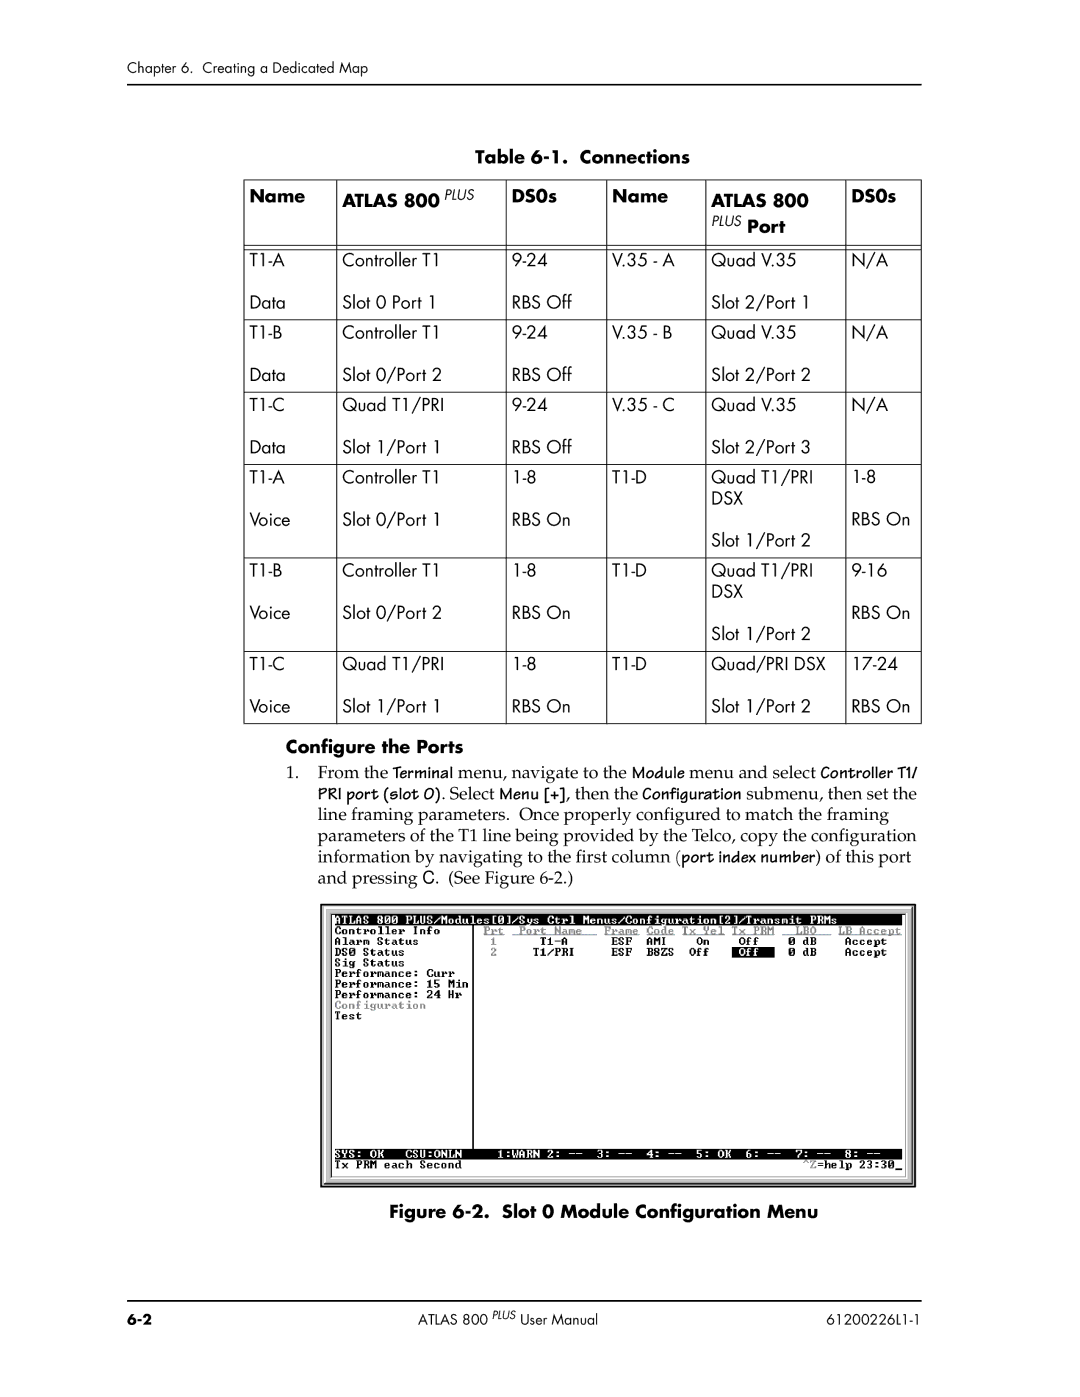
1.From the Terminal menu, navigate to the Module menu and select Controller T1/ PRI port (slot 0). Select Menu [+], then the Configuration submenu, then set the line framing parameters. Once properly configured to match the framing parameters of the T1 line being provided by the Telco, copy the configuration information by navigating to the first column (port index number) of this port and pressing C. (See Figure
Figure 6-2. Slot 0 Module Configuration Menu
ATLAS 800 PLUS User Manual |
|