Chapter 5. Using the Terminal Menu
MODULES
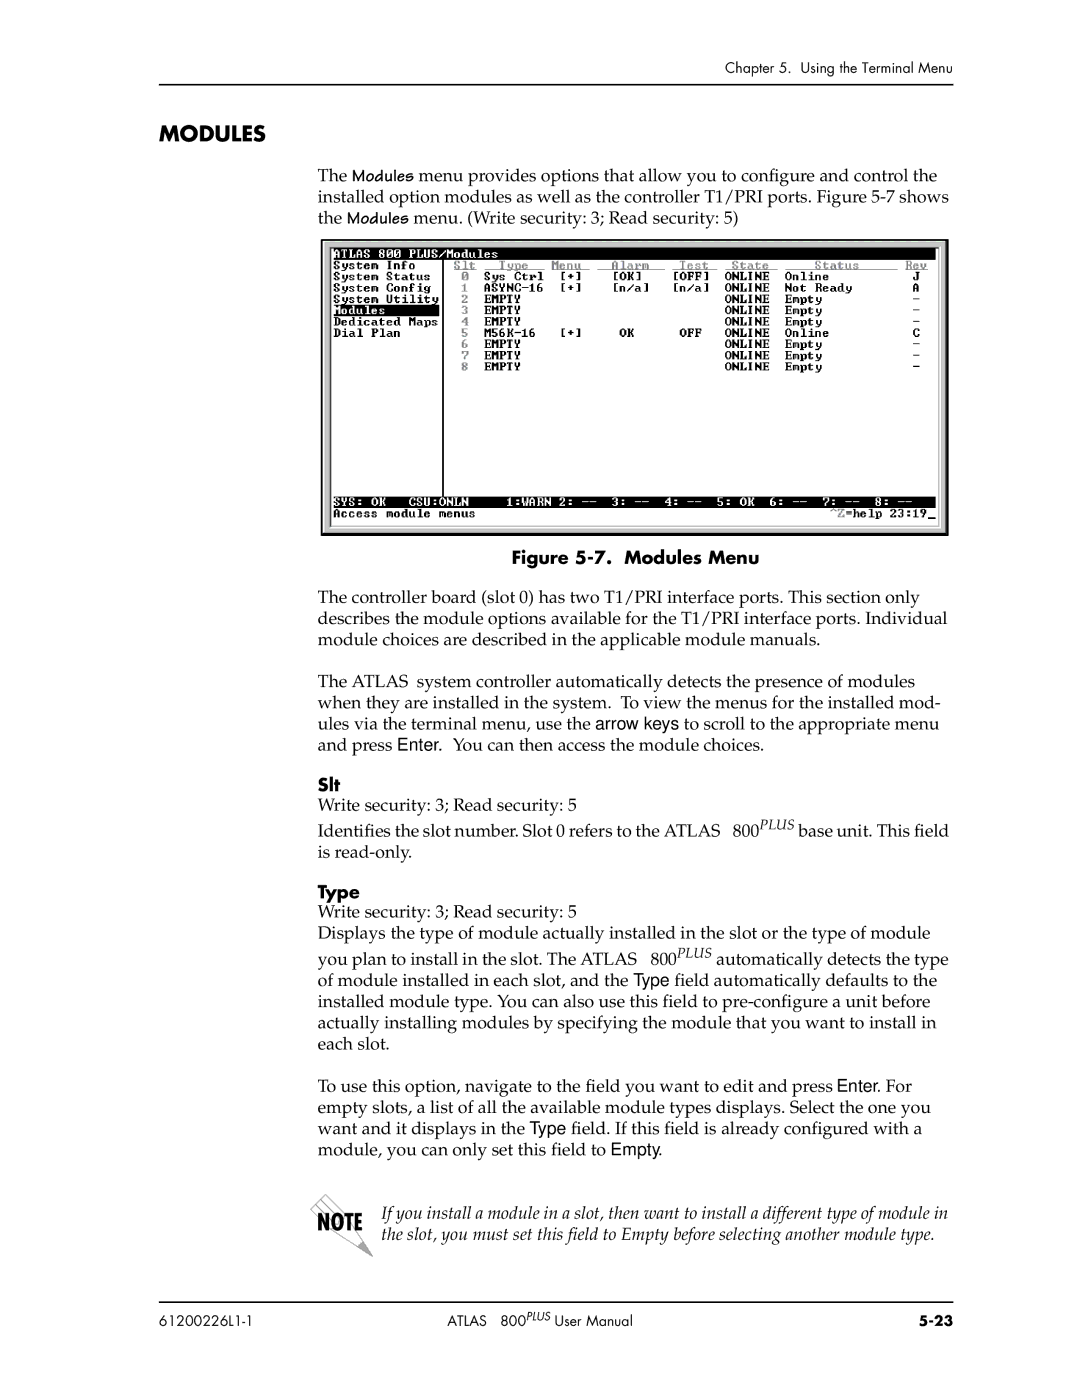
The Modules menu provides options that allow you to configure and control the installed option modules as well as the controller T1/PRI ports. Figure
Figure 5-7. Modules Menu
The controller board (slot 0) has two T1/PRI interface ports. This section only describes the module options available for the T1/PRI interface ports. Individual module choices are described in the applicable module manuals.
The ATLAS system controller automatically detects the presence of modules when they are installed in the system. To view the menus for the installed mod- ules via the terminal menu, use the arrow keys to scroll to the appropriate menu and press Enter. You can then access the module choices.
Slt
Write security: 3; Read security: 5
Identifies the slot number. Slot 0 refers to the ATLAS 800PLUS base unit. This field is
Type
Write security: 3; Read security: 5
Displays the type of module actually installed in the slot or the type of module you plan to install in the slot. The ATLAS 800PLUS automatically detects the type of module installed in each slot, and the Type field automatically defaults to the installed module type. You can also use this field to
To use this option, navigate to the field you want to edit and press Enter. For empty slots, a list of all the available module types displays. Select the one you want and it displays in the Type field. If this field is already configured with a module, you can only set this field to Empty.
If you install a module in a slot, then want to install a different type of module in the slot, you must set this field to Empty before selecting another module type.
| ATLAS 800PLUS User Manual |