Installing a Hard Drive in the Removable Hard Drive Cage
To install a hard drive in the removable hard drive cage:
1.Perform the service preparations shown on page
2.Remove the following components:
❏Workstation feet
❏Side access panel
❏Removable hard drive cage
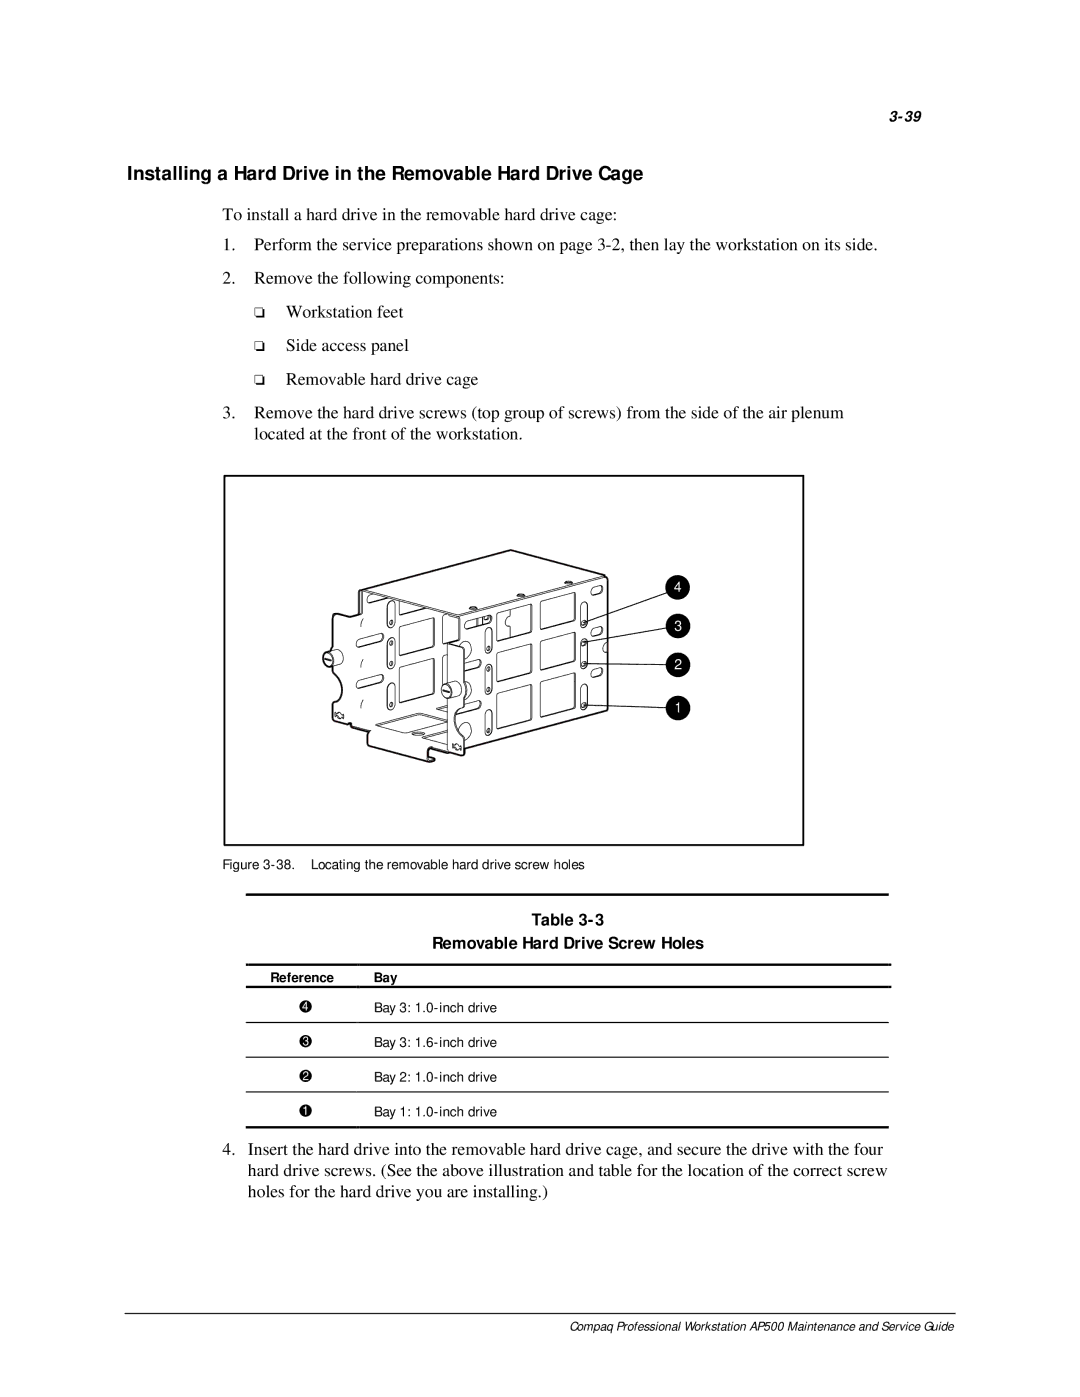
3.Remove the hard drive screws (top group of screws) from the side of the air plenum located at the front of the workstation.
4
3
2
1
Figure 3-38. Locating the removable hard drive screw holes
Table
Removable Hard Drive Screw Holes
Reference Bay
Bay 3:
Bay 3:
Bay 2:
BBay 1:
4.Insert the hard drive into the removable hard drive cage, and secure the drive with the four hard drive screws. (See the above illustration and table for the location of the correct screw holes for the hard drive you are installing.)
Compaq Professional Workstation AP500 Maintenance and Service Guide