3-14 Removal and Replacement Procedures
Removing a PCI or ISA Expansion Board
NOTE: The following instructions also apply to installing and removing graphics controllers. For information about the installed graphics controller, refer to the appropriate guide on the SmartStart for Workstations CD under X:\DOCS\GRAPHICS, where X is the
To remove a PCI or ISA expansion board:
1.Perform the service preparations shown on page
2.Remove the following components:
❏Workstation feet
❏Side access panel
❏I/O bracket assembly
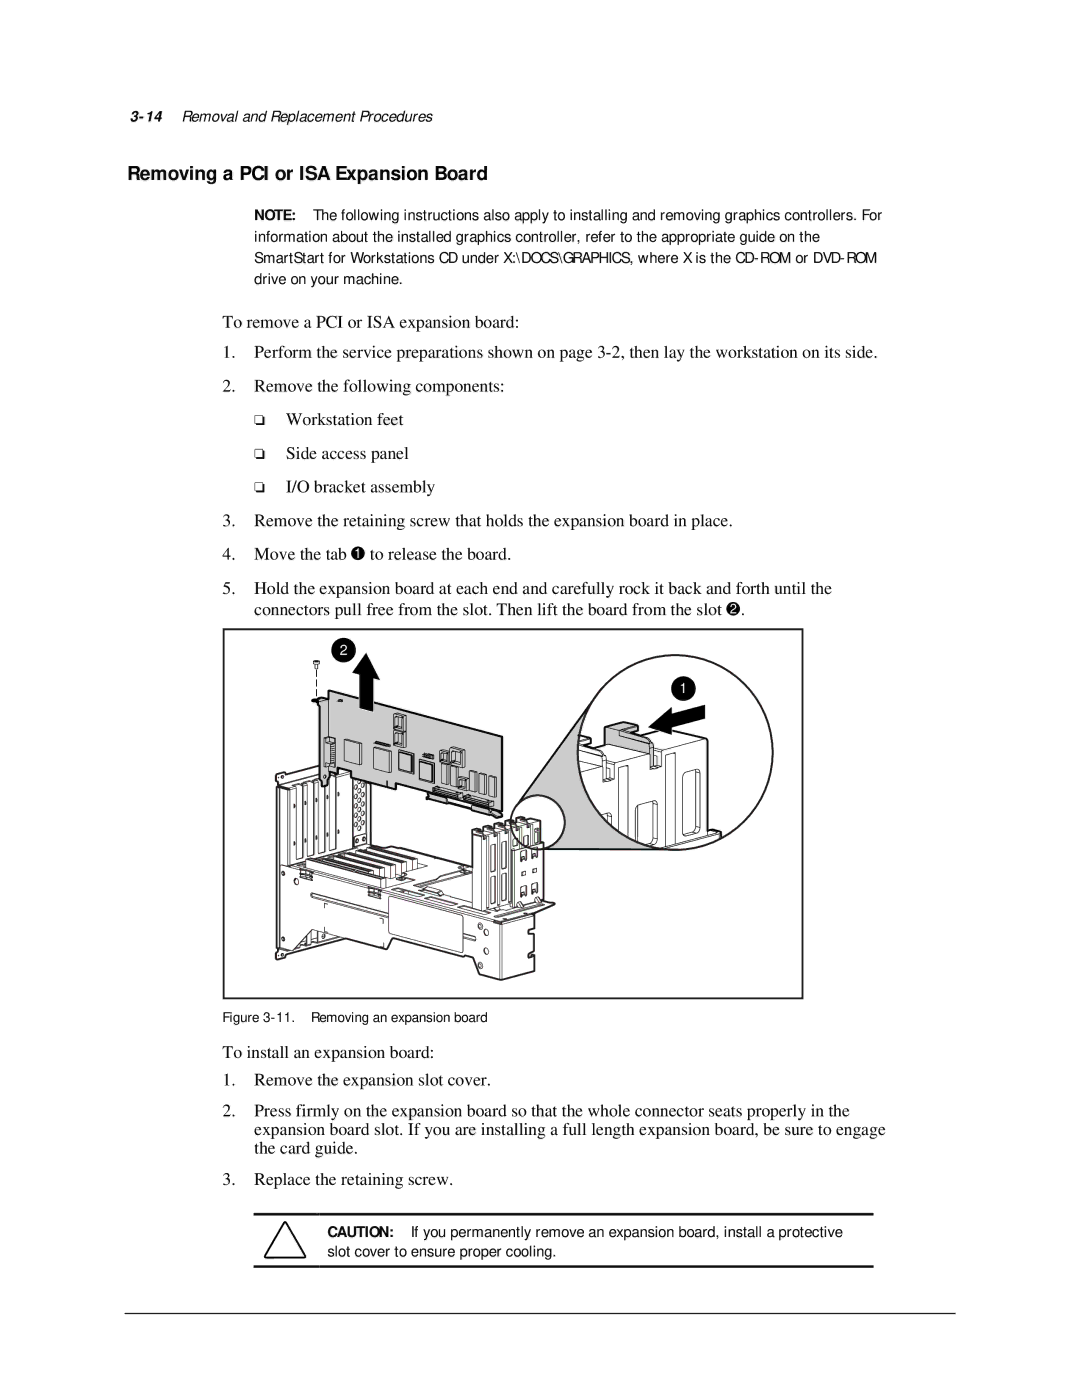
3.Remove the retaining screw that holds the expansion board in place.
4.Move the tab B to release the board.
5.Hold the expansion board at each end and carefully rock it back and forth until the
connectors pull free from the slot. Then lift the board from the slot . |
2 |
1 |
Figure 3-11. Removing an expansion board
To install an expansion board:
1.Remove the expansion slot cover.
2.Press firmly on the expansion board so that the whole connector seats properly in the expansion board slot. If you are installing a full length expansion board, be sure to engage the card guide.
3.Replace the retaining screw.
CAUTION: If you permanently remove an expansion board, install a protective slot cover to ensure proper cooling.