Configuring the Fast EtherNet
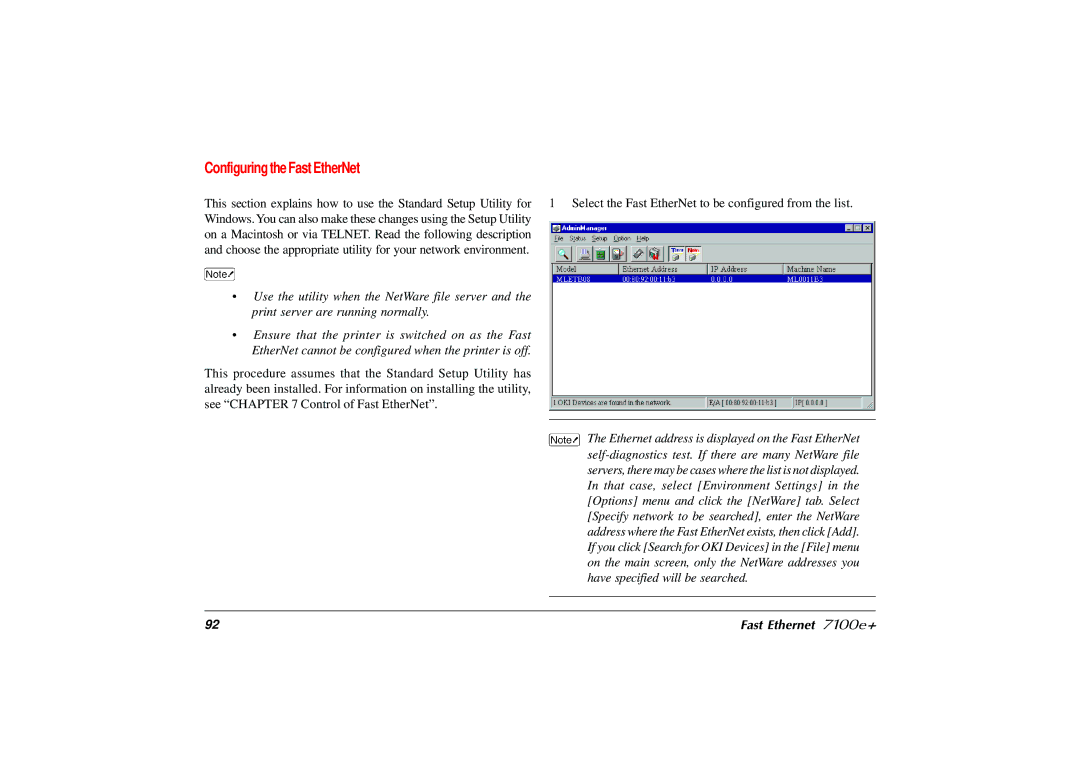
This section explains how to use the Standard Setup Utility for 1 Select the Fast EtherNet to be configured from the list. Windows. You can also make these changes using the Setup Utility
on a Macintosh or via TELNET. Read the following description and choose the appropriate utility for your network environment.
•Use the utility when the NetWare file server and the print server are running normally.
•Ensure that the printer is switched on as the Fast EtherNet cannot be configured when the printer is off.
This procedure assumes that the Standard Setup Utility has already been installed. For information on installing the utility, see “CHAPTER 7 Control of Fast EtherNet”.
The Ethernet address is displayed on the Fast EtherNet
92 | Fast Ethernet 7100e+ |