6-28 ENGINE TOP END
Valves
•Measure the outside diameter of the seating surface with a vernier caliper.
![]() If the outside diameter of the seating surface is too small, repeat the 45° grind until the diameter is within the spec- ified range.
If the outside diameter of the seating surface is too small, repeat the 45° grind until the diameter is within the spec- ified range.
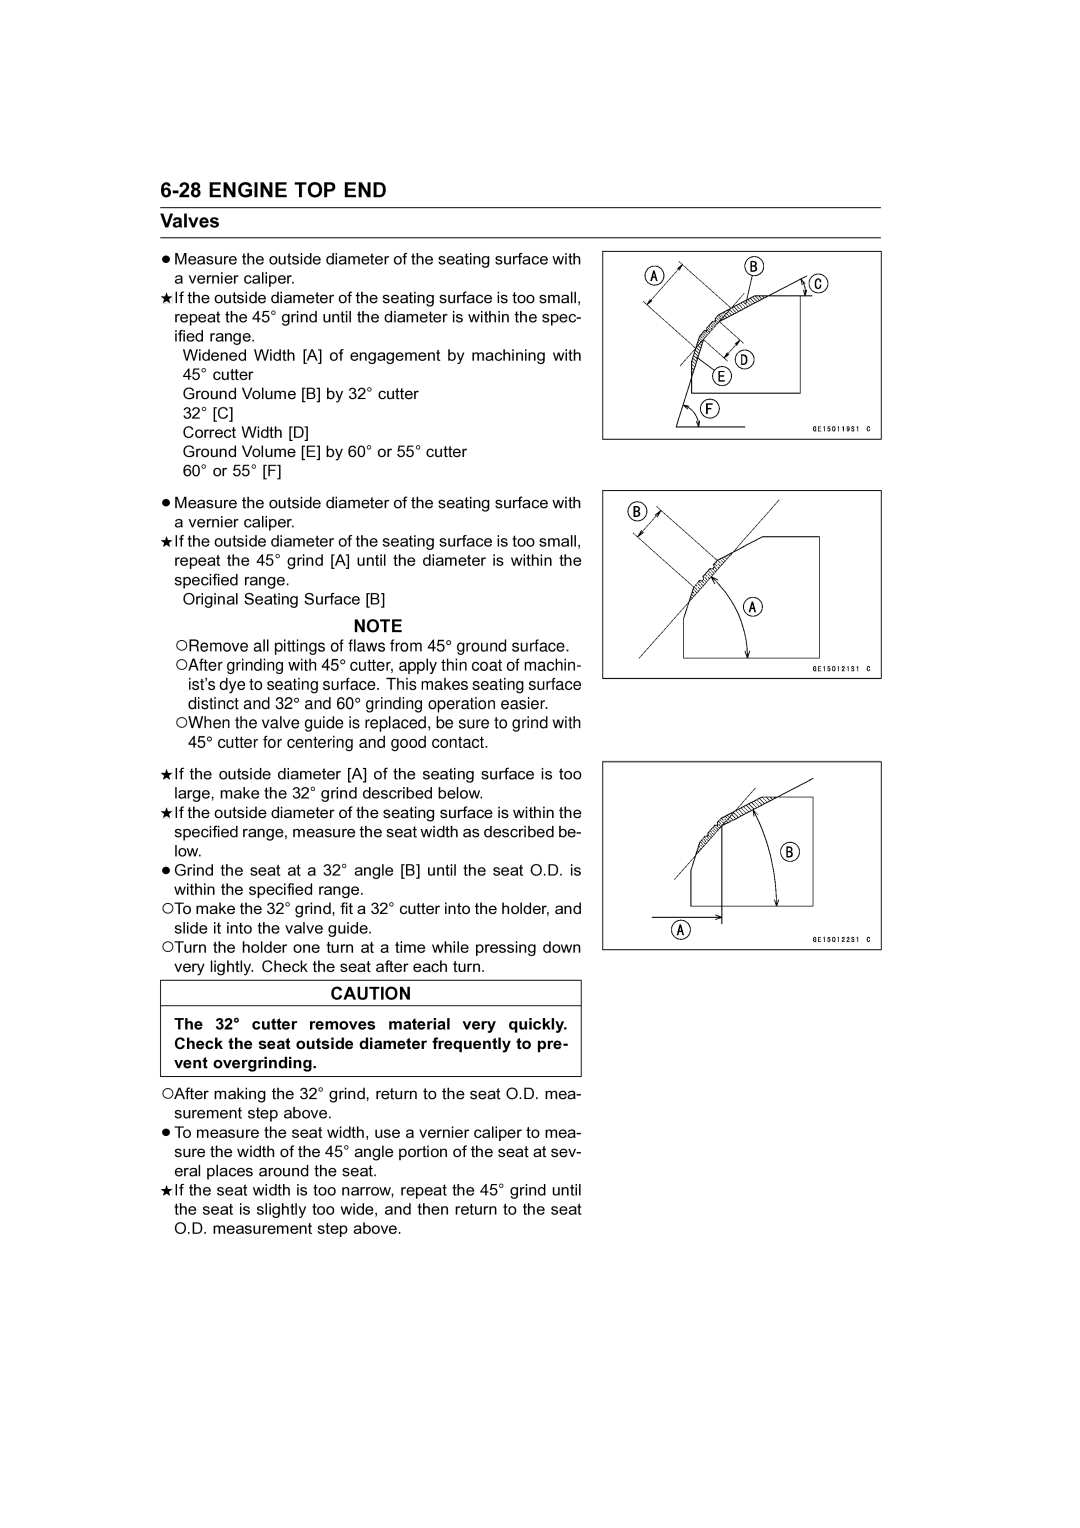
Widened Width [A] of engagement by machining with 45° cutter
Ground Volume [B] by 32° cutter 32° [C]
Correct Width [D]
Ground Volume [E] by 60° or 55° cutter 60° or 55° [F]
•Measure the outside diameter of the seating surface with a vernier caliper.
![]() If the outside diameter of the seating surface is too small, repeat the 45° grind [A] until the diameter is within the specified range.
If the outside diameter of the seating surface is too small, repeat the 45° grind [A] until the diameter is within the specified range.
Original Seating Surface [B]
NOTE
○Remove all pittings of flaws from 45° ground surface. ○After grinding with 45° cutter, apply thin coat of machin- ist’s dye to seating surface. This makes seating surface
distinct and 32° and 60° grinding operation easier. ○When the valve guide is replaced, be sure to grind with
45° cutter for centering and good contact.
![]() If the outside diameter [A] of the seating surface is too large, make the 32° grind described below.
If the outside diameter [A] of the seating surface is too large, make the 32° grind described below.
![]() If the outside diameter of the seating surface is within the specified range, measure the seat width as described be- low.
If the outside diameter of the seating surface is within the specified range, measure the seat width as described be- low.
•Grind the seat at a 32° angle [B] until the seat O.D. is within the specified range.
○To make the 32° grind, fit a 32° cutter into the holder, and slide it into the valve guide.
○Turn the holder one turn at a time while pressing down very lightly. Check the seat after each turn.
CAUTION
The 32° cutter removes material very quickly. Check the seat outside diameter frequently to pre- vent overgrinding.
○After making the 32° grind, return to the seat O.D. mea- surement step above.
•To measure the seat width, use a vernier caliper to mea- sure the width of the 45° angle portion of the seat at sev- eral places around the seat.
![]() If the seat width is too narrow, repeat the 45° grind until the seat is slightly too wide, and then return to the seat O.D. measurement step above.
If the seat width is too narrow, repeat the 45° grind until the seat is slightly too wide, and then return to the seat O.D. measurement step above.
