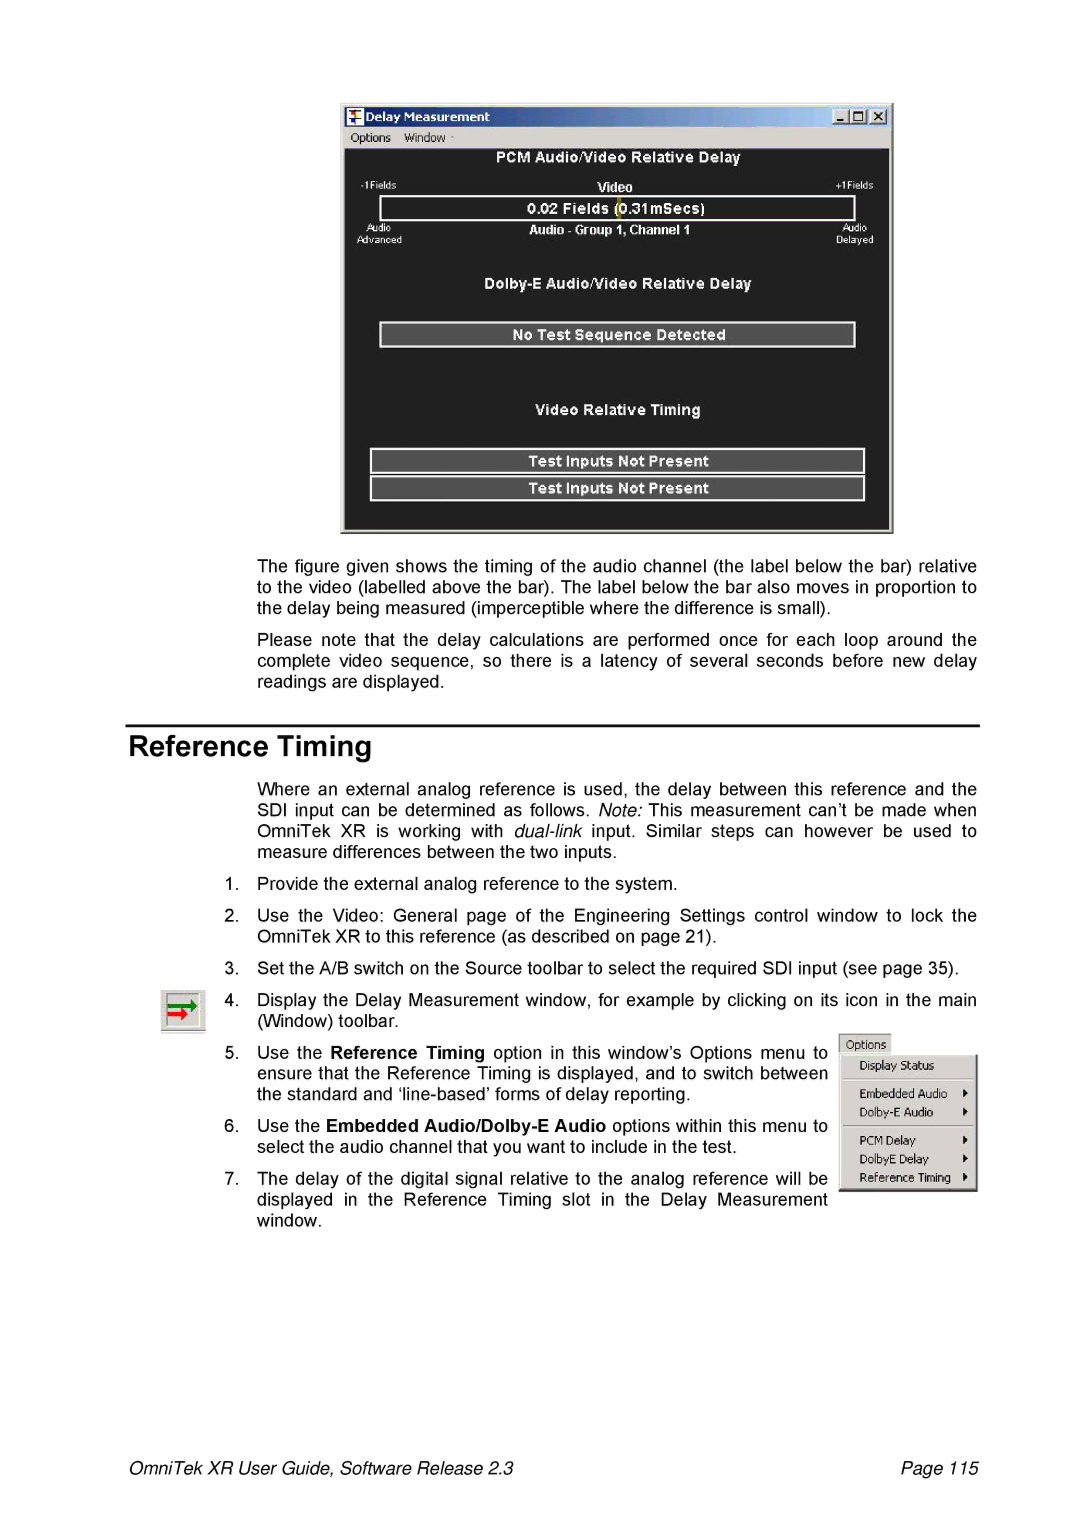
The figure given shows the timing of the audio channel (the label below the bar) relative to the video (labelled above the bar). The label below the bar also moves in proportion to the delay being measured (imperceptible where the difference is small).
Please note that the delay calculations are performed once for each loop around the complete video sequence, so there is a latency of several seconds before new delay readings are displayed.
Reference Timing
Where an external analog reference is used, the delay between this reference and the SDI input can be determined as follows. Note: This measurement can’t be made when OmniTek XR is working with
1.Provide the external analog reference to the system.
2.Use the Video: General page of the Engineering Settings control window to lock the OmniTek XR to this reference (as described on page 21).
3.Set the A/B switch on the Source toolbar to select the required SDI input (see page 35).
4.Display the Delay Measurement window, for example by clicking on its icon in the main (Window) toolbar.
5.Use the Reference Timing option in this window’s Options menu to ensure that the Reference Timing is displayed, and to switch between the standard and
6.Use the Embedded
7.The delay of the digital signal relative to the analog reference will be displayed in the Reference Timing slot in the Delay Measurement window.
OmniTek XR User Guide, Software Release 2.3 | Page 115 |