impresión de imágenes

drucken von fotos

fotográfi cas


IMPRESIÓN DIRECTA CON PICTBRIDGE

DIREKTDRUCK ÜBER PICTBRIDGE


• Si la impresora es compatible con PictBridge, las imágenes fotográfi cas se pueden imprimir fácilmente conectando la videocámara con el cable USB directamente a la impresora. También se puede utilizar el ajuste de DPOF. página 91

AVISO: Después de seleccionar “PictBridge(Impresora) en el menú, conecte el cable USB.

1. Defi na “USB Connect(Conexión USB) en

PictBridge(Impresora). página 73

2. Conecte la videocámara con DVD a la impresora utilizando el cable USB suministrado.

3. Encienda la impresora.

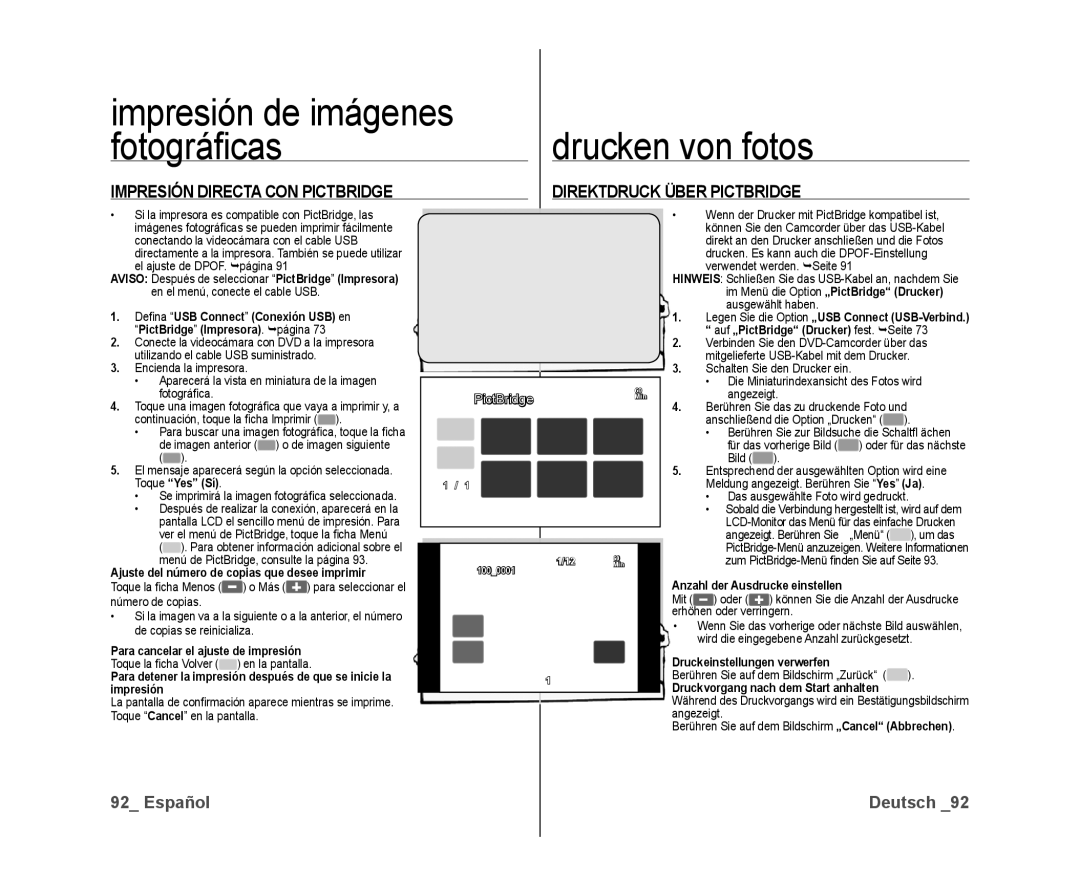
• Aparecerá la vista en miniatura de la imagen fotográfi ca.

4. Toque una imagen fotográfi ca que vaya a imprimir y, a continuación, toque la fi cha Imprimir ( ).

• Para buscar una imagen fotográfi ca, toque la fi cha de imagen anterior ( ) o de imagen siguiente

( ).

5. El mensaje aparecerá según la opción seleccionada. Toque “Yes” (Sí).

• Se imprimirá la imagen fotográfi ca seleccionada.

• Después de realizar la conexión, aparecerá en la pantalla LCD el sencillo menú de impresión. Para ver el menú de PictBridge, toque la fi cha Menú

( ). Para obtener información adicional sobre el menú de PictBridge, consulte la página 93.

Ajuste del número de copias que desee imprimir

Toque la fi cha Menos () o Más () para seleccionar el número de copias.

Si la imagen va a la siguiente o a la anterior, el número de copias se reinicializa.

Para cancelar el ajuste de impresión

Toque la fi cha Volver ( ) en la pantalla.

Para detener la impresión después de que se inicie la impresión

La pantalla de confi rmación aparece mientras se imprime. Toque “Cancel” en la pantalla.

����������


�����


���


PictBridge

60


Min


1

/

1


1/12

60


Min


100_0001


1

• Wenn der Drucker mit PictBridge kompatibel ist, können Sie den Camcorder über das USB-Kabel direkt an den Drucker anschließen und die Fotos drucken. Es kann auch die DPOF-Einstellung verwendet werden. Seite 91

HINWEIS: Schließen Sie das USB-Kabel an, nachdem Sie


im Menü die Option „PictBridge“ (Drucker)

1.

ausgewählt haben.


Legen Sie die Option „USB Connect (USB-Verbind.)

2.

auf „PictBridge“ (Drucker) fest. Seite 73

Verbinden Sie den DVD-Camcorder über das

3.

mitgelieferte USB-Kabel mit dem Drucker.

Schalten Sie den Drucker ein.


• Die Miniaturindexansicht des Fotos wird

4.

angezeigt.


Berühren Sie das zu druckende Foto und


anschließend die Option „Drucken“ (

).


• Berühren Sie zur Bildsuche die Schaltfl ächen


für das vorherige Bild (

) oder für das nächste

5.

Bild (

).


Entsprechend der ausgewählten Option wird eine


Meldung angezeigt. Berühren Sie “Yes(Ja).


• Das ausgewählte Foto wird gedruckt.


• Sobald die Verbindung hergestellt ist, wird auf dem


LCD-Monitor das Menü für das einfache Drucken


angezeigt. Berühren Sie

„Menü“ (

), um das


PictBridge-Menü anzuzeigen. Weitere Informationen


zum PictBridge-Menü fi nden Sie auf Seite 93.

Anzahl der Ausdrucke einstellen


Mit (

) oder (

) können Sie die Anzahl der Ausdrucke

erhöhen oder verringern.


Wenn Sie das vorherige oder nächste Bild auswählen, wird die eingegebene Anzahl zurückgesetzt.

Druckeinstellungen verwerfen

Berühren Sie auf dem Bildschirm „Zurück“ ( ).

Druckvorgang nach dem Start anhalten

Während des Druckvorgangs wird ein Bestätigungsbildschirm angezeigt.

Berühren Sie auf dem Bildschirm „Cancel“ (Abbrechen).

92_ Español

Deutsch _92

Page 98
Image 98
Samsung VP-DX10/XEE, VP-DX10/XEF, VP-DX10/XEO manual Impresión de imágenes Drucken von fotos Fotográfi cas

VP-DX10/XEO, VP-DX10/XEF, VP-DX10/XEE specifications

The Samsung VP-DX10 is a compact, versatile camcorder that represents an ideal blend of technological innovation and user-friendly design. This model caters to both novice and experienced videographers, offering an impressive assortment of features that enhance the recording experience.

One of the standout characteristics of the VP-DX10 is its ability to record in high-quality MPEG-2 format, ensuring that videos maintain excellent clarity and detail. The device supports DVD-RW/-R and -R DL formats, giving users flexibility in choosing their recording media. With a storage capacity of up to 8 hours and the ability to easily transfer videos to DVD, it streamlines the process of archiving memories.

In terms of imaging performance, the VP-DX10 is equipped with a 1/6-inch CCD sensor, providing a resolution of up to 800,000 pixels for clear and vibrant footage. The 34x optical zoom lens amplifies the camcorder’s capabilities, allowing for dynamic shooting from various distances. Alongside its optical prowess, the VP-DX10 incorporates digital image stabilization technology that minimizes shakiness, making it easier to capture smooth video even during movement.

The device's user-centered design includes a bright, swivel LCD screen, making it convenient to frame shots and play back recordings. Additionally, it features easy-to-navigate menus, enabling quick access to various settings and functions. The built-in USB connectivity allows for direct downloads to computers, facilitating hassle-free editing and sharing of videos.

Moreover, the VP-DX10 incorporates various shooting modes, including sports, portrait, and night modes, each tailored to specific scenarios, enhancing overall recording quality. The presence of a built-in flash and an advanced microphone improves audio-visual recordings, ensuring rich sound quality.

From intelligent battery management to enhanced connectivity options, the Samsung VP-DX10 is designed to meet the demands of modern videographers. Its combination of reliable performance and innovative features makes it a noteworthy choice in the compact camcorder market, appealing to users seeking both portability and quality.