| Setting the Sports Camcorder |
| Ajuste de la Videocámara |
|
ENGLISH | ESPAÑOL | |||
|
| |||
: Using USB Mode |
| Deportiva: Utilización de la modalidad USB | ||
|
|
| ||
Using the PC Cam Function |
| Utilización de la función PC Cam (Cámara PC) | ||
You can use your Sports Camcorder as a PC camera for video chatting, video conference and other PC camera applications.
Puede utilizar esta CAM como una cámara de PC para chat con vídeo, videoconferencia y otras aplicaciones de cámara en PC.
Before your start!
◆For PC Cam use, it is required to install the DV Driver. ➥page 97
1.Press the [power] button to turn on the Sports Camcorder.
◆The Movie Record screen appears.
2.Set the System Settings mode by pressing the [MODE] button.
◆The System Settings screen appears.
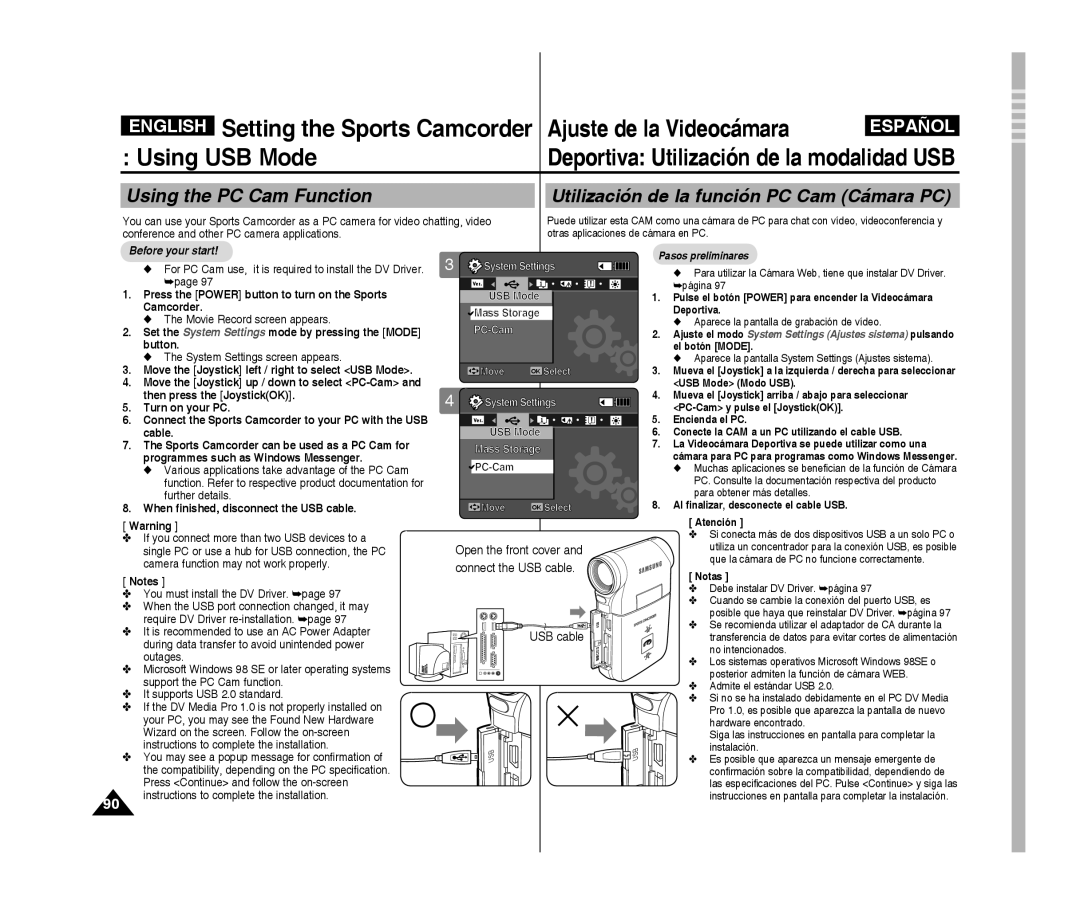
3.Move the [joystick] left / right to select <USB Mode>.
4.Move the [joystick] up / down to select
5.Turn on your PC.
6.Connect the Sports Camcorder to your PC with the USB cable.
7.The Sports Camcorder can be used as a PC Cam for programmes such as Windows Messenger.
◆Various applications take advantage of the PC Cam function. Refer to respective product documentation for further details.
8.When finished, disconnect the USB cable.
3 ![]() System Settings
System Settings
Ver.
USB Mode
![]() Mass Storage
Mass Storage
Move | OK Select |
4 | System Settings | |
| Ver. |
|
| USB Mode | |
| Mass Storage | |
|
| |
| Move | OK Select |
Pasos preliminares
◆Para utilizar la Cámara Web, tiene que instalar DV Driver. ➥página 97
1.Pulse el botón [Power] para encender la Videocámara Deportiva.
◆Aparece la pantalla de grabación de vídeo.
2.Ajuste el modo System Settings (Ajustes sistema) pulsando el botón [MODE].
◆Aparece la pantalla System Settings (Ajustes sistema).
3.Mueva el [joystick] a la izquierda / derecha para seleccionar <USB Mode> (Modo USB).
4.Mueva el [joystick] arriba / abajo para seleccionar
5.Encienda el PC.
6.Conecte la CAM a un PC utilizando el cable USB.
7.La Videocámara Deportiva se puede utilizar como una cámara para PC para programas como Windows Messenger.
◆Muchas aplicaciones se benefician de la función de Cámara PC. Consulte la documentación respectiva del producto para obtener más detalles.
8.Al finalizar, desconecte el cable USB.
[ Warning ]
✤If you connect more than two USB devices to a single PC or use a hub for USB connection, the PC camera function may not work properly.
[ Notes ]
✤You must install the DV Driver. ➥page 97
✤When the USB port connection changed, it may require DV Driver
✤It is recommended to use an AC Power Adapter during data transfer to avoid unintended power outages.
✤Microsoft Windows 98 SE or later operating systems support the PC Cam function.
✤It supports USB 2.0 standard.
✤If the DV Media Pro 1.0 is not properly installed on your PC, you may see the Found New Hardware Wizard on the screen. Follow the
✤You may see a popup message for confirmation of the compatibility, depending on the PC specification.
Press <Continue> and follow the
90instructions to complete the installation.
Open the front cover and connect the USB cable. ![]()
| USB |
| USB cable |
| MMC/SD |
USB | USB |
[ Atención ]
✤Si conecta más de dos dispositivos USB a un solo PC o utiliza un concentrador para la conexión USB, es posible que la cámara de PC no funcione correctamente.
[ Notas ]
✤Debe instalar DV Driver. ➥página 97
✤Cuando se cambie la conexión del puerto USB, es posible que haya que reinstalar DV Driver. ➥página 97
✤Se recomienda utilizar el adaptador de CA durante la transferencia de datos para evitar cortes de alimentación no intencionados.
✤Los sistemas operativos Microsoft Windows 98SE o posterior admiten la función de cámara WEB.
✤Admite el estándar USB 2.0.
✤Si no se ha instalado debidamente en el PC DV Media Pro 1.0, es posible que aparezca la pantalla de nuevo hardware encontrado.
Siga las instrucciones en pantalla para completar la instalación.
✤Es posible que aparezca un mensaje emergente de confirmación sobre la compatibilidad, dependiendo de las especificaciones del PC. Pulse <Continue> y siga las instrucciones en pantalla para completar la instalación.