Installing the I/O Riser Board
See Figure 32.
1.Remove the I/O riser board from its antistatic protective wrapper.
2.Holding the board by the top edge or upper corners, carefully insert the edge connector of the board into the connector on the PHP I/O carrier. Press the board firmly into the connector until it is fully seated.
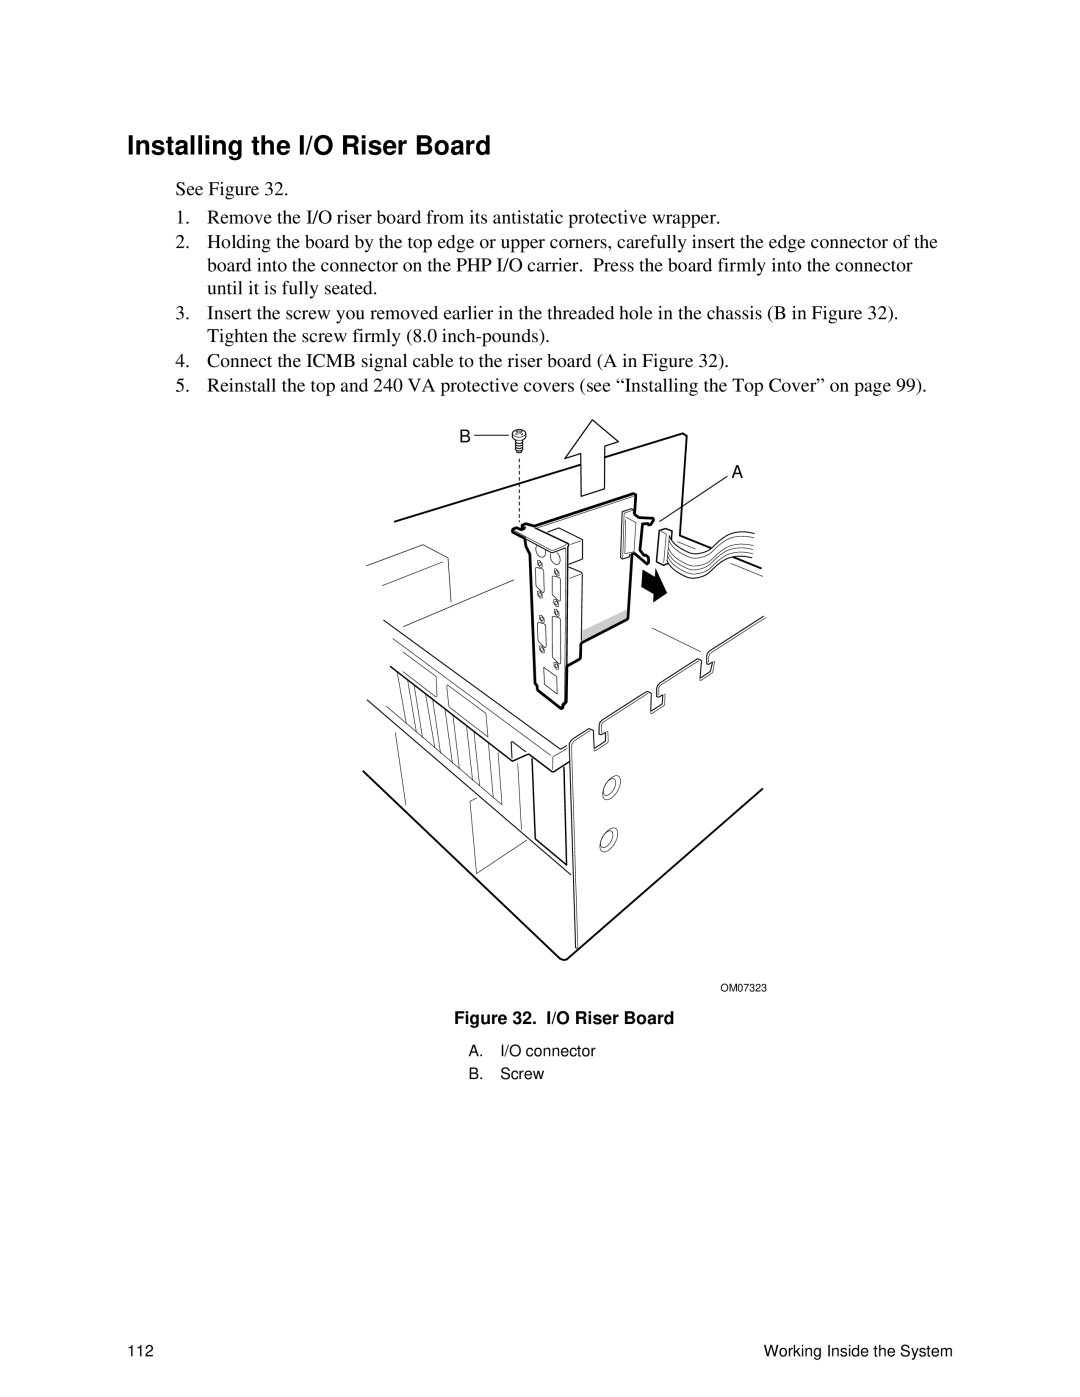
3.Insert the screw you removed earlier in the threaded hole in the chassis (B in Figure 32). Tighten the screw firmly (8.0
4.Connect the ICMB signal cable to the riser board (A in Figure 32).
5.Reinstall the top and 240 VA protective covers (see “Installing the Top Cover” on page 99).
B
A
OM07323
Figure 32. I/O Riser Board
A.I/O connector
B.Screw
112 | Working Inside the System |