Installing a Processor
See Figure 51 (page 148) and Figure 52 (page 149).
1.Observe the safety and ESD precautions at the beginning of this chapter.
2.To access the processor mezzanine board(s), follow the steps in “Removing a Processor” on page 148.
3.Being careful not to touch the gold edge connector on the processor cartridge, remove it from the protective wrapper. Place the cartridge with the
4.Record the serial number of the cartridge in your equipment log (page 197).
5.Install processors sequentially beginning with the connector marked Processor 1 on the mezzanine board.
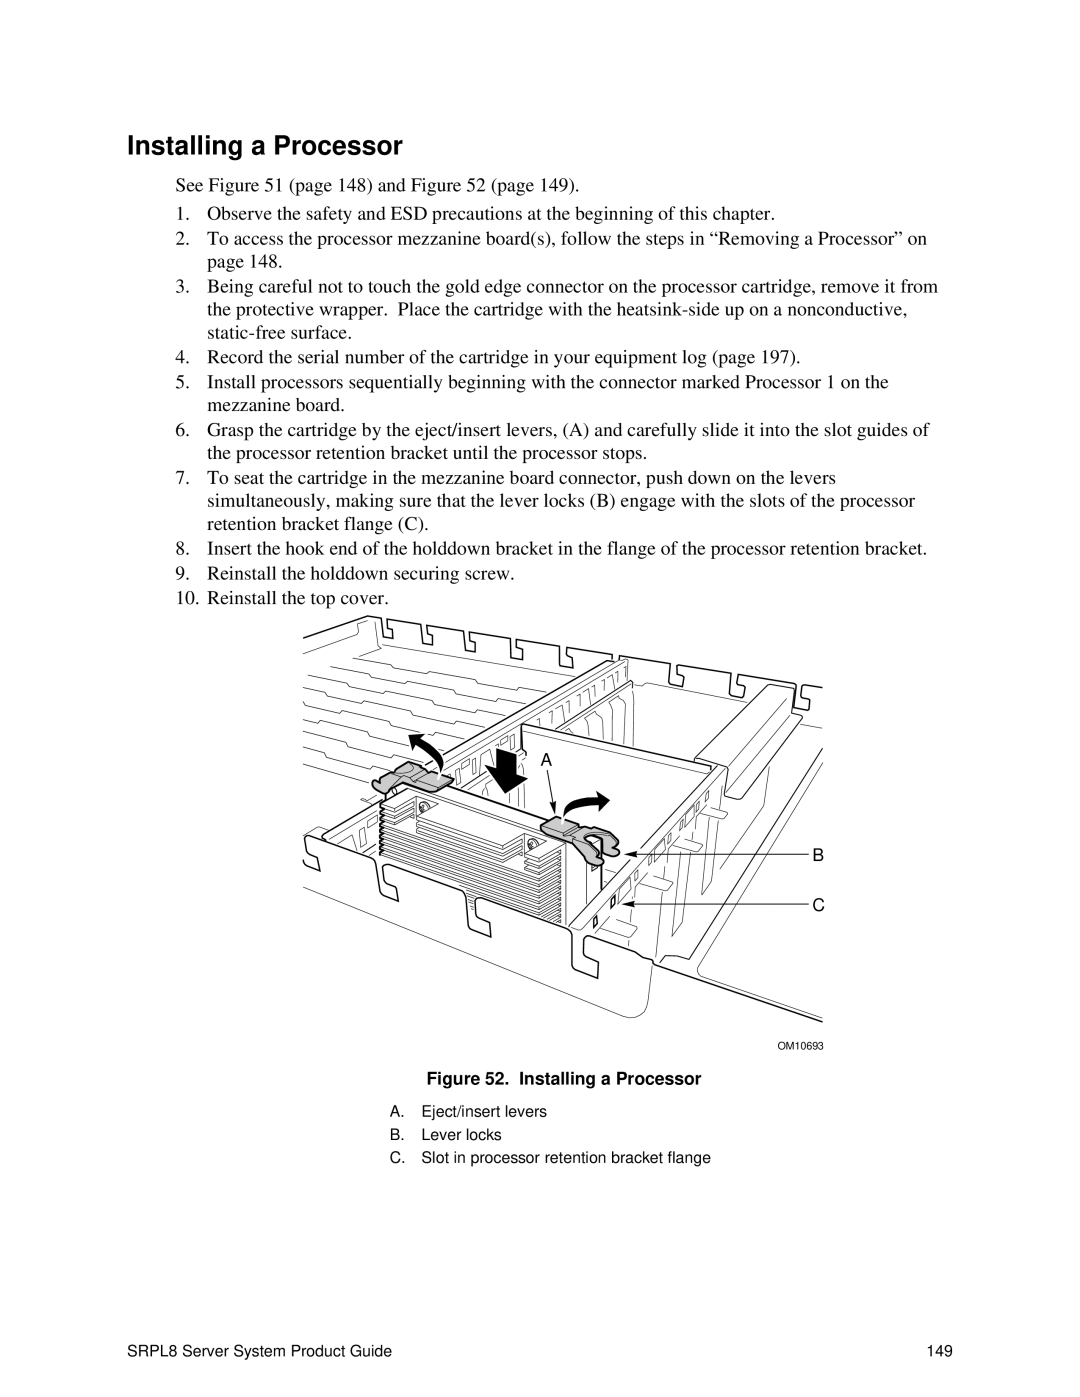
6.Grasp the cartridge by the eject/insert levers, (A) and carefully slide it into the slot guides of the processor retention bracket until the processor stops.
7.To seat the cartridge in the mezzanine board connector, push down on the levers simultaneously, making sure that the lever locks (B) engage with the slots of the processor retention bracket flange (C).
8.Insert the hook end of the holddown bracket in the flange of the processor retention bracket.
9.Reinstall the holddown securing screw.
10.Reinstall the top cover.
A
![]()
![]()
![]()
![]() B
B
![]()
![]() C
C
OM10693
Figure 52. Installing a Processor
A.Eject/insert levers
B.Lever locks
C.Slot in processor retention bracket flange
SRPL8 Server System Product Guide | 149 |