Determining Drive Status
Status LEDs arranged in sets of three below each of the two
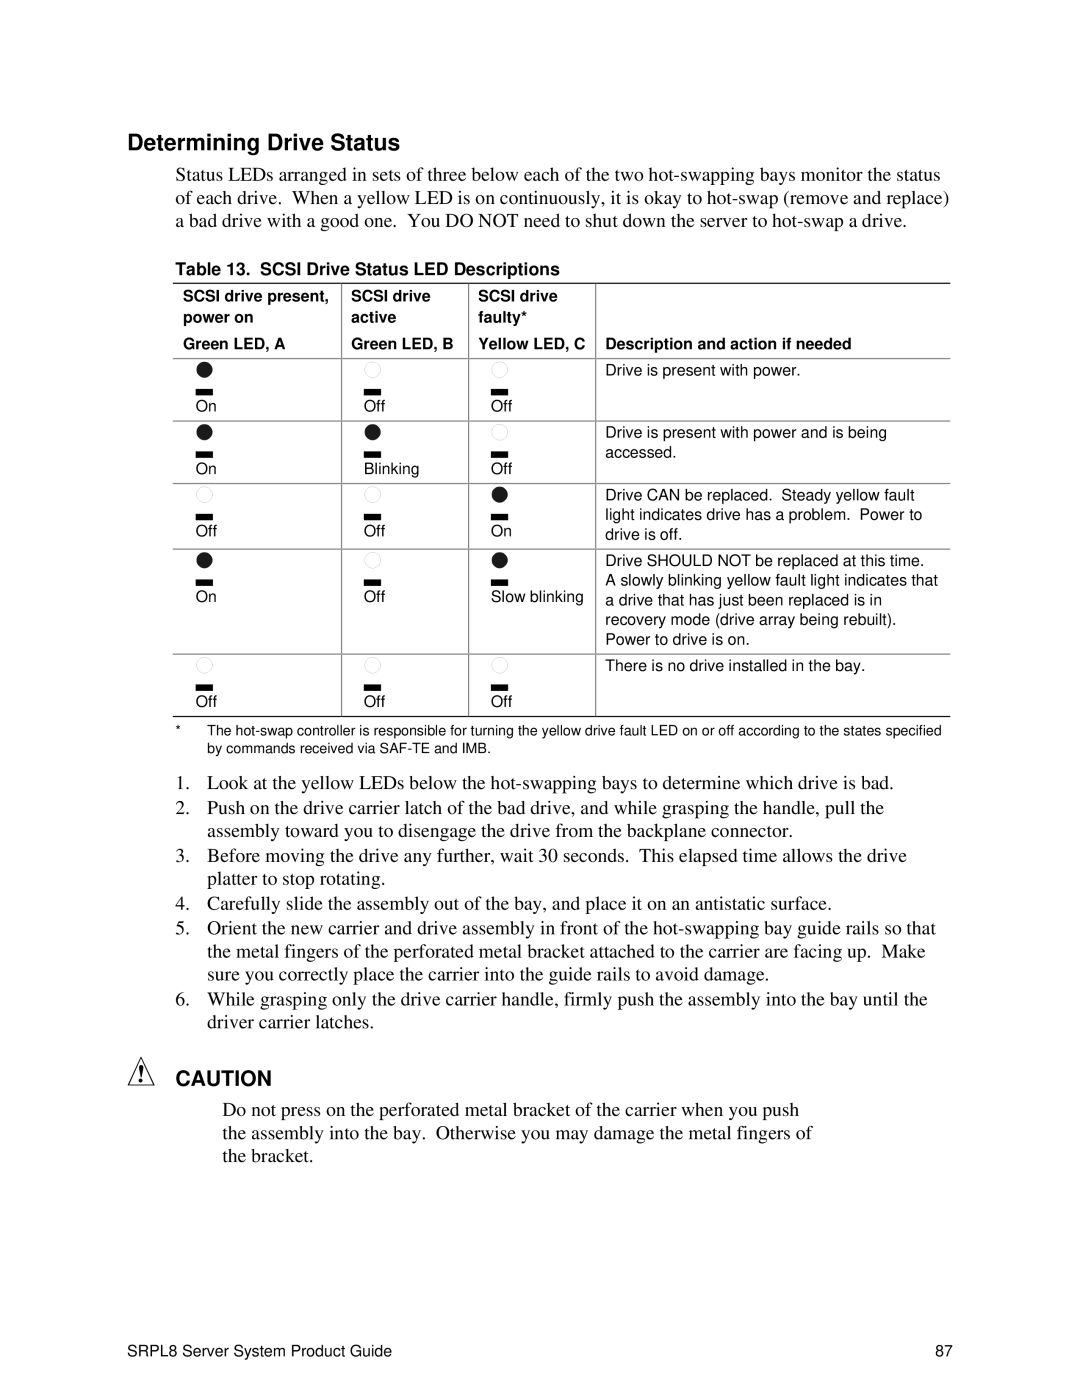
Table 13. SCSI Drive Status LED Descriptions
SCSI drive present, | SCSI drive | SCSI drive |
power on | active | faulty* |
Green LED, A | Green LED, B | Yellow LED, C |
On | Off | Off |
On | Blinking | Off |
Off | Off | On |
On | Off | Slow blinking |
|
|
|
|
|
|
|
|
|
|
|
|
|
|
|
|
|
|
| Off |
| Off |
| Off | |||
Description and action if needed
Drive is present with power.
Drive is present with power and is being accessed.
Drive CAN be replaced. Steady yellow fault light indicates drive has a problem. Power to drive is off.
Drive SHOULD NOT be replaced at this time. A slowly blinking yellow fault light indicates that a drive that has just been replaced is in recovery mode (drive array being rebuilt). Power to drive is on.
There is no drive installed in the bay.
*The
1.Look at the yellow LEDs below the
2.Push on the drive carrier latch of the bad drive, and while grasping the handle, pull the assembly toward you to disengage the drive from the backplane connector.
3.Before moving the drive any further, wait 30 seconds. This elapsed time allows the drive platter to stop rotating.
4.Carefully slide the assembly out of the bay, and place it on an antistatic surface.
5.Orient the new carrier and drive assembly in front of the
6.While grasping only the drive carrier handle, firmly push the assembly into the bay until the driver carrier latches.
CAUTION
Do not press on the perforated metal bracket of the carrier when you push the assembly into the bay. Otherwise you may damage the metal fingers of the bracket.
SRPL8 Server System Product Guide | 87 |