5 Working Inside the System
This chapter describes procedures for removing and installing most components inside the system. Table 14 lists these procedures and their page numbers in this chapter.
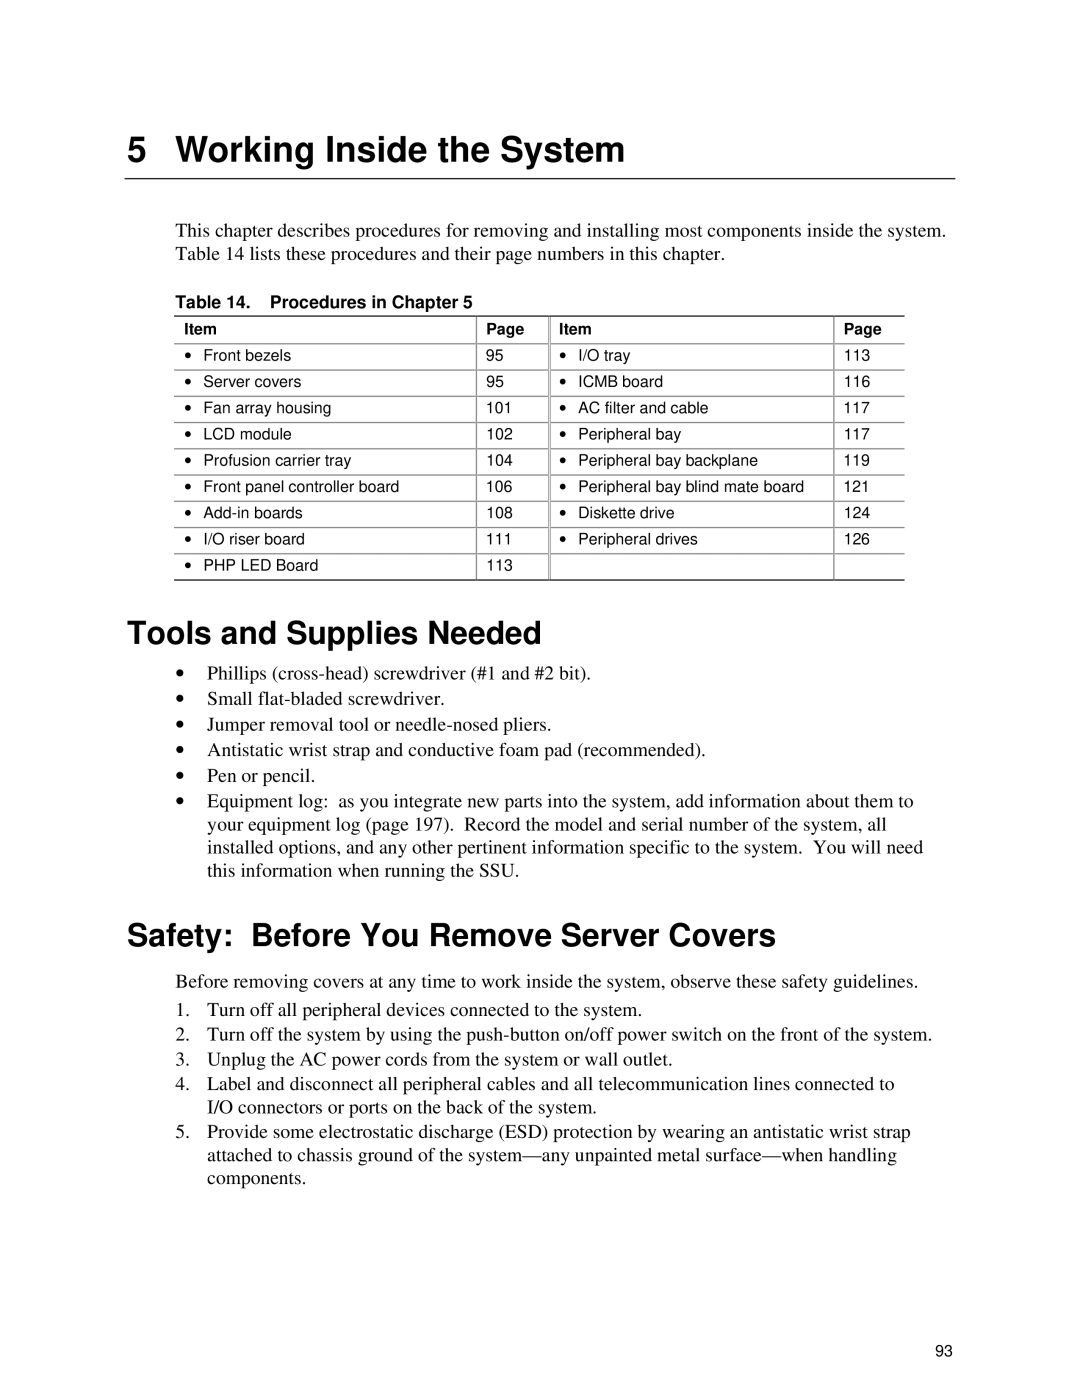
Table 14. Procedures in Chapter 5
Item
∙Front bezels
∙Server covers
∙Fan array housing
∙LCD module
∙Profusion carrier tray
∙Front panel controller board
∙
∙I/O riser board
∙PHP LED Board
Page
95
95
101
102
104
106
108
111
113
Item
∙I/O tray
∙ICMB board
∙AC filter and cable
∙Peripheral bay
∙Peripheral bay backplane
∙Peripheral bay blind mate board
∙Diskette drive
∙Peripheral drives
Page
113
116
117
117
119
121
124
126
Tools and Supplies Needed
∙Phillips
∙Small
∙Jumper removal tool or
∙Antistatic wrist strap and conductive foam pad (recommended).
∙Pen or pencil.
∙Equipment log: as you integrate new parts into the system, add information about them to your equipment log (page 197). Record the model and serial number of the system, all installed options, and any other pertinent information specific to the system. You will need this information when running the SSU.
Safety: Before You Remove Server Covers
Before removing covers at any time to work inside the system, observe these safety guidelines.
1.Turn off all peripheral devices connected to the system.
2.Turn off the system by using the
3.Unplug the AC power cords from the system or wall outlet.
4.Label and disconnect all peripheral cables and all telecommunication lines connected to I/O connectors or ports on the back of the system.
5.Provide some electrostatic discharge (ESD) protection by wearing an antistatic wrist strap attached to chassis ground of the
93