Diskette Drive
Removing the Diskette Drive
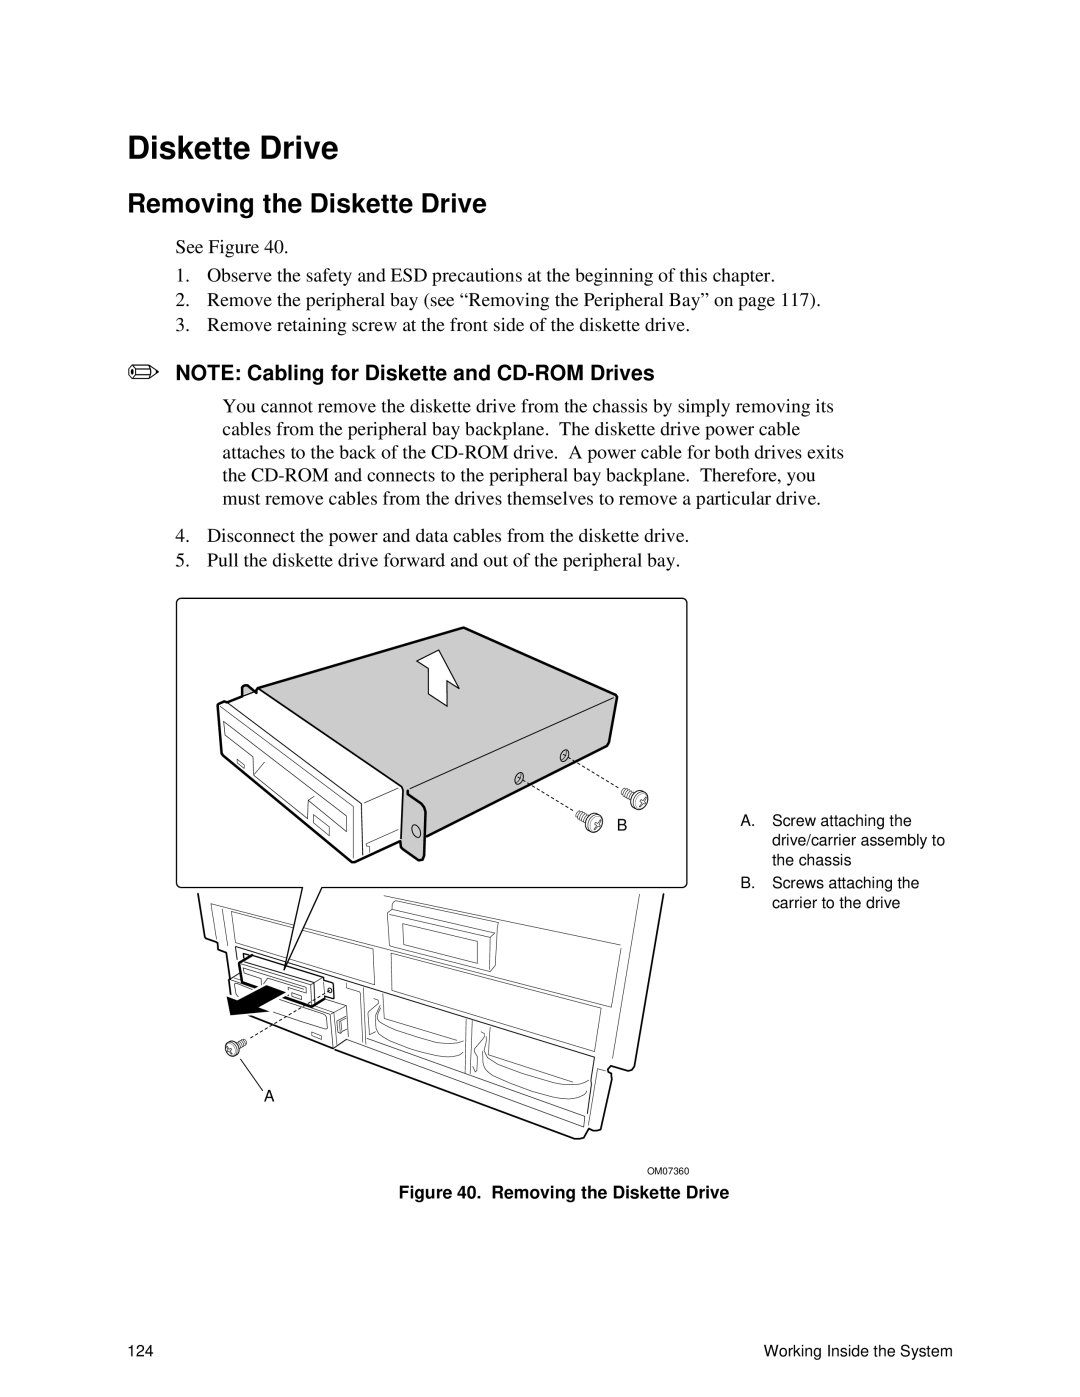
See Figure 40.
1.Observe the safety and ESD precautions at the beginning of this chapter.
2.Remove the peripheral bay (see “Removing the Peripheral Bay” on page 117).
3.Remove retaining screw at the front side of the diskette drive.
✏NOTE: Cabling for Diskette and
You cannot remove the diskette drive from the chassis by simply removing its cables from the peripheral bay backplane. The diskette drive power cable attaches to the back of the
4.Disconnect the power and data cables from the diskette drive.
5.Pull the diskette drive forward and out of the peripheral bay.
B | A. | Screw attaching the |
| drive/carrier assembly to | |
|
| |
|
| the chassis |
| B. | Screws attaching the |
|
| carrier to the drive |
A
OM07360
Figure 40. Removing the Diskette Drive
124 | Working Inside the System |