Chapter 12: Customizing the Development Environment

345

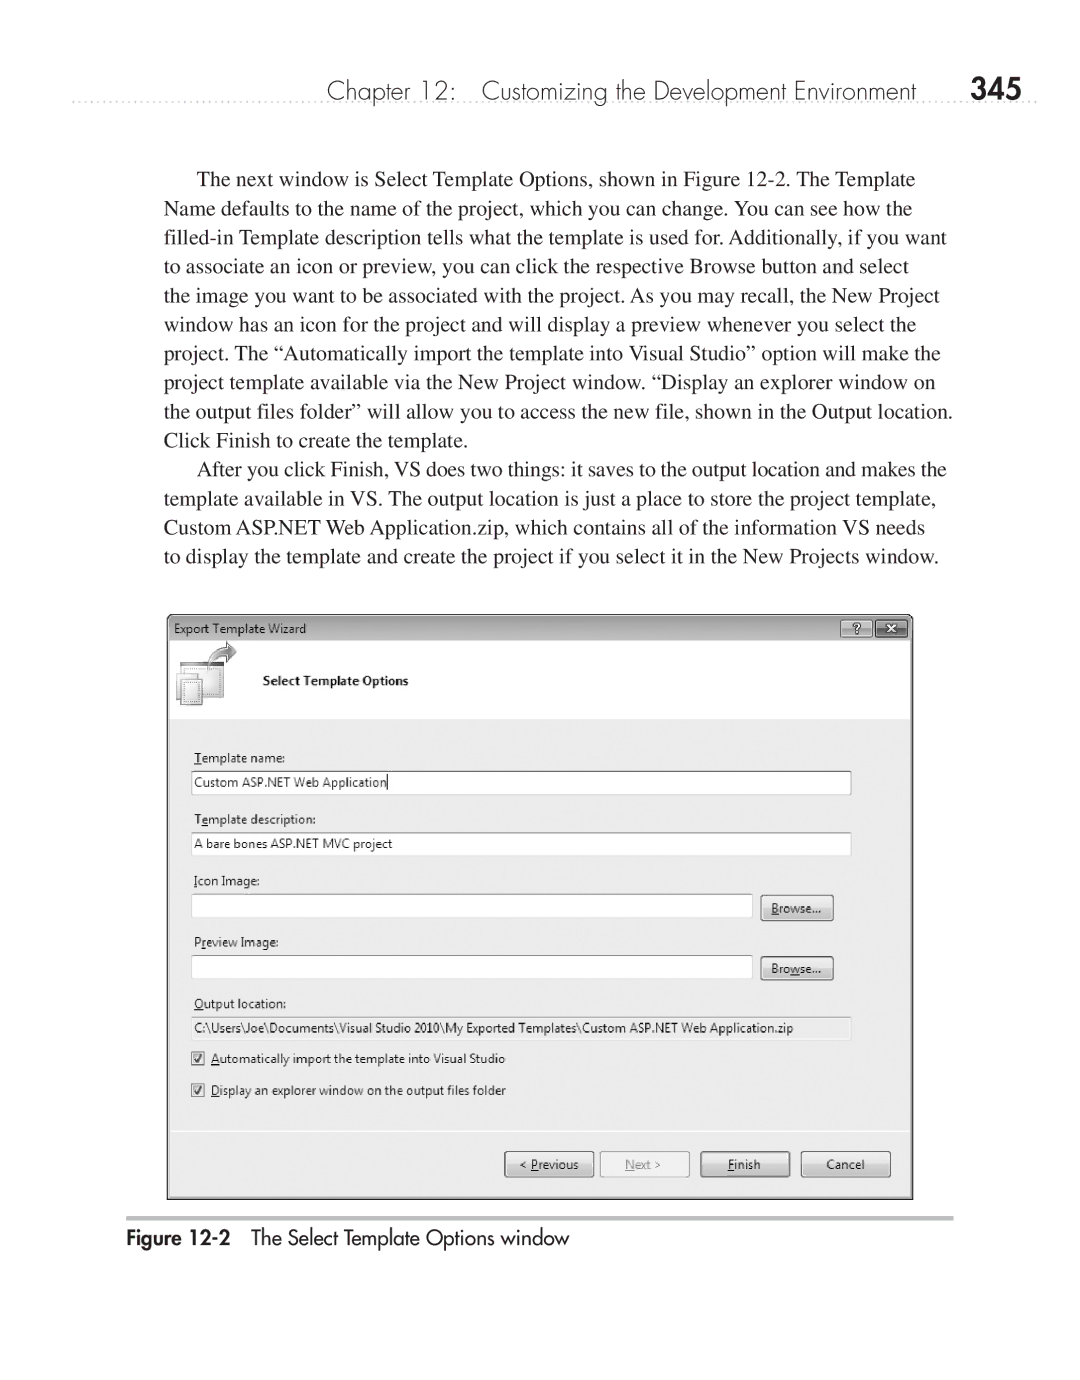
The next window is Select Template Options, shown in Figure 12-2. The Template Name defaults to the name of the project, which you can change. You can see how the filled-in Template description tells what the template is used for. Additionally, if you want to associate an icon or preview, you can click the respective Browse button and select the image you want to be associated with the project. As you may recall, the New Project window has an icon for the project and will display a preview whenever you select the project. The “Automatically import the template into Visual Studio” option will make the project template available via the New Project window. “Display an explorer window on the output files folder” will allow you to access the new file, shown in the Output location. Click Finish to create the template.

After you click Finish, VS does two things: it saves to the output location and makes the template available in VS. The output location is just a place to store the project template, Custom ASP.NET Web Application.zip, which contains all of the information VS needs to display the template and create the project if you select it in the New Projects window.

Figure 12-2 The Select Template Options window

Page 368
Image 368
Microsoft 9GD00001 manual 345, Select Template Options window