Chapter 1: Introducing Visual Studio 2010

9

Figure 1-4 Setup Customization window

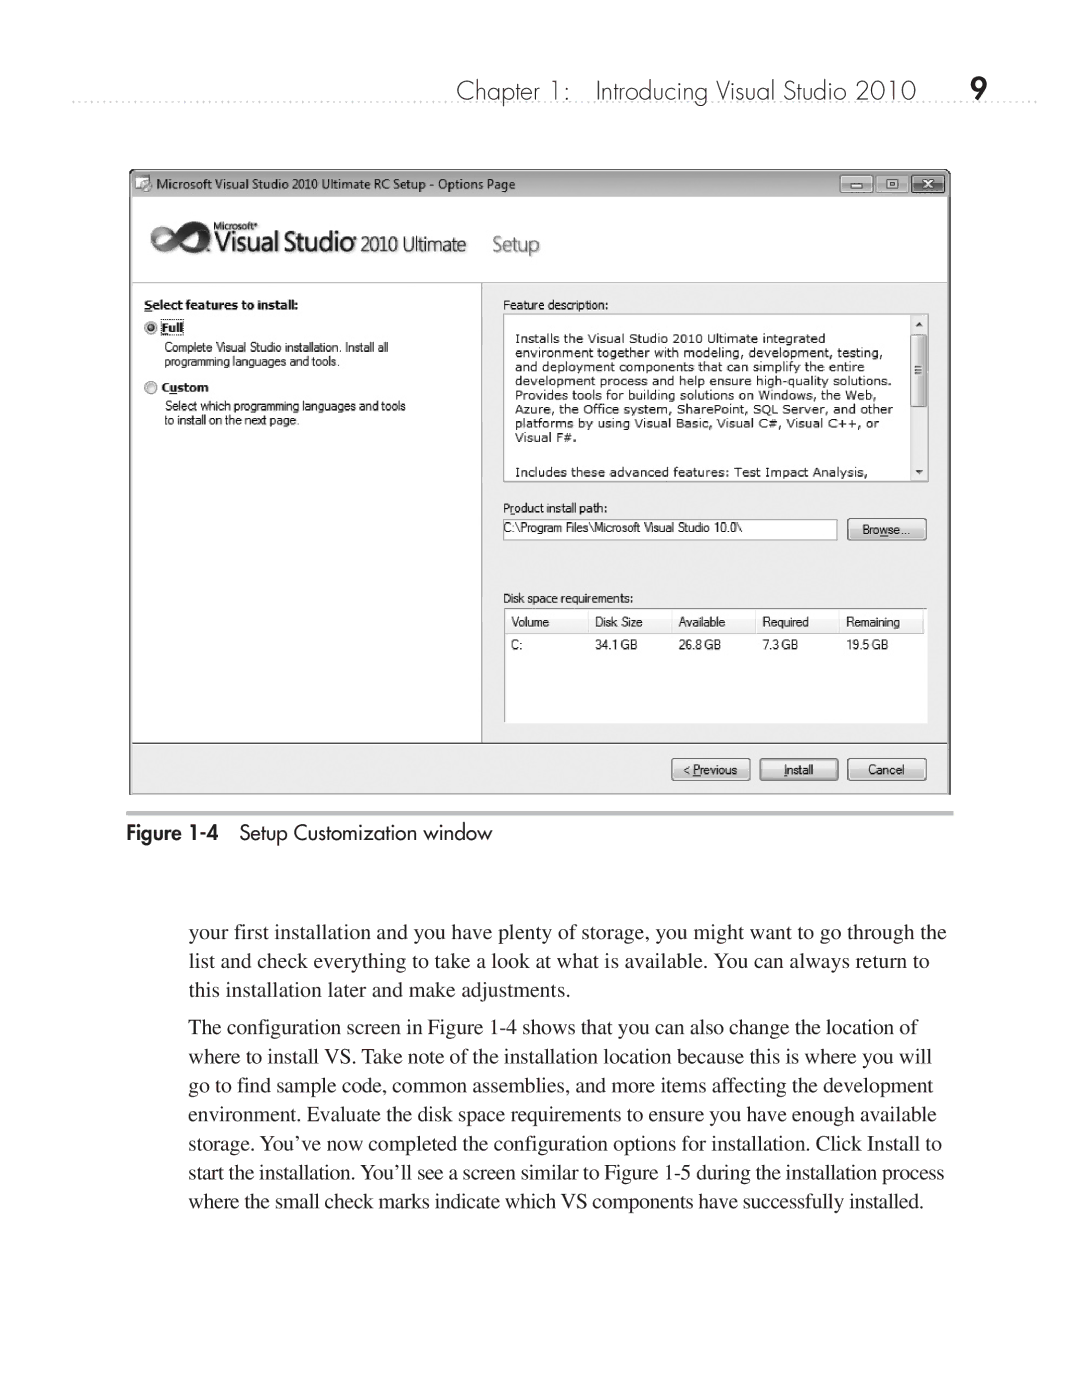
your first installation and you have plenty of storage, you might want to go through the list and check everything to take a look at what is available. You can always return to this installation later and make adjustments.

The configuration screen in Figure 1-4 shows that you can also change the location of where to install VS. Take note of the installation location because this is where you will go to find sample code, common assemblies, and more items affecting the development environment. Evaluate the disk space requirements to ensure you have enough available storage. You’ve now completed the configuration options for installation. Click Install to start the installation. You’ll see a screen similar to Figure 1-5 during the installation process where the small check marks indicate which VS components have successfully installed.

Page 32
Image 32
Microsoft 9GD00001 manual Setup Customization window