Chapter 13: Extending Visual Studio 2010

373

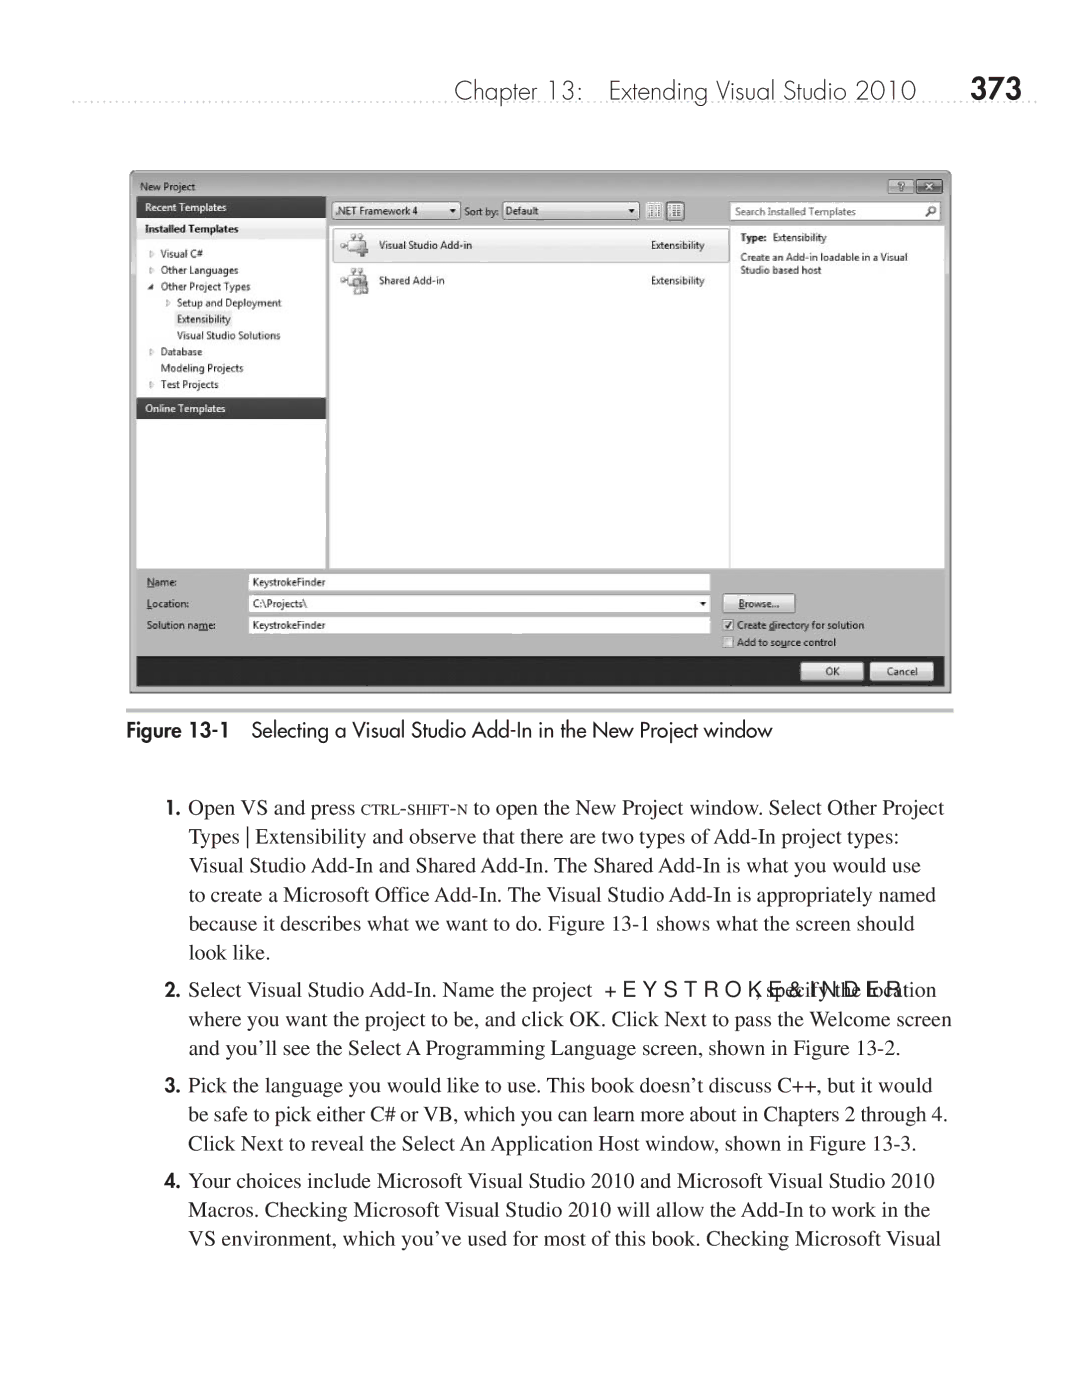
Figure 13-1 Selecting a Visual Studio Add-In in the New Project window

1.Open VS and press CTRL-SHIFT-Nto open the New Project window. Select Other Project Types Extensibility and observe that there are two types of Add-In project types: Visual Studio Add-In and Shared Add-In. The Shared Add-In is what you would use to create a Microsoft Office Add-In. The Visual Studio Add-In is appropriately named because it describes what we want to do. Figure 13-1 shows what the screen should look like.

2.Select Visual Studio Add-In. Name the project KeystrokeFinder, specify the location where you want the project to be, and click OK. Click Next to pass the Welcome screen and you’ll see the Select A Programming Language screen, shown in Figure 13-2.

3.Pick the language you would like to use. This book doesn’t discuss C++, but it would be safe to pick either C# or VB, which you can learn more about in Chapters 2 through 4. Click Next to reveal the Select An Application Host window, shown in Figure 13-3.

4.Your choices include Microsoft Visual Studio 2010 and Microsoft Visual Studio 2010 Macros. Checking Microsoft Visual Studio 2010 will allow the Add-In to work in the VS environment, which you’ve used for most of this book. Checking Microsoft Visual

Page 396
Image 396
Microsoft 9GD00001 manual 373, Selecting a Visual Studio Add-In in the New Project window