A
B
C
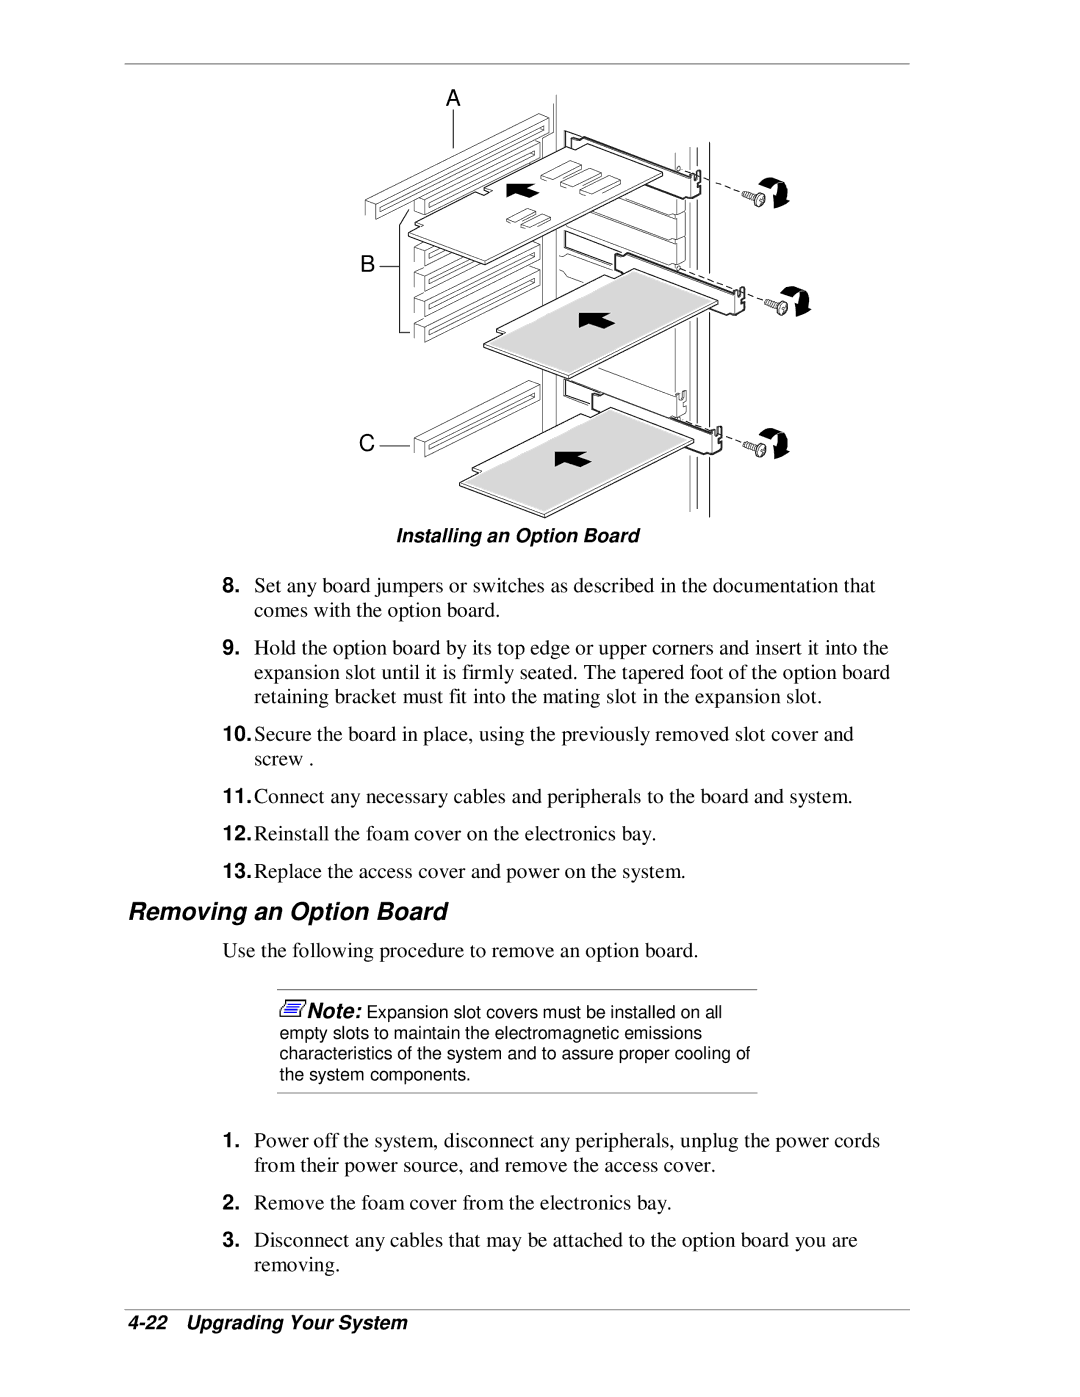
Installing an Option Board
8.Set any board jumpers or switches as described in the documentation that comes with the option board.
9.Hold the option board by its top edge or upper corners and insert it into the expansion slot until it is firmly seated. The tapered foot of the option board retaining bracket must fit into the mating slot in the expansion slot.
10.Secure the board in place, using the previously removed slot cover and screw .
11.Connect any necessary cables and peripherals to the board and system.
12.Reinstall the foam cover on the electronics bay.
13.Replace the access cover and power on the system.
Removing an Option Board
Use the following procedure to remove an option board.
![]() Note: Expansion slot covers must be installed on all empty slots to maintain the electromagnetic emissions characteristics of the system and to assure proper cooling of the system components.
Note: Expansion slot covers must be installed on all empty slots to maintain the electromagnetic emissions characteristics of the system and to assure proper cooling of the system components.
1.Power off the system, disconnect any peripherals, unplug the power cords from their power source, and remove the access cover.
2.Remove the foam cover from the electronics bay.
3.Disconnect any cables that may be attached to the option board you are removing.
