OpenWorX Business Attendant System User Guide | Processing Calls |
|
|
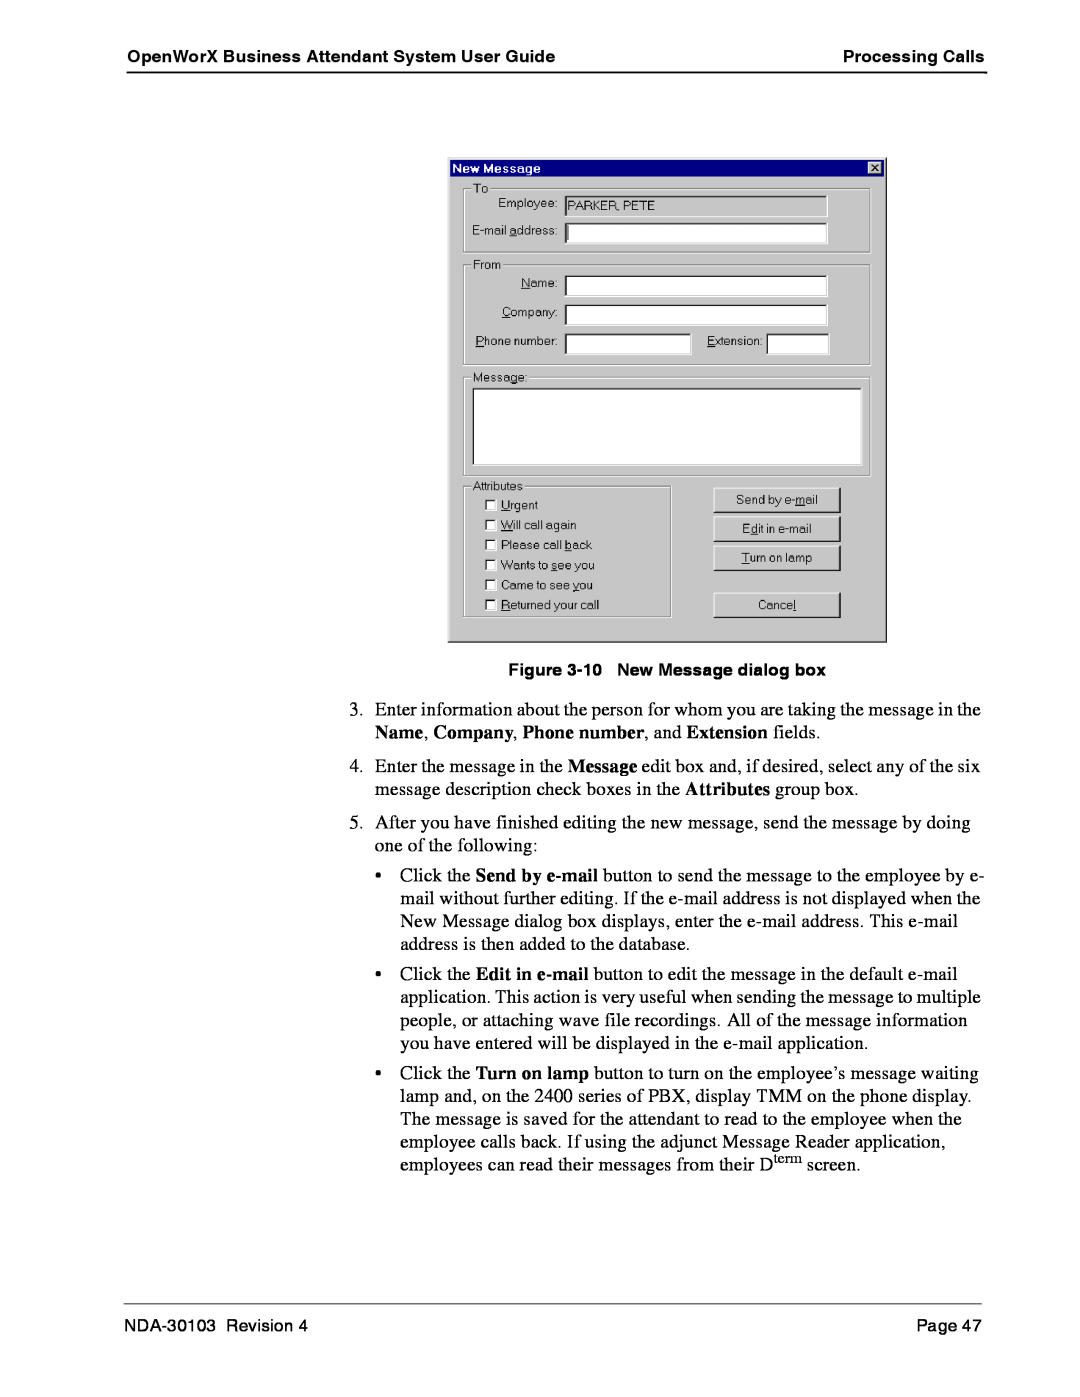
Figure 3-10 New Message dialog box
3.Enter information about the person for whom you are taking the message in the Name, Company, Phone number, and Extension fields.
4.Enter the message in the Message edit box and, if desired, select any of the six message description check boxes in the Attributes group box.
5.After you have finished editing the new message, send the message by doing one of the following:
•Click the Send by
•Click the Edit in
•Click the Turn on lamp button to turn on the employee’s message waiting lamp and, on the 2400 series of PBX, display TMM on the phone display. The message is saved for the attendant to read to the employee when the
employee calls back. If using the adjunct Message Reader application, employees can read their messages from their Dterm screen.
Page 47 |