148
Symphony Pro User Manual 2.0.2.15
·Enter the vendor number (double click or press
·Enter the number you want to assign to this order, or press [Generate] to obtain an order number from Symphony Pro.
·Enter the date of this transaction. You may want to select a previous date (for example you were on holidays and this entry needs to be done as of 3 days ago).
·Enter the store number if you are operating a
·The Cost target is normally used in
·It is compulsory to enter a remark for tracking purposes.
·The Load all items flag can be used when you want to import a list with all items that can be ordered for the designated vendor.
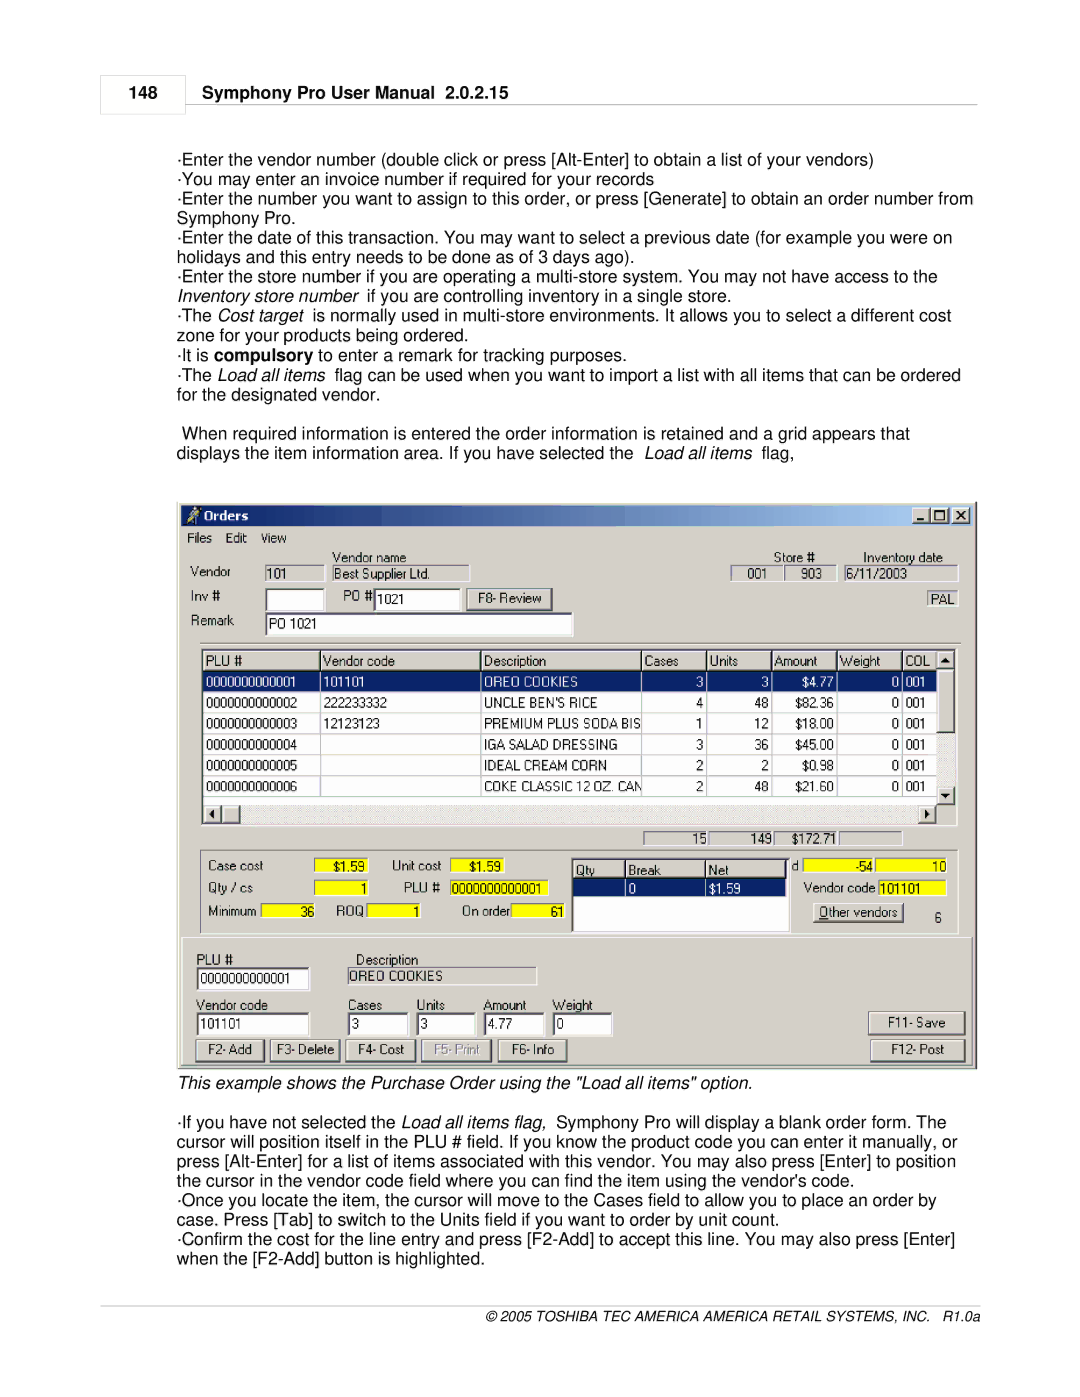
When required information is entered the order information is retained and a grid appears that displays the item information area. If you have selected the Load all items flag,
This example shows the Purchase Order using the "Load all items" option.
·If you have not selected the Load all items flag, Symphony Pro will display a blank order form. The cursor will position itself in the PLU # field. If you know the product code you can enter it manually, or press
·Once you locate the item, the cursor will move to the Cases field to allow you to place an order by case. Press [Tab] to switch to the Units field if you want to order by unit count.
·Confirm the cost for the line entry and press
