Maintaining the Aastra CNX
Update CNX software
Step | Action |
|
|
1Open your Web browser and enter the URL for your Aastra CNX. Log in with a valid user ID and password.
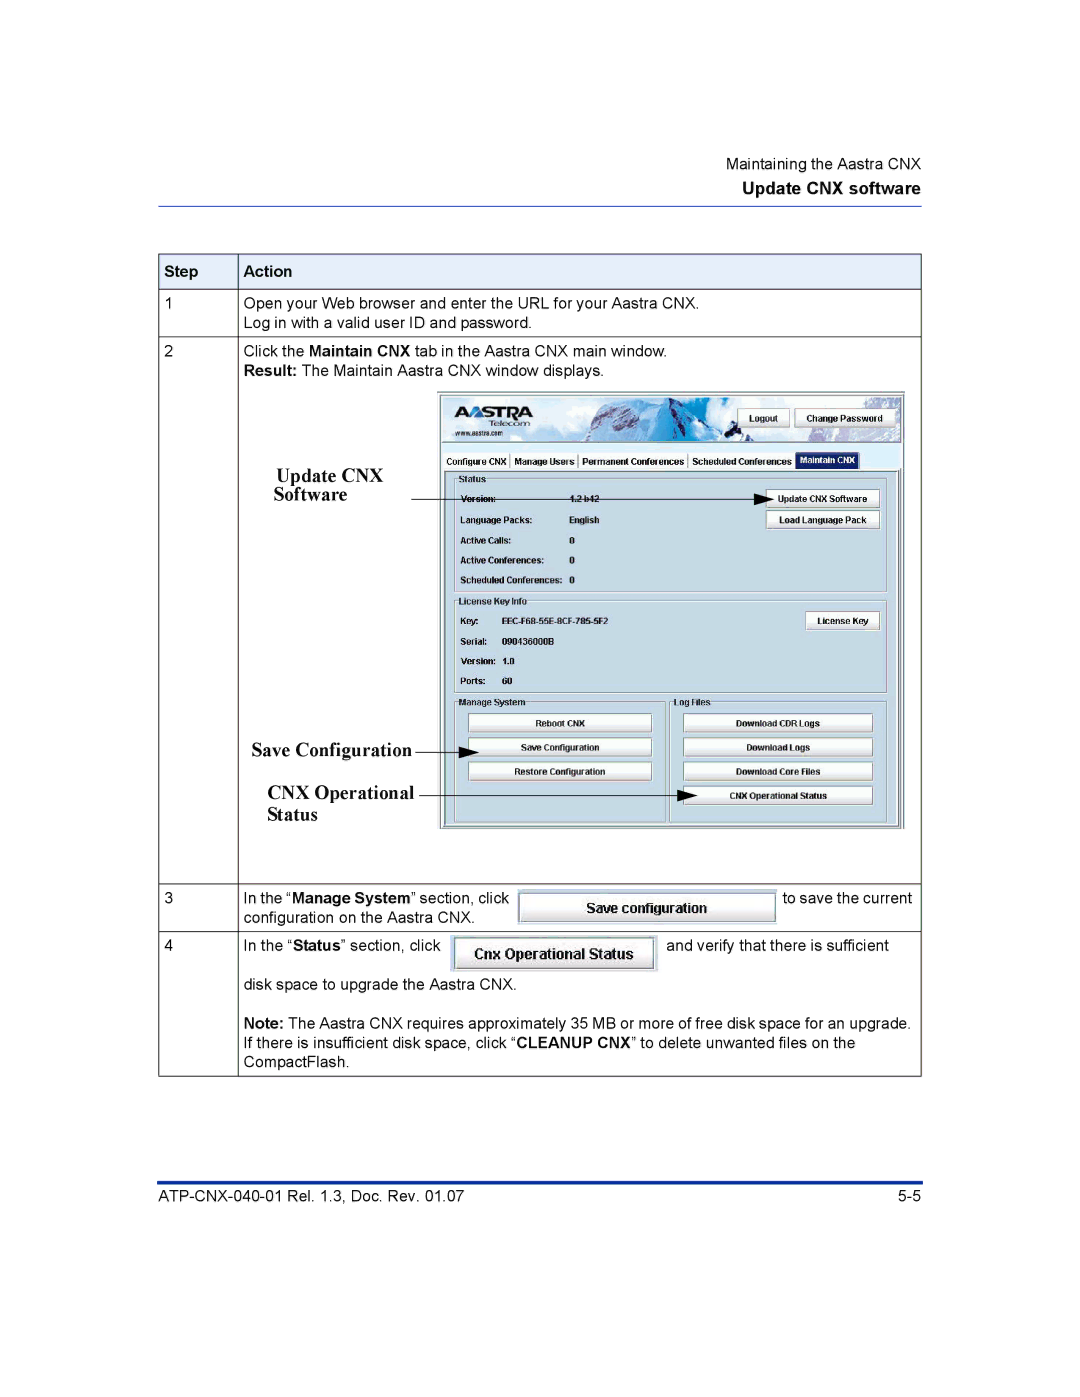
2Click the Maintain CNX tab in the Aastra CNX main window. Result: The Maintain Aastra CNX window displays.
Update CNX
Software
| Save Configuration |
|
|
|
|
|
|
|
|
|
| ||
| CNX Operational |
|
|
| ||
|
|
|
| |||
| Status |
|
| |||
|
|
|
|
|
|
|
3 | In the “Manage System” section, click |
| to save the current | |||
| configuration on the Aastra CNX. |
|
| |||
|
|
|
|
|
|
|
4 | In the “Status” section, click | and verify that there is sufficient | ||||
| disk space to upgrade the Aastra CNX. |
|
| |||
| Note: The Aastra CNX requires approximately 35 MB or more of free disk space for an upgrade. | |||||
| If there is insufficient disk space, click “CLEANUP CNX” to delete unwanted files on the | |||||
| CompactFlash. |
|
| |||