Maintaining the Aastra CNX
Setting date and time
Setting date and time
Description
During initial configuration of the Aastra CNX (see Chapter 3, “Configuring the Aastra CNX”) the date and time is set in the setup script. Using the
Set CNX Date and Time tool, this date and time configuration displays as the default in the Aastra CNX GUI. You can change the date and time as required by clicking the Set CNX Date and Time button.
Procedure
Setting the date and time
Use the following procedure to set the date and time on the Aastra CNX.
Step | Action |
|
|
1Open your Web browser and enter the URL for your Aastra CNX. Log in with a valid user ID and password.
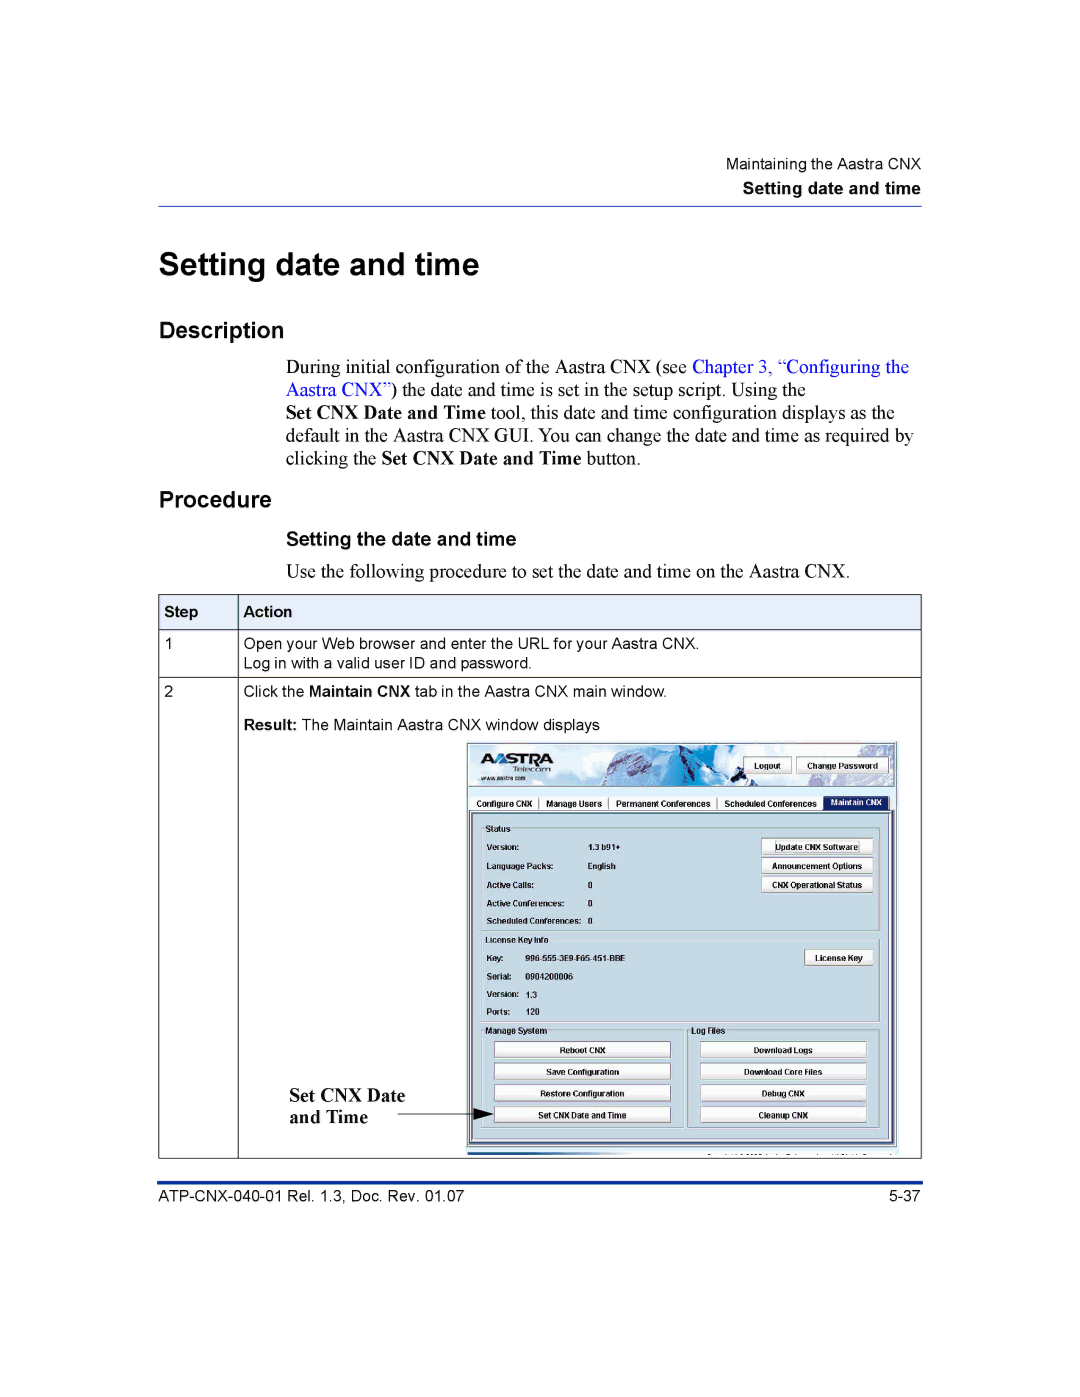
2Click the Maintain CNX tab in the Aastra CNX main window. Result: The Maintain Aastra CNX window displays