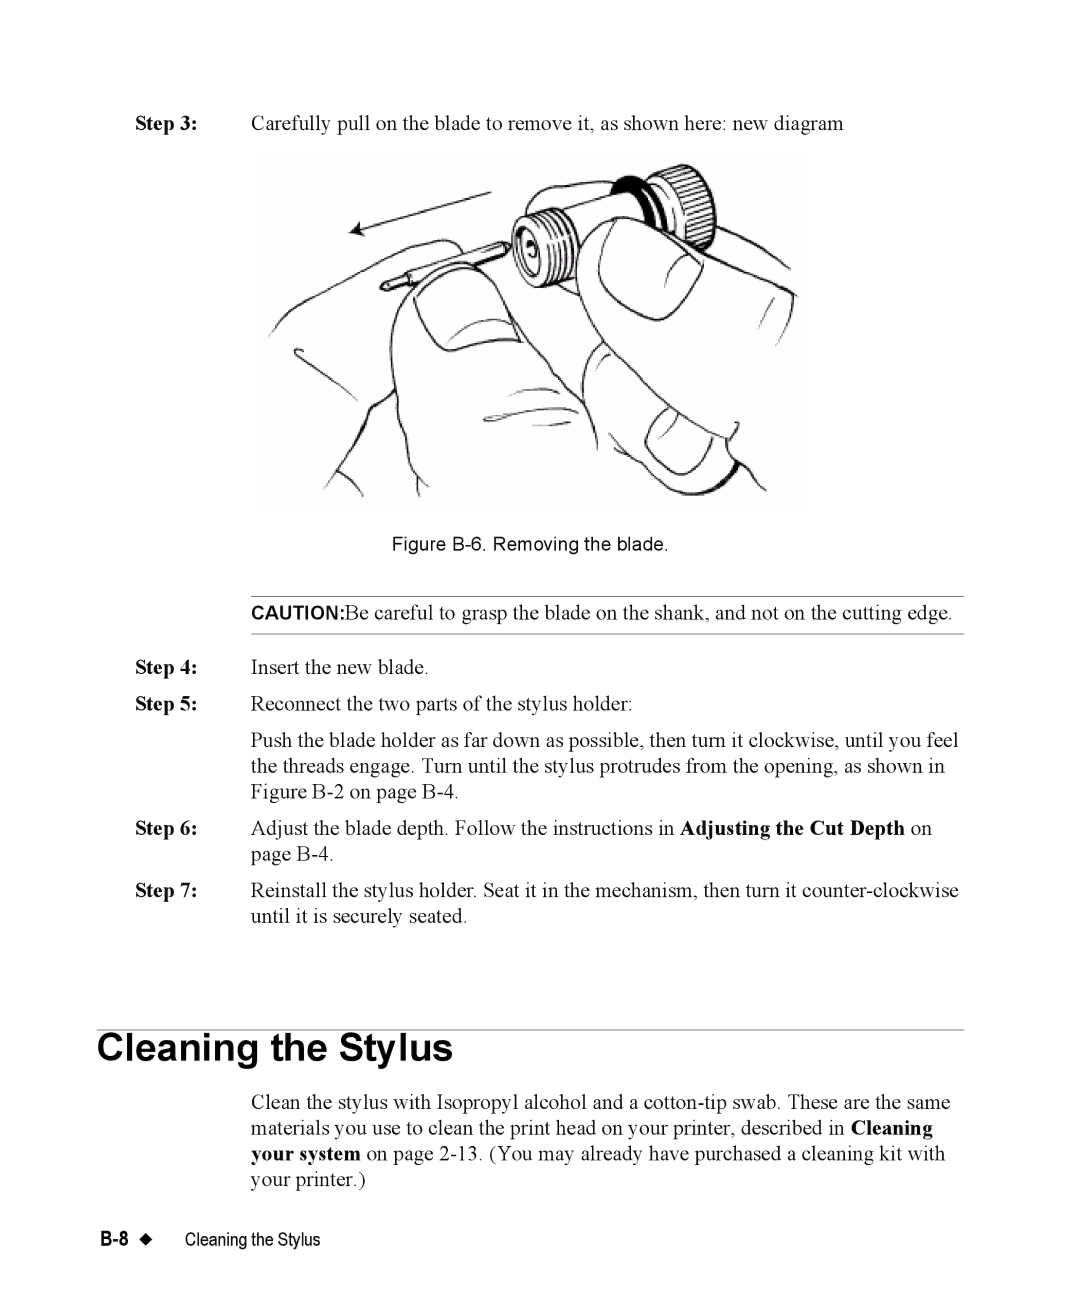
Step 3: Carefully pull on the blade to remove it, as shown here: new diagram
Figure B-6. Removing the blade.
CAUTION:Be careful to grasp the blade on the shank, and not on the cutting edge.
Step 4: Insert the new blade.
Step 5: Reconnect the two parts of the stylus holder:
Push the blade holder as far down as possible, then turn it clockwise, until you feel the threads engage. Turn until the stylus protrudes from the opening, as shown in Figure
Step 6: Adjust the blade depth. Follow the instructions in Adjusting the Cut Depth on page
Step 7: Reinstall the stylus holder. Seat it in the mechanism, then turn it
Cleaning the Stylus
Clean the stylus with Isopropyl alcohol and a