TM-L90/TM-L90 with Peeler Technical Reference Guide
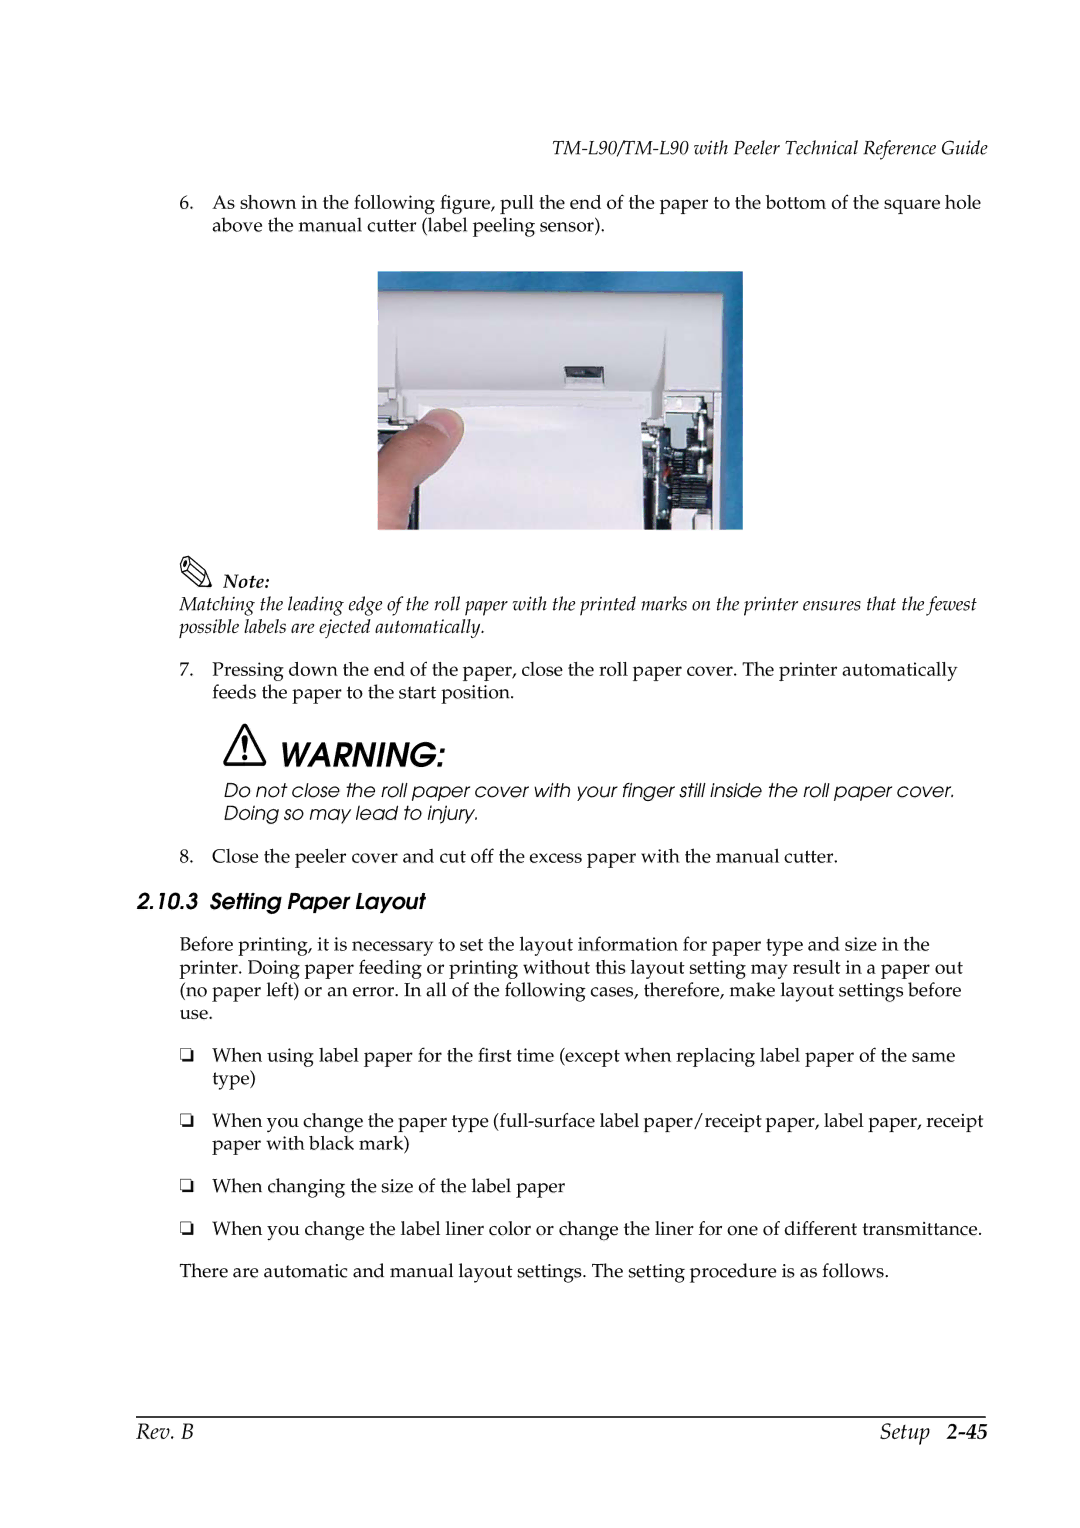
6.As shown in the following figure, pull the end of the paper to the bottom of the square hole above the manual cutter (label peeling sensor).
Note:
Matching the leading edge of the roll paper with the printed marks on the printer ensures that the fewest possible labels are ejected automatically.
7.Pressing down the end of the paper, close the roll paper cover. The printer automatically feeds the paper to the start position.
![]() WARNING:
WARNING:
Do not close the roll paper cover with your finger still inside the roll paper cover. Doing so may lead to injury.
8. Close the peeler cover and cut off the excess paper with the manual cutter.
2.10.3 Setting Paper Layout
Before printing, it is necessary to set the layout information for paper type and size in the printer. Doing paper feeding or printing without this layout setting may result in a paper out (no paper left) or an error. In all of the following cases, therefore, make layout settings before use.
❏When using label paper for the first time (except when replacing label paper of the same type)
❏When you change the paper type
❏When changing the size of the label paper
❏When you change the label liner color or change the liner for one of different transmittance. There are automatic and manual layout settings. The setting procedure is as follows.
Rev. B | Setup |