TM-L90/TM-L90 with Peeler Technical Reference Guide
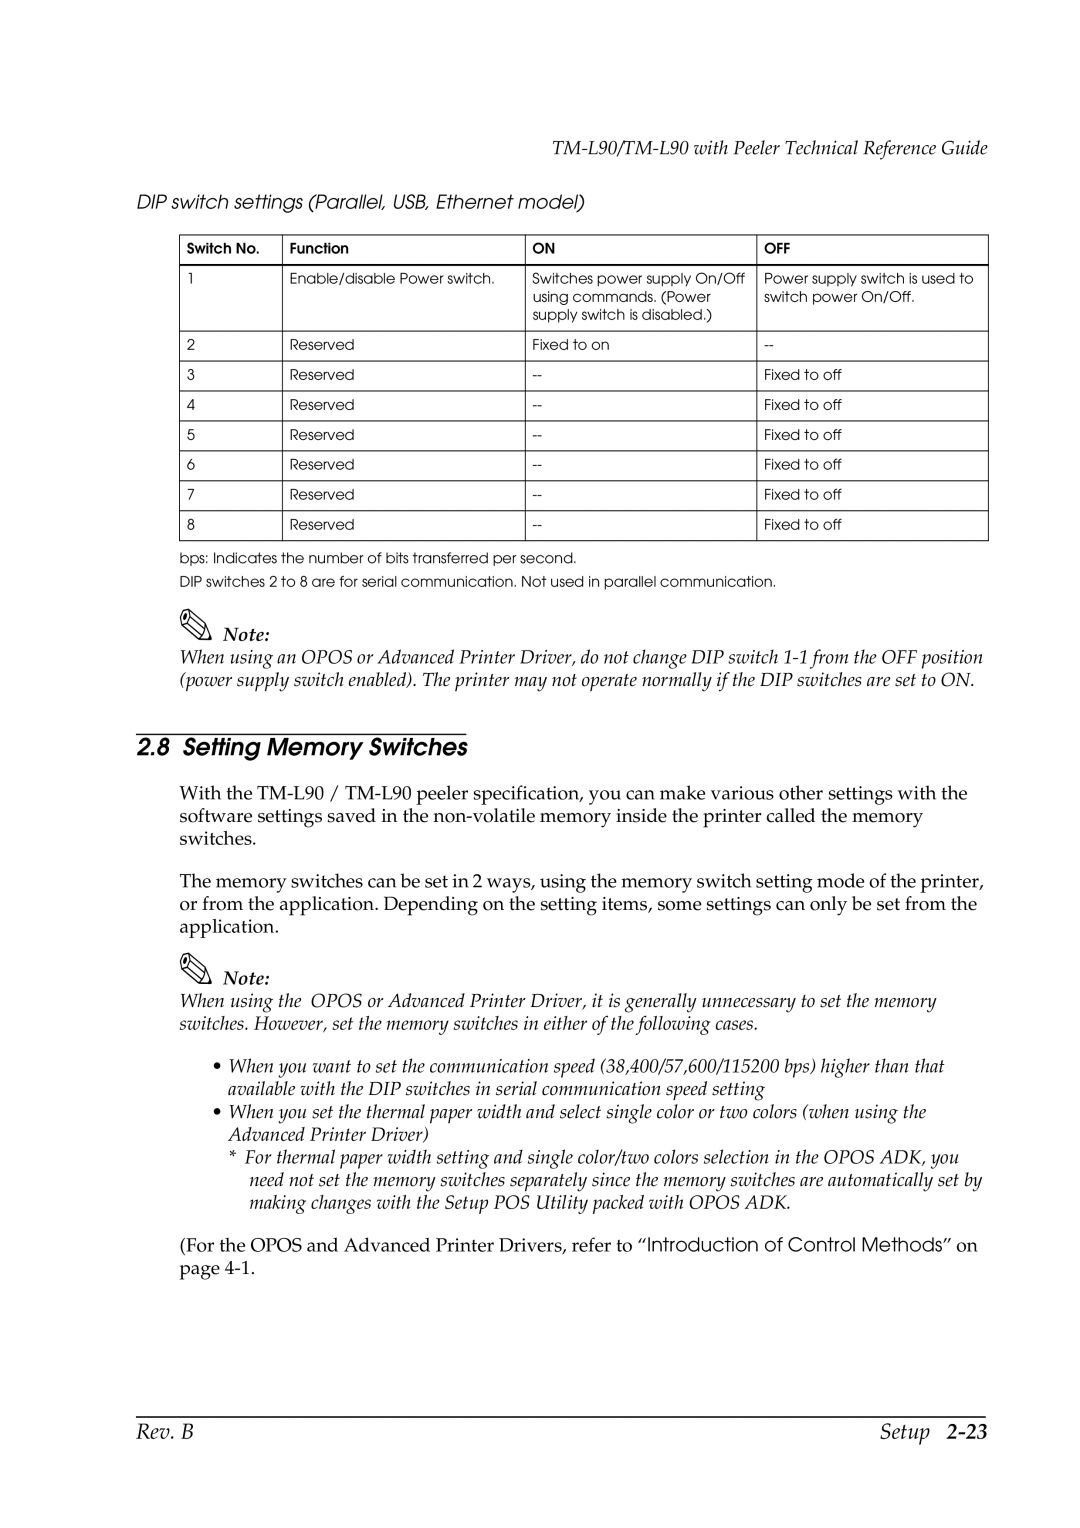
DIP switch settings (Parallel, USB, Ethernet model)
Switch No. | Function | ON | OFF |
|
|
|
|
1 | Enable/disable Power switch. | Switches power supply On/Off | Power supply switch is used to |
|
| using commands. (Power | switch power On/Off. |
|
| supply switch is disabled.) |
|
|
|
|
|
2 | Reserved | Fixed to on | |
|
|
|
|
3 | Reserved | Fixed to off | |
|
|
|
|
4 | Reserved | Fixed to off | |
|
|
|
|
5 | Reserved | Fixed to off | |
|
|
|
|
6 | Reserved | Fixed to off | |
|
|
|
|
7 | Reserved | Fixed to off | |
|
|
|
|
8 | Reserved | Fixed to off | |
|
|
|
|
bps: Indicates the number of bits transferred per second.
DIP switches 2 to 8 are for serial communication. Not used in parallel communication.
Note:
When using an OPOS or Advanced Printer Driver, do not change DIP switch
2.8 Setting Memory Switches
With the
The memory switches can be set in 2 ways, using the memory switch setting mode of the printer, or from the application. Depending on the setting items, some settings can only be set from the application.
Note:
When using the OPOS or Advanced Printer Driver, it is generally unnecessary to set the memory switches. However, set the memory switches in either of the following cases.
•When you want to set the communication speed (38,400/57,600/115200 bps) higher than that available with the DIP switches in serial communication speed setting
•When you set the thermal paper width and select single color or two colors (when using the Advanced Printer Driver)
*For thermal paper width setting and single color/two colors selection in the OPOS ADK, you need not set the memory switches separately since the memory switches are automatically set by making changes with the Setup POS Utility packed with OPOS ADK.
(For the OPOS and Advanced Printer Drivers, refer to “Introduction of Control Methods” on page
Rev. B | Setup |