Use automatic duplex printing
1.Insert enough paper into one of the trays to accommodate the print job. If you are loading special paper such as letterhead, load it in one of the following ways:
●For tray 1, load the letterhead paper with the front side up,
●For all other trays, load the letterhead paper with front side down, and the top edge at the back of the tray.
CAUTION: To avoid jams, do not load paper that is heavier than 105 g/m2 (28 lb bond).
2.Open the printer driver (see Open the printer drivers on page 9).
3.On the Finishing tab, click Print on Both Sides.
●If necessary, select Flip Pages Up to change the manner in which pages are turned, or select a binding option in the Booklet Layout list box.
4.Click OK.
Print on both sides manually
1.Insert enough paper into one of the trays to accommodate the print job. If you are loading special paper such as letterhead, load it in one of the following ways:
●For tray 1, load the letterhead paper with the front side up,
●For all other trays, load letterhead paper with front side down, and the top edge at the back of the tray.
![]() CAUTION: To avoid jams, do not load paper that is heavier than 105 g/m2 (28 lb bond).
CAUTION: To avoid jams, do not load paper that is heavier than 105 g/m2 (28 lb bond).
2.Open the printer driver (see Open the printer drivers on page 9).
3.On the Finishing tab, select Print on Both Sides (manually).
4.Click OK.
5.Send the print job to the product. Follow the instructions in the
6.Go to the product. Remove any blank paper that is in tray 1. Insert the printed stack with the printed side up, and the
7.If prompted, press a
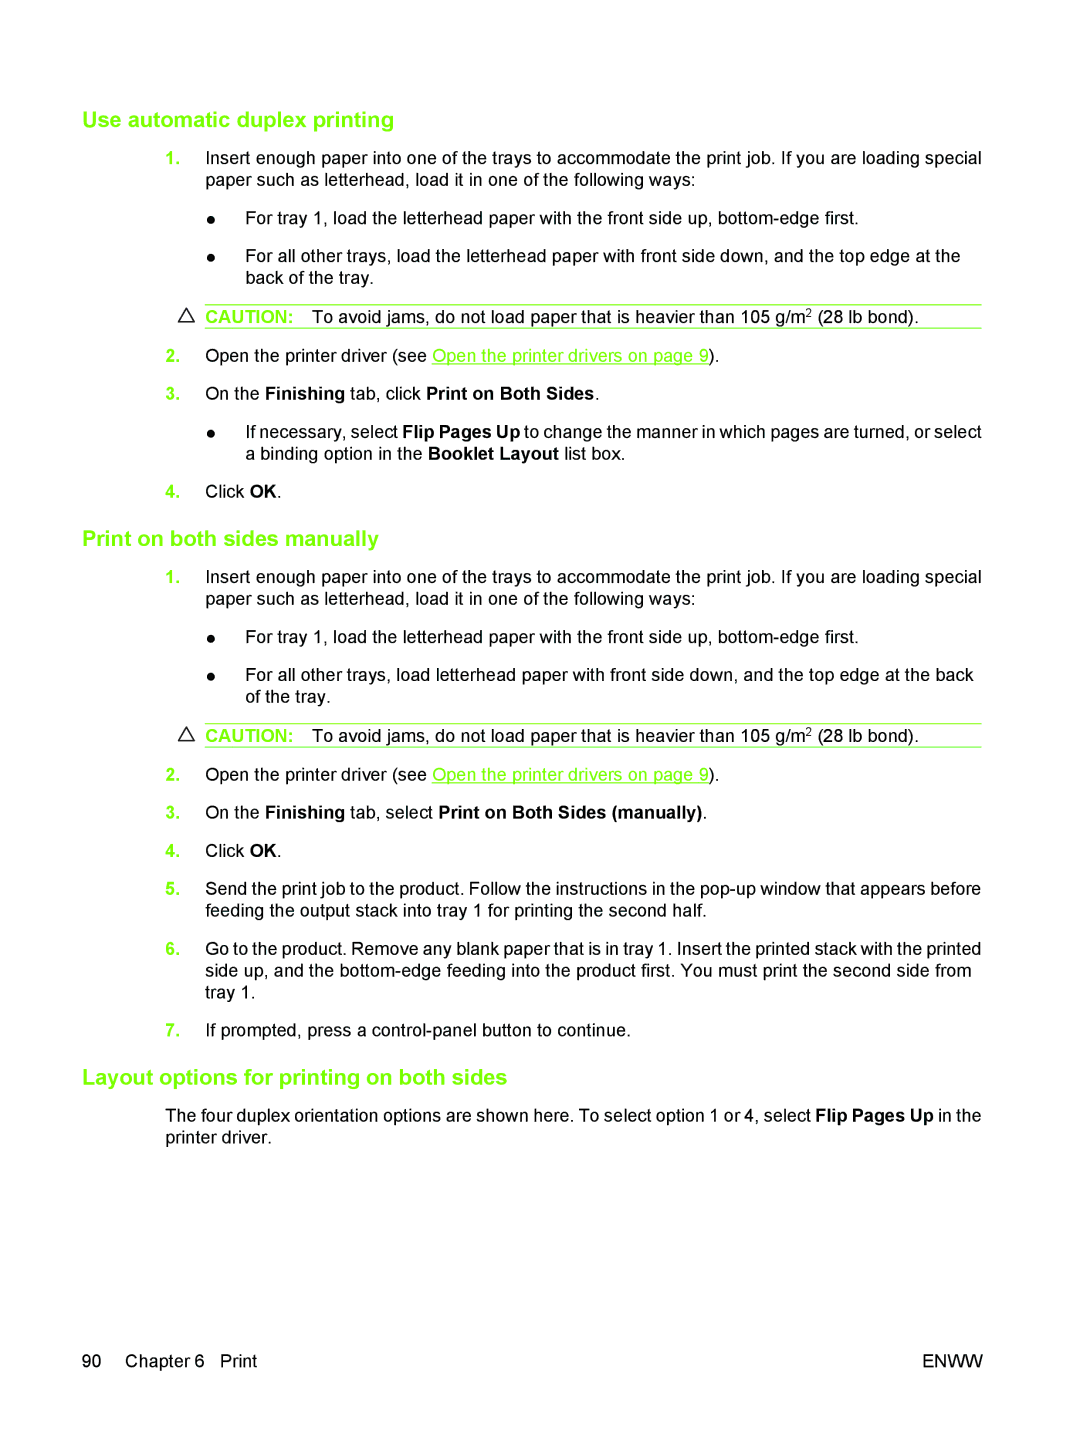
Layout options for printing on both sides
The four duplex orientation options are shown here. To select option 1 or 4, select Flip Pages Up in the printer driver.
90 Chapter 6 Print | ENWW |