Use the control panel
The control panel has a VGA touchscreen that provides access to all device functions. Use the buttons and numeric keypad to control jobs and the device status. The LEDs indicate overall device status.
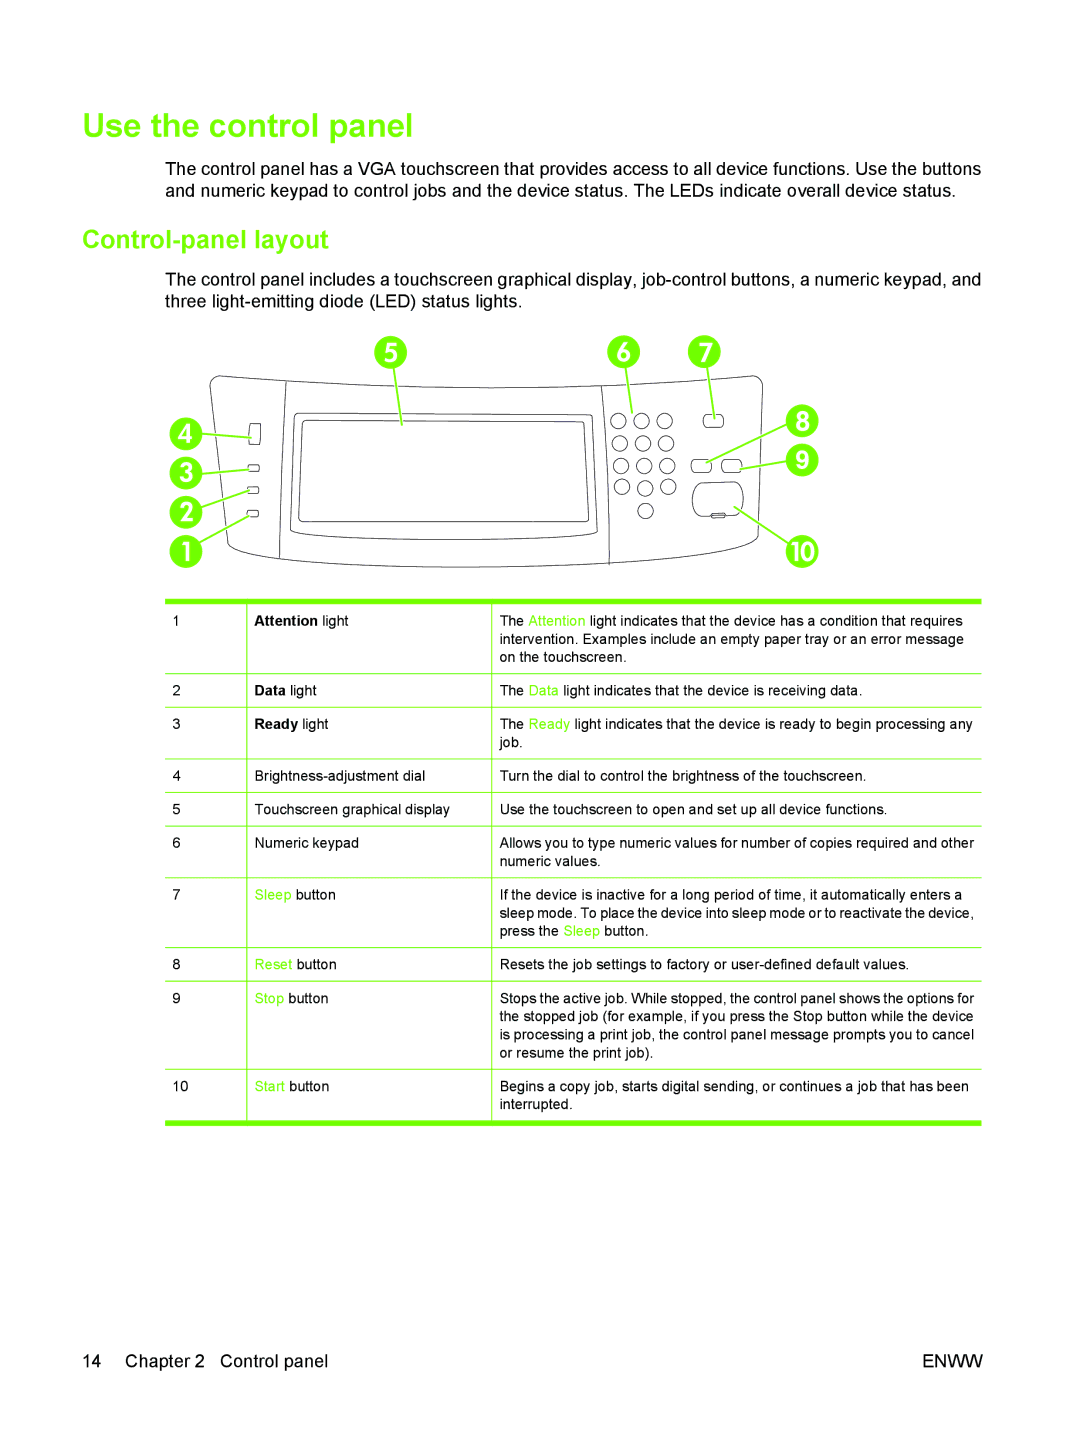
Control-panel layout
The control panel includes a touchscreen graphical display,
1 |
| Attention light |
| The Attention light indicates that the device has a condition that requires |
|
|
|
| intervention. Examples include an empty paper tray or an error message |
|
|
|
| on the touchscreen. |
|
|
|
|
|
2 |
| Data light |
| The Data light indicates that the device is receiving data. |
|
|
|
|
|
3 |
| Ready light |
| The Ready light indicates that the device is ready to begin processing any |
|
|
|
| job. |
|
|
|
|
|
4 |
|
| Turn the dial to control the brightness of the touchscreen. | |
|
|
|
|
|
5 |
| Touchscreen graphical display |
| Use the touchscreen to open and set up all device functions. |
|
|
|
|
|
6 |
| Numeric keypad |
| Allows you to type numeric values for number of copies required and other |
|
|
|
| numeric values. |
|
|
|
|
|
7 |
| Sleep button |
| If the device is inactive for a long period of time, it automatically enters a |
|
|
|
| sleep mode. To place the device into sleep mode or to reactivate the device, |
|
|
|
| press the Sleep button. |
|
|
|
|
|
8 |
| Reset button |
| Resets the job settings to factory or |
|
|
|
|
|
9 |
| Stop button |
| Stops the active job. While stopped, the control panel shows the options for |
|
|
|
| the stopped job (for example, if you press the Stop button while the device |
|
|
|
| is processing a print job, the control panel message prompts you to cancel |
|
|
|
| or resume the print job). |
|
|
|
|
|
10 |
| Start button |
| Begins a copy job, starts digital sending, or continues a job that has been |
|
|
|
| interrupted. |
|
|
|
|
|
14 Chapter 2 Control panel | ENWW |