4. Choose the spool file you want to transfer.
Press the TAB key until the cursor is next to the spool file you want to transfer. In the
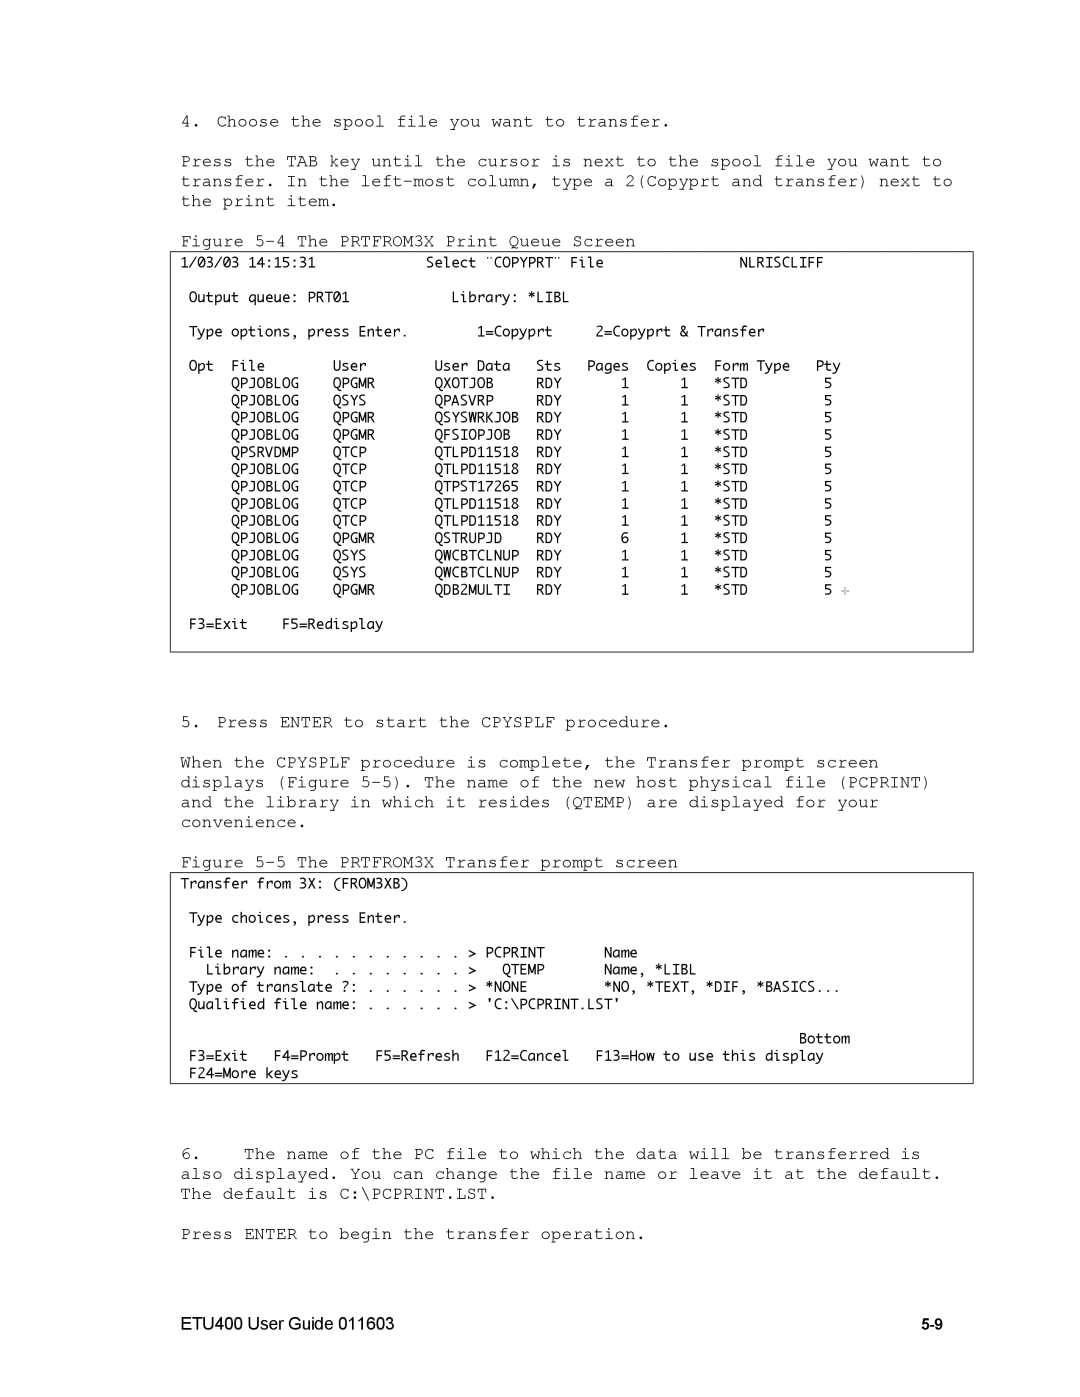
Figure 5-4 The PRTFROM3X Print Queue Screen
1/03/03 14:15:31 |
| Select "COPYPRT" File |
| NLRISCLIFF | |||||
Output queue: PRT01 | Library: *LIBL |
|
|
|
| ||||
Type | options, press Enter. | 1=Copyprt | 2=Copyprt & Transfer |
| |||||
Opt | File |
| User | User Data | Sts | Pages | Copies | Form Type | Pty |
| QPJOBLOG | QPGMR | QXOTJOB | RDY | 1 | 1 | *STD | 5 | |
| QPJOBLOG | QSYS | QPASVRP | RDY | 1 | 1 | *STD | 5 | |
| QPJOBLOG | QPGMR | QSYSWRKJOB | RDY | 1 | 1 | *STD | 5 | |
| QPJOBLOG | QPGMR | QFSIOPJOB | RDY | 1 | 1 | *STD | 5 | |
| QPSRVDMP | QTCP | QTLPD11518 | RDY | 1 | 1 | *STD | 5 | |
| QPJOBLOG | QTCP | QTLPD11518 | RDY | 1 | 1 | *STD | 5 | |
| QPJOBLOG | QTCP | QTPST17265 | RDY | 1 | 1 | *STD | 5 | |
| QPJOBLOG | QTCP | QTLPD11518 | RDY | 1 | 1 | *STD | 5 | |
| QPJOBLOG | QTCP | QTLPD11518 | RDY | 1 | 1 | *STD | 5 | |
| QPJOBLOG | QPGMR | QSTRUPJD | RDY | 6 | 1 | *STD | 5 | |
| QPJOBLOG | QSYS | QWCBTCLNUP | RDY | 1 | 1 | *STD | 5 | |
| QPJOBLOG | QSYS | QWCBTCLNUP | RDY | 1 | 1 | *STD | 5 | |
| QPJOBLOG | QPGMR | QDB2MULTI | RDY | 1 | 1 | *STD | 5 | |
F3=Exit | F5=Redisplay |
|
|
|
|
|
| ||
|
|
|
|
|
|
|
|
|
|
5. Press ENTER to start the CPYSPLF procedure.
When the CPYSPLF procedure is complete, the Transfer prompt screen displays (Figure
Figure 5-5 The PRTFROM3X Transfer prompt screen
Transfer from 3X: (FROM3XB)
Type choices, press Enter. |
|
|
|
| |
File | name: | > PCPRINT | Name |
| |
Library name: | > | QTEMP | Name, *LIBL | ||
Type | of translate ?: | > | *NONE | *NO, | *TEXT, *DIF, *BASICS... |
Qualified | file name: . | . . . . . | > 'C:\PCPRINT.LST' | |
|
|
|
| Bottom |
F3=Exit | F4=Prompt | F5=Refresh | F12=Cancel | F13=How to use this display |
F24=More keys |
|
|
| |
6.The name of the PC file to which the data will be transferred is also displayed. You can change the file name or leave it at the default. The default is C:\PCPRINT.LST.
Press ENTER to begin the transfer operation.
ETU400 User Guide 011603 |