6.7 Chart setup
The set up for your chart and its cartography can be changed from the standard configuration to suit your particular needs.
Although you will probably only do this when you first use the chart, you may decide to make subsequent adjustments once you become more familiar with the system. Any settings that you change are retained even when you power off.
Selecting the chart setup menu
In the chart application:
1.Press the MENU button.
2.Using the trackpad, highlight the Chart Setup menu item.
3.Press right on the trackpad to enter the Chart Setup menu.
Chart setup menu options
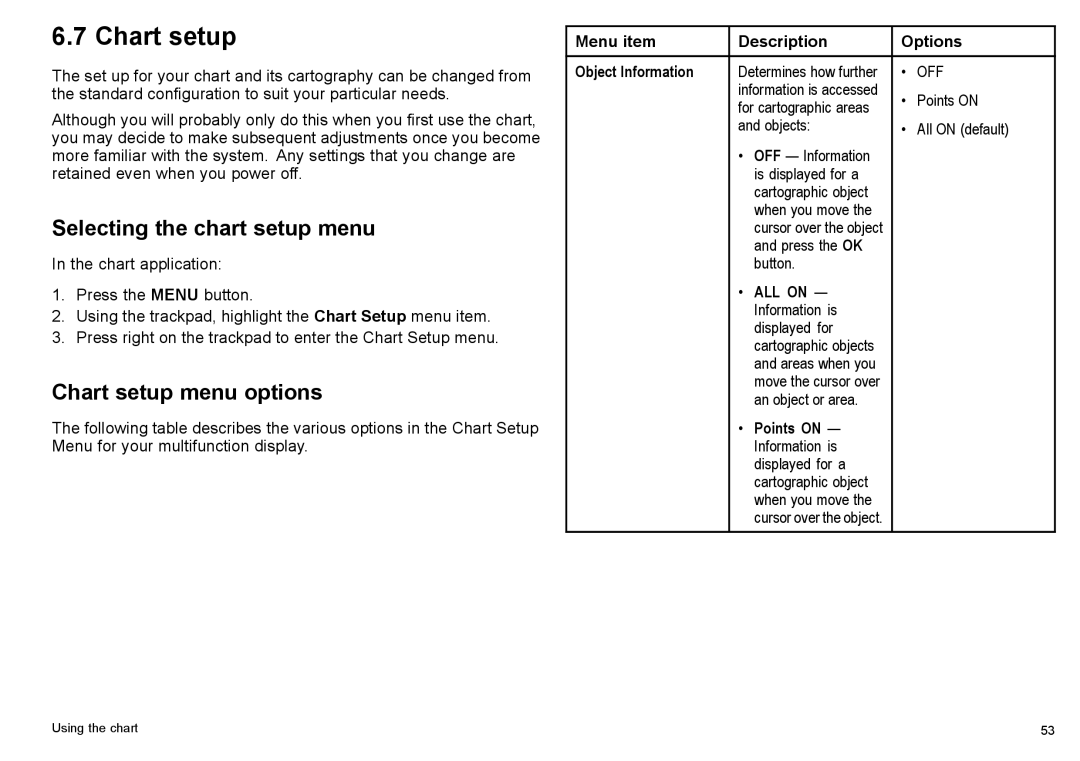
The following table describes the various options in the Chart Setup Menu for your multifunction display.
Menu item | Description | Options | ||
Object Information | Determines how further | • | OFF | |
| information is accessed | • | Points ON | |
| for cartographic areas | |||
| and objects: | • | All ON (default) | |
| • | OFF — Information |
|
|
|
| is displayed for a |
|
|
|
| cartographic object |
|
|
|
| when you move the |
|
|
|
| cursor over the object |
|
|
|
| and press the OK |
|
|
|
| button. |
|
|
| • | ALL ON — |
|
|
|
| Information is |
|
|
|
| displayed for |
|
|
|
| cartographic objects |
|
|
|
| and areas when you |
|
|
|
| move the cursor over |
|
|
|
| an object or area. |
|
|
| • | Points ON — |
|
|
|
| Information is |
|
|
|
| displayed for a |
|
|
|
| cartographic object |
|
|
|
| when you move the |
|
|
|
| cursor over the object. |
|
|
Using the chart | 53 |