1.12 Adjustment of the doctor-sleeve gap
Tool to be used:
(1)Remove the toner cartridge and process unit.
(2)Detach the drum assembly and dispose the developer material (Chapter
(3)Remove the 2 screws and detach the developer cover. Place the drum assembly on a flat surface.
(4)Loosen 3 screws fixing the doctor blade.
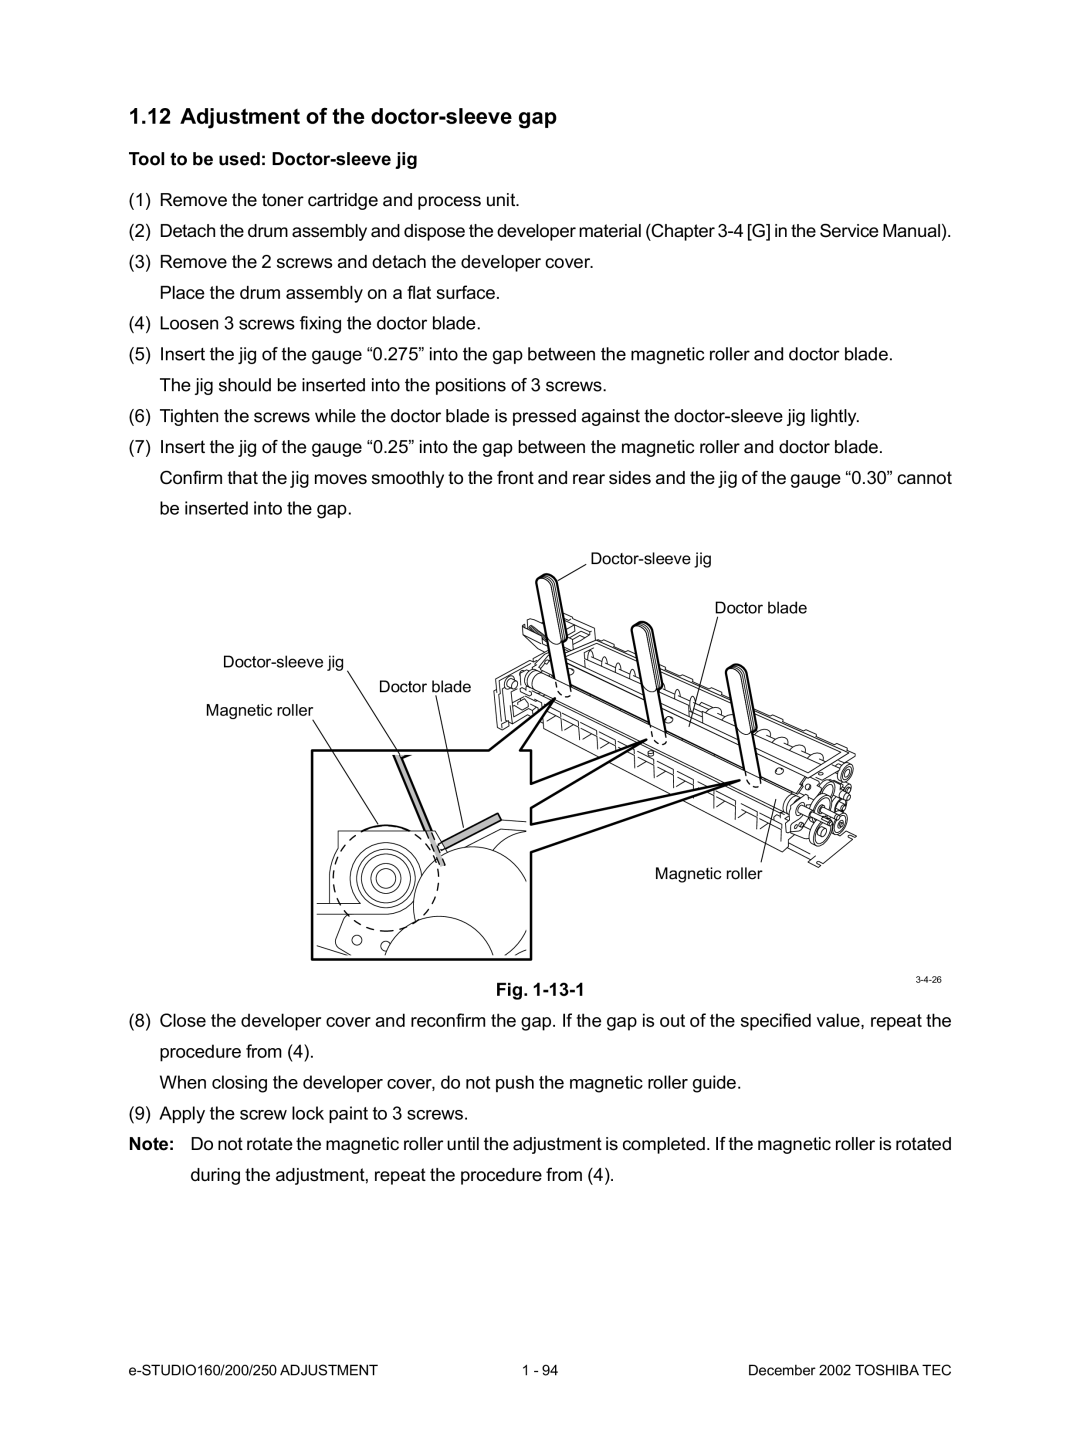
(5)Insert the jig of the gauge “0.275” into the gap between the magnetic roller and doctor blade. The jig should be inserted into the positions of 3 screws.
(6)Tighten the screws while the doctor blade is pressed against the
(7)Insert the jig of the gauge “0.25” into the gap between the magnetic roller and doctor blade. Confirm that the jig moves smoothly to the front and rear sides and the jig of the gauge “0.30” cannot be inserted into the gap.
Doctor blade
Doctor blade
Magnetic roller
Magnetic roller
Fig.
(8)Close the developer cover and reconfirm the gap. If the gap is out of the specified value, repeat the procedure from (4).
When closing the developer cover, do not push the magnetic roller guide.
(9)Apply the screw lock paint to 3 screws.
Note: Do not rotate the magnetic roller until the adjustment is completed. If the magnetic roller is rotated during the adjustment, repeat the procedure from (4).
1 - 94 | December 2002 TOSHIBA TEC |