1.8.2 Installing the scanner motor
When mounting the scanner motor, adjust the tension of timing belt 142 and timing belt 157 in the
following manner.
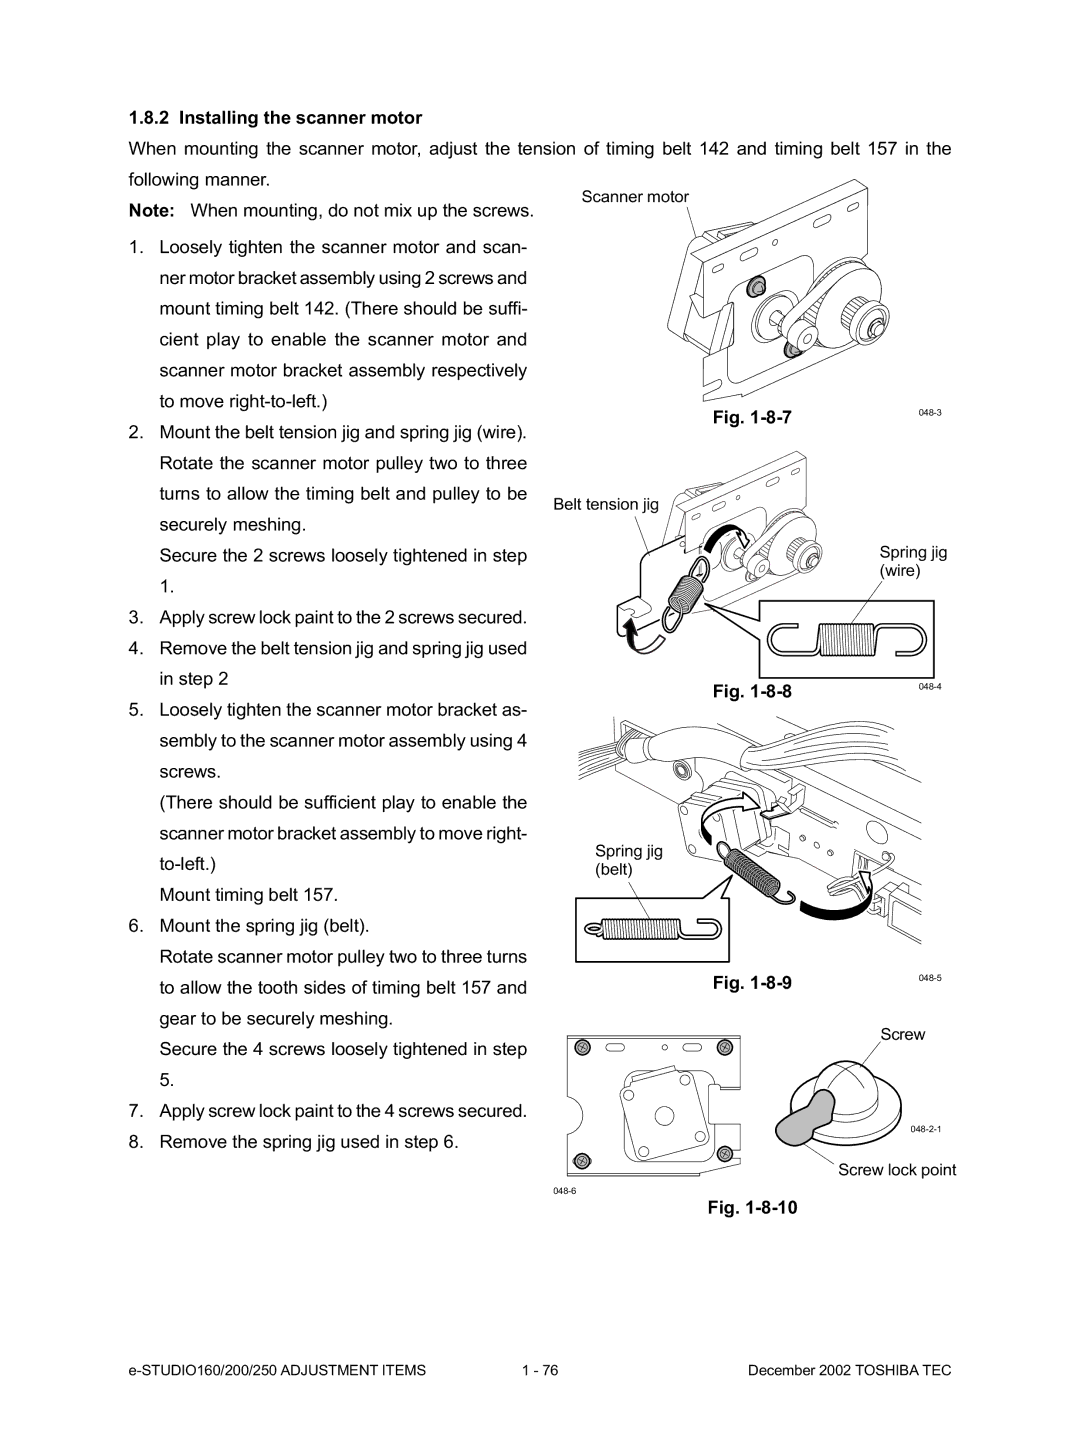
Scanner motor
Note: When mounting, do not mix up the screws.
1.Loosely tighten the scanner motor and scan- ner motor bracket assembly using 2 screws and mount timing belt 142. (There should be suffi- cient play to enable the scanner motor and scanner motor bracket assembly respectively to move
2.Mount the belt tension jig and spring jig (wire). Rotate the scanner motor pulley two to three turns to allow the timing belt and pulley to be securely meshing.
Secure the 2 screws loosely tightened in step 1.
3.Apply screw lock paint to the 2 screws secured.
4.Remove the belt tension jig and spring jig used in step 2
5.Loosely tighten the scanner motor bracket as- sembly to the scanner motor assembly using 4 screws.
(There should be sufficient play to enable the scanner motor bracket assembly to move right-
Mount timing belt 157.
6.Mount the spring jig (belt).
Rotate scanner motor pulley two to three turns to allow the tooth sides of timing belt 157 and gear to be securely meshing.
Secure the 4 screws loosely tightened in step 5.
7.Apply screw lock paint to the 4 screws secured.
8.Remove the spring jig used in step 6.
Belt tension jig
Spring jig (belt)
Fig. | |
|
Spring jig (wire)
Fig. | |
|
Fig. | |
|
Screw
Screw lock point
Fig.
1 - 76 | December 2002 TOSHIBA TEC |