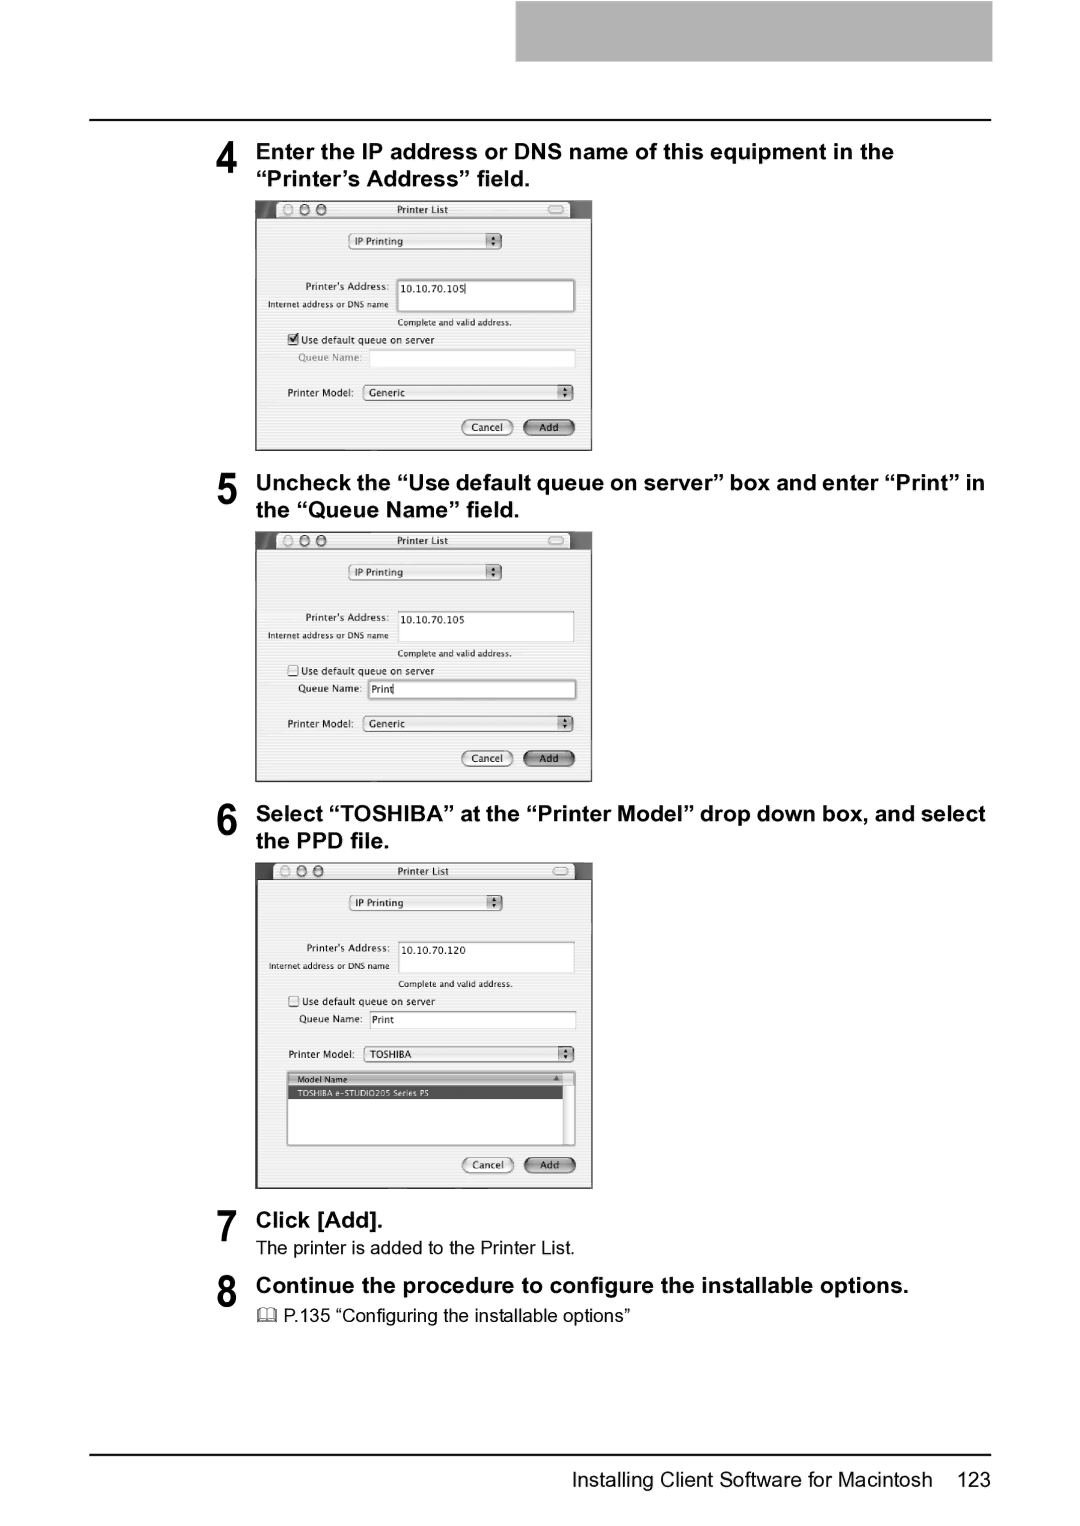
4 Enter the IP address or DNS name of this equipment in the “Printer’s Address” field.
5 | Uncheck the “Use default queue on server” box and enter “Print” in |
the “Queue Name” field. |
6 | Select “TOSHIBA” at the “Printer Model” drop down box, and select |
the PPD file. |
7 Click [Add].
The printer is added to the Printer List.
8 Continue the procedure to configure the installable options.
P.135 “Configuring the installable options”
Installing Client Software for Macintosh 123
