3PRINTING
—Print Job tab
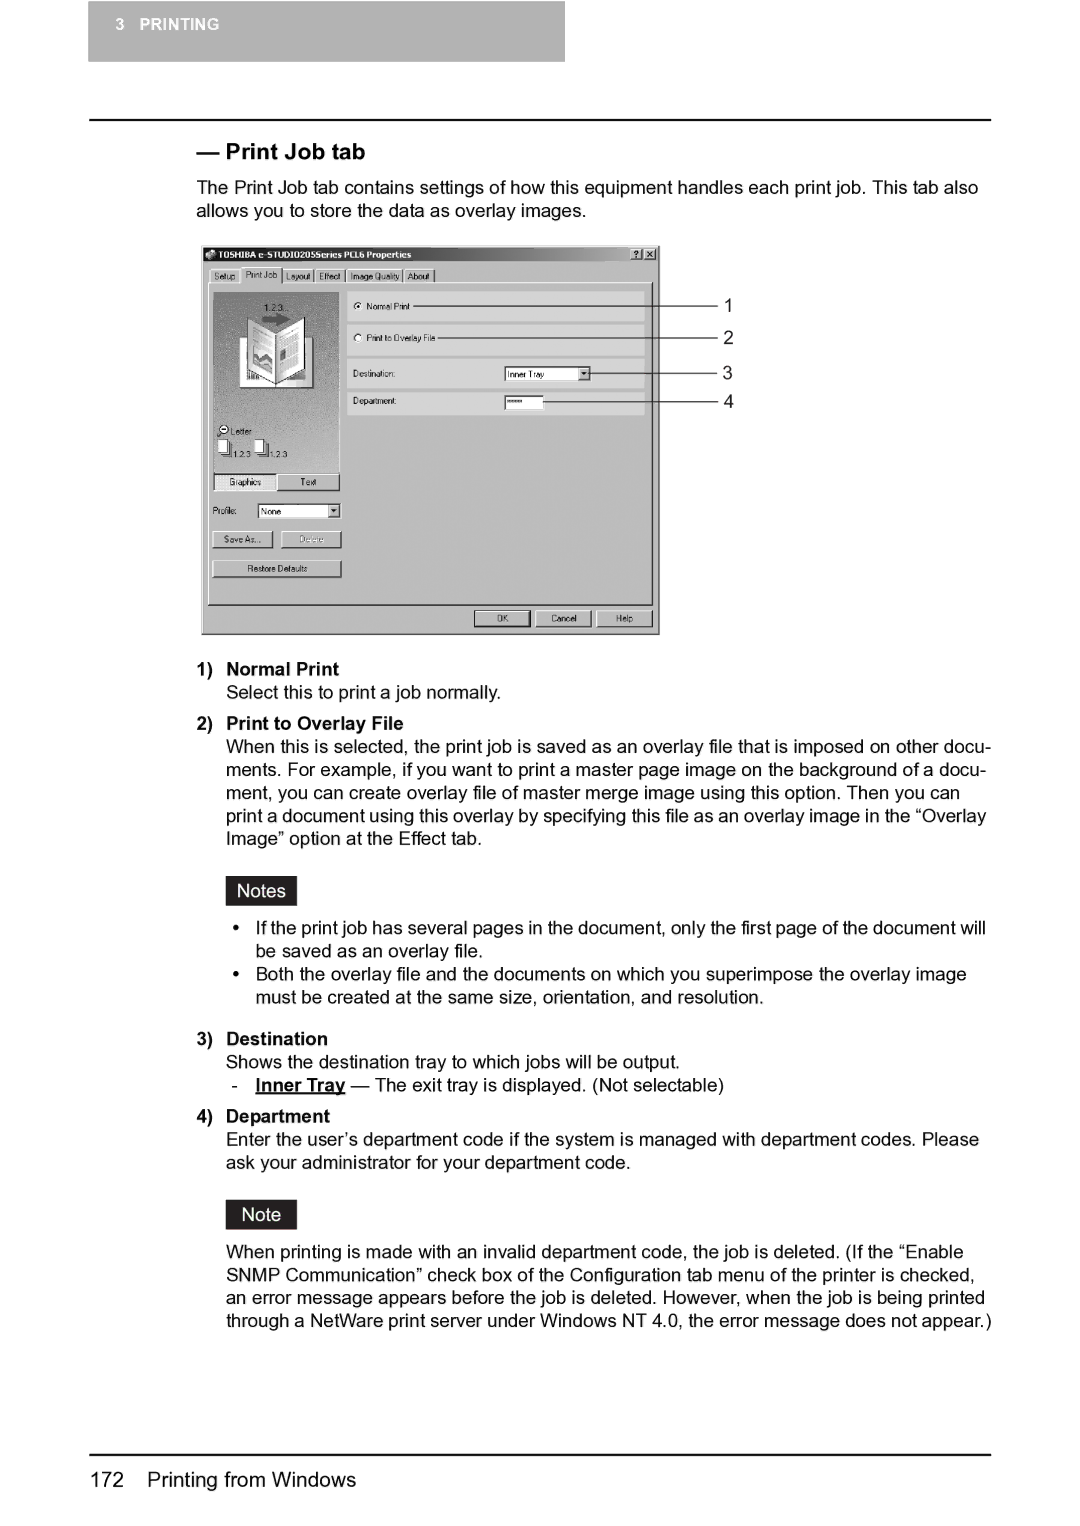
The Print Job tab contains settings of how this equipment handles each print job. This tab also allows you to store the data as overlay images.
1
2
3
4
1)Normal Print
Select this to print a job normally.
2)Print to Overlay File
When this is selected, the print job is saved as an overlay file that is imposed on other docu- ments. For example, if you want to print a master page image on the background of a docu- ment, you can create overlay file of master merge image using this option. Then you can print a document using this overlay by specifying this file as an overlay image in the “Overlay Image” option at the Effect tab.
yIf the print job has several pages in the document, only the first page of the document will be saved as an overlay file.
yBoth the overlay file and the documents on which you superimpose the overlay image must be created at the same size, orientation, and resolution.
3)Destination
Shows the destination tray to which jobs will be output.
- Inner Tray — The exit tray is displayed. (Not selectable)
4)Department
Enter the user’s department code if the system is managed with department codes. Please ask your administrator for your department code.
When printing is made with an invalid department code, the job is deleted. (If the “Enable SNMP Communication” check box of the Configuration tab menu of the printer is checked, an error message appears before the job is deleted. However, when the job is being printed through a NetWare print server under Windows NT 4.0, the error message does not appear.)