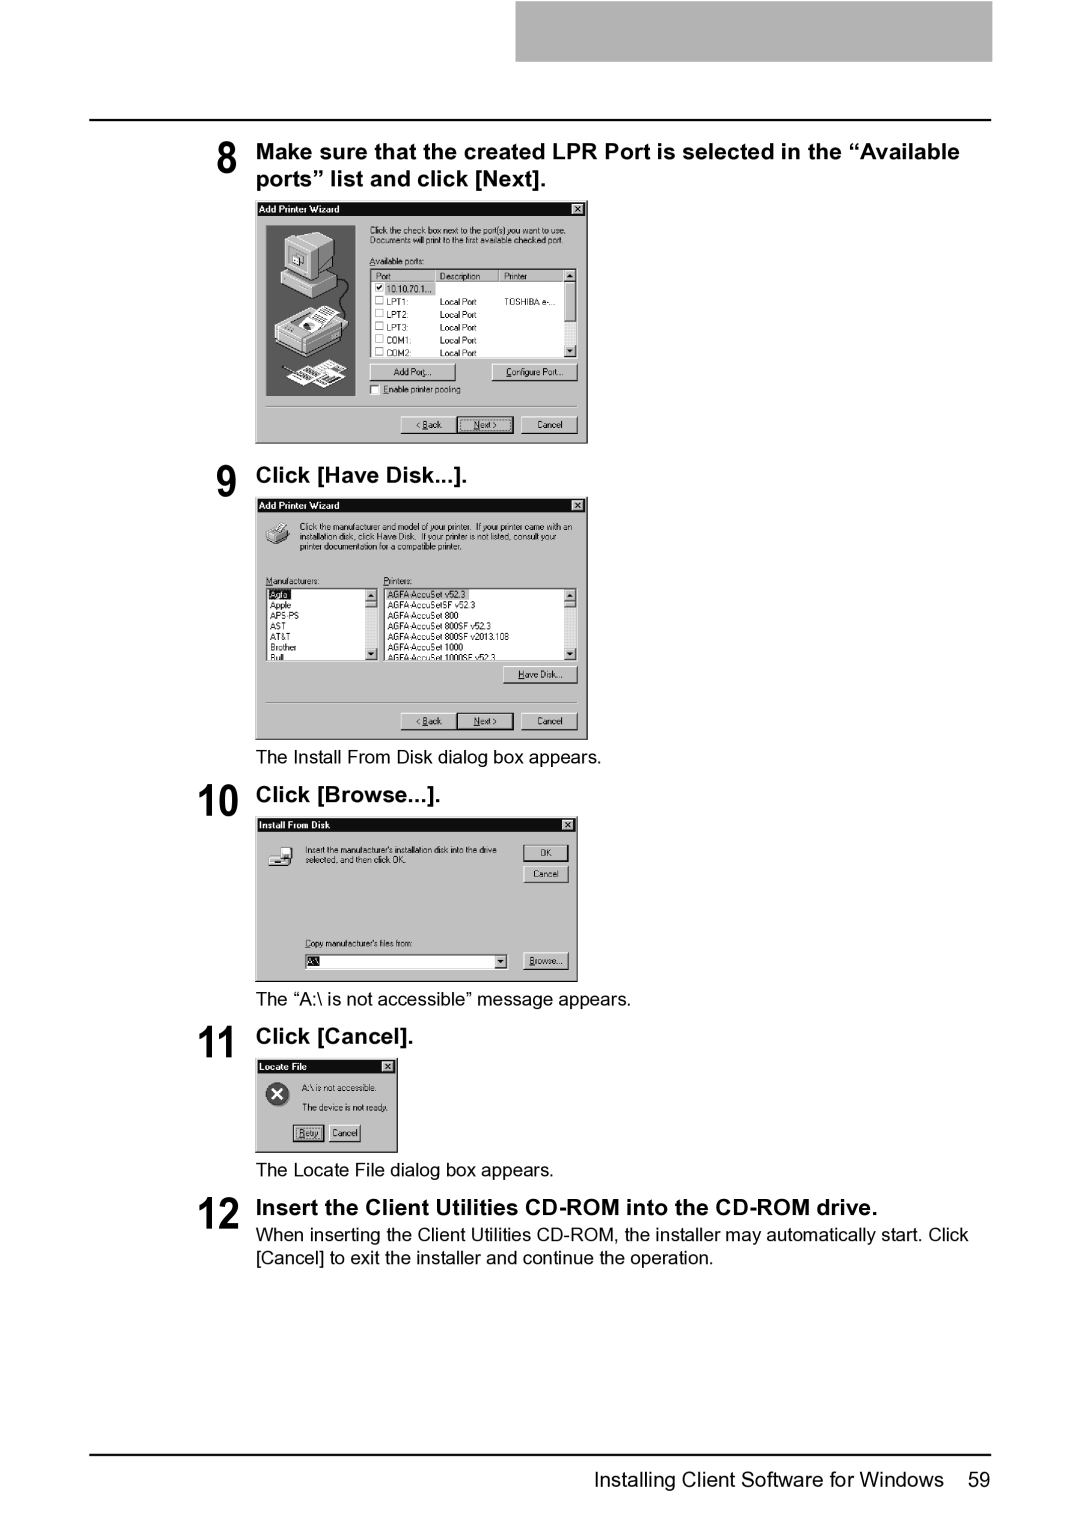
8 Make sure that the created LPR Port is selected in the “Available ports” list and click [Next].
9 Click [Have Disk...].
The Install From Disk dialog box appears.
10 Click [Browse...].
The “A:\ is not accessible” message appears.
11 Click [Cancel].
The Locate File dialog box appears.
12 Insert the Client Utilities
When inserting the Client Utilities