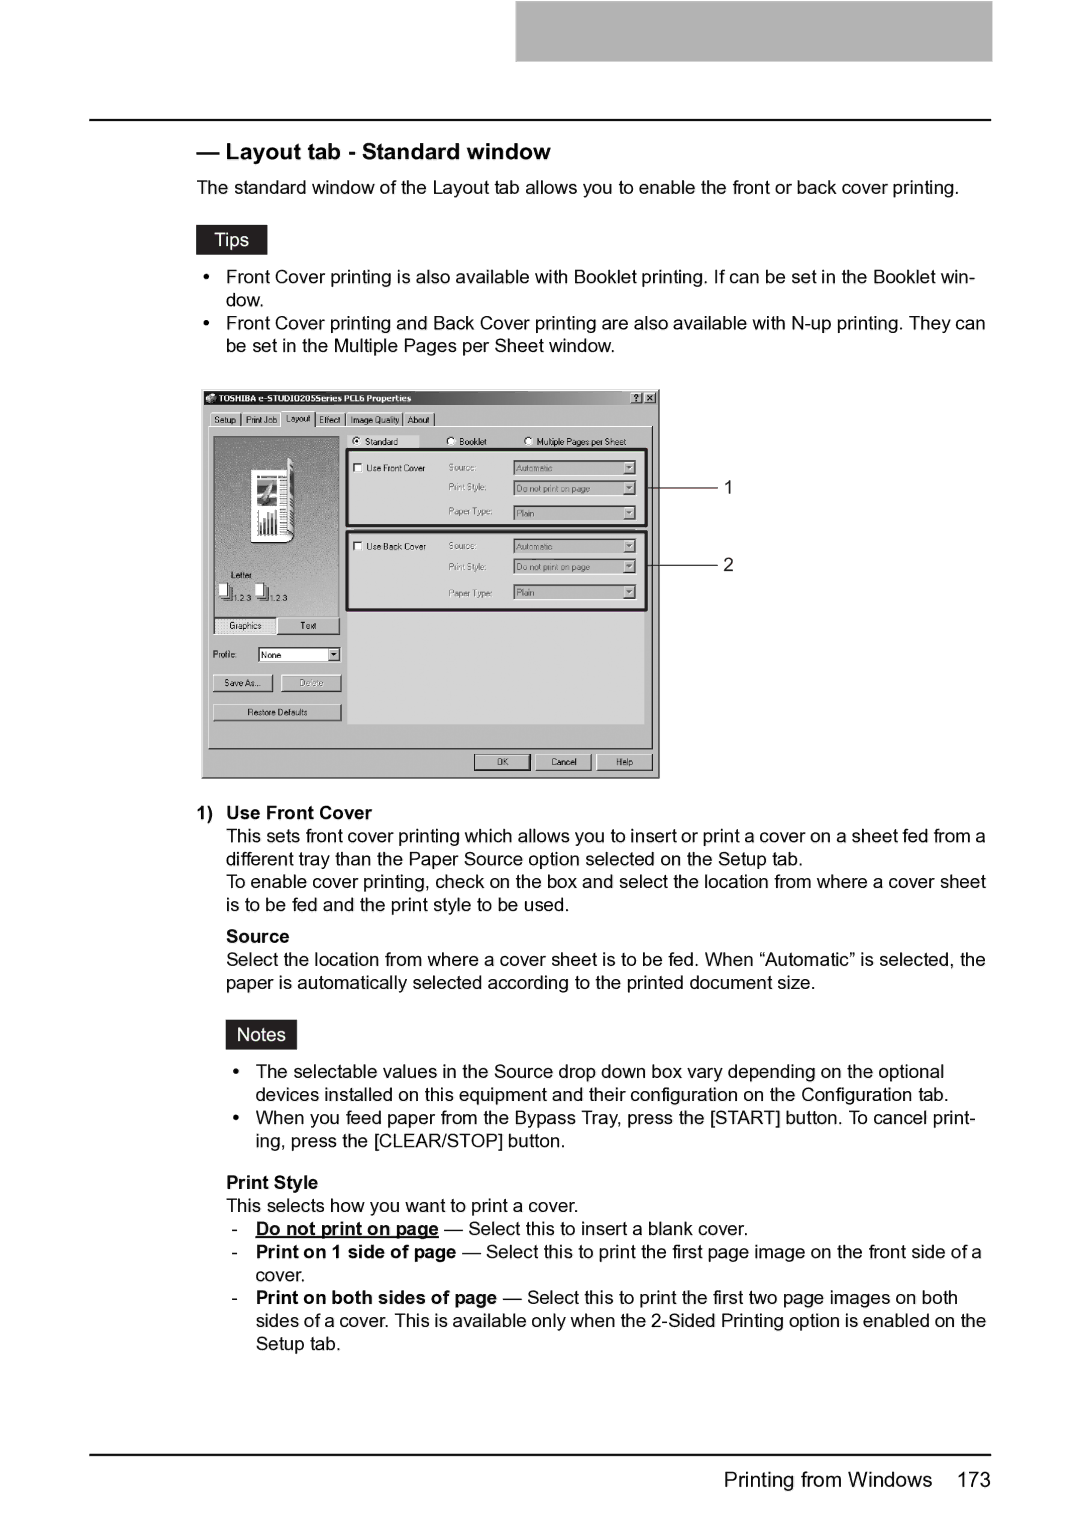
— Layout tab - Standard window
The standard window of the Layout tab allows you to enable the front or back cover printing.
yFront Cover printing is also available with Booklet printing. If can be set in the Booklet win- dow.
yFront Cover printing and Back Cover printing are also available with
1
2
1)Use Front Cover
This sets front cover printing which allows you to insert or print a cover on a sheet fed from a different tray than the Paper Source option selected on the Setup tab.
To enable cover printing, check on the box and select the location from where a cover sheet is to be fed and the print style to be used.
Source
Select the location from where a cover sheet is to be fed. When “Automatic” is selected, the paper is automatically selected according to the printed document size.
yThe selectable values in the Source drop down box vary depending on the optional devices installed on this equipment and their configuration on the Configuration tab.
yWhen you feed paper from the Bypass Tray, press the [START] button. To cancel print- ing, press the [CLEAR/STOP] button.
Print Style
This selects how you want to print a cover.
-Do not print on page — Select this to insert a blank cover.
-Print on 1 side of page — Select this to print the first page image on the front side of a cover.
-Print on both sides of page — Select this to print the first two page images on both sides of a cover. This is available only when the