Maintenance
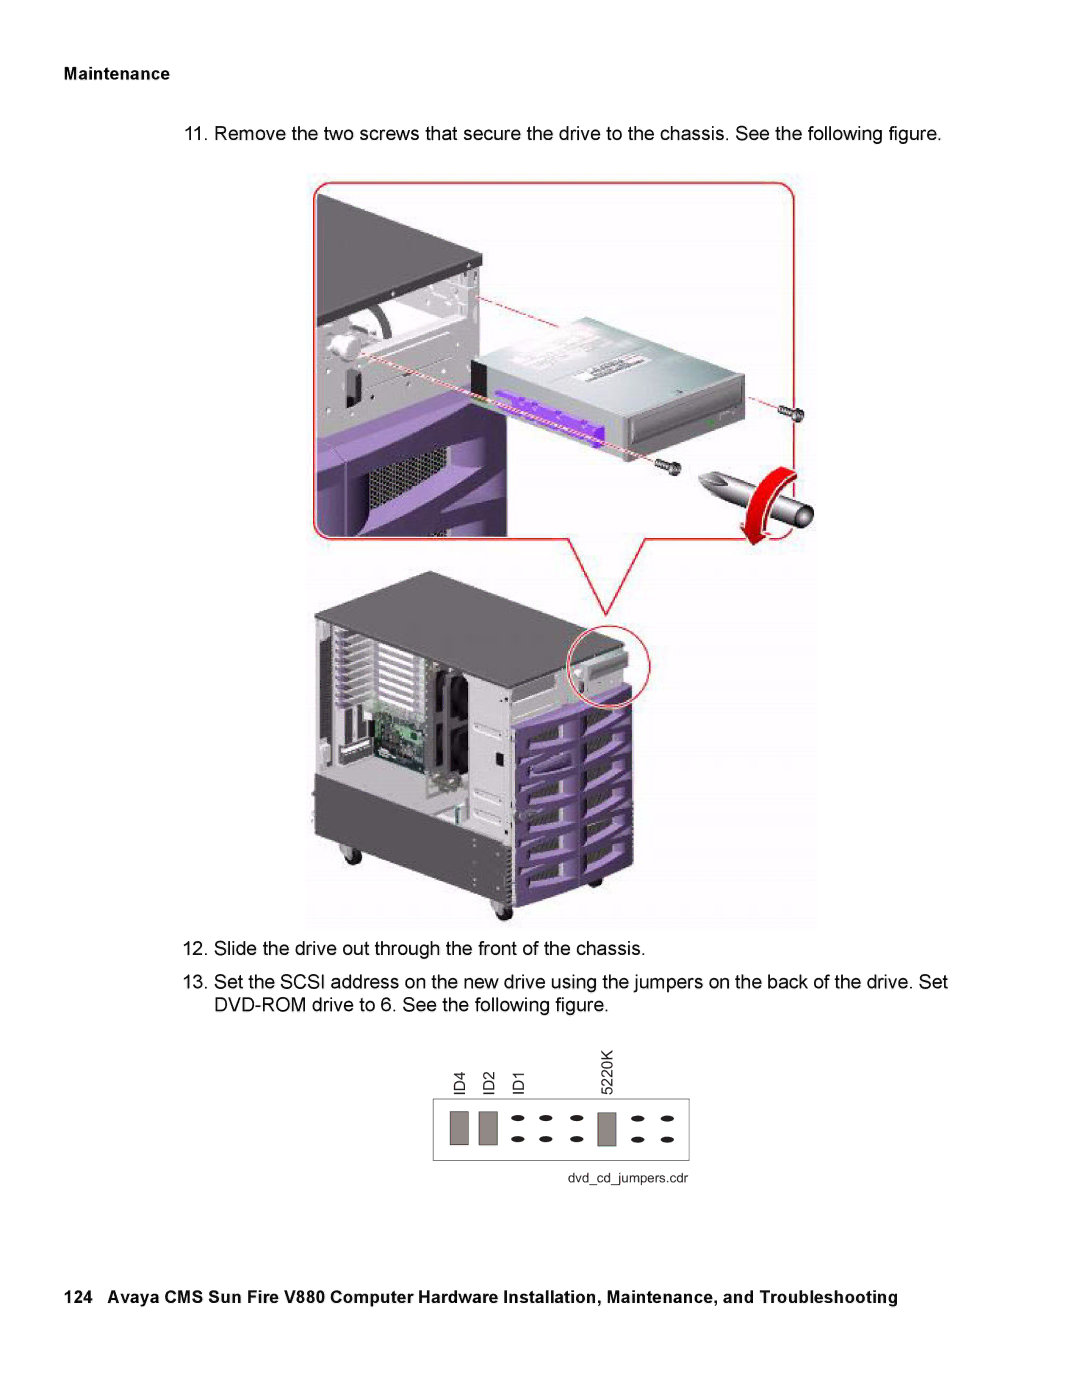
11. Remove the two screws that secure the drive to the chassis. See the following figure.
12.Slide the drive out through the front of the chassis.
13.Set the SCSI address on the new drive using the jumpers on the back of the drive. Set
| ID4 |
| ID2 | ID1 | 5220K | |
|
|
|
|
|
|
|
|
|
|
|
|
|
|
|
|
|
|
|
|
|
dvd_cd_jumpers.cdr
124 Avaya CMS Sun Fire V880 Computer Hardware Installation, Maintenance, and Troubleshooting
