Replacing the RSC card
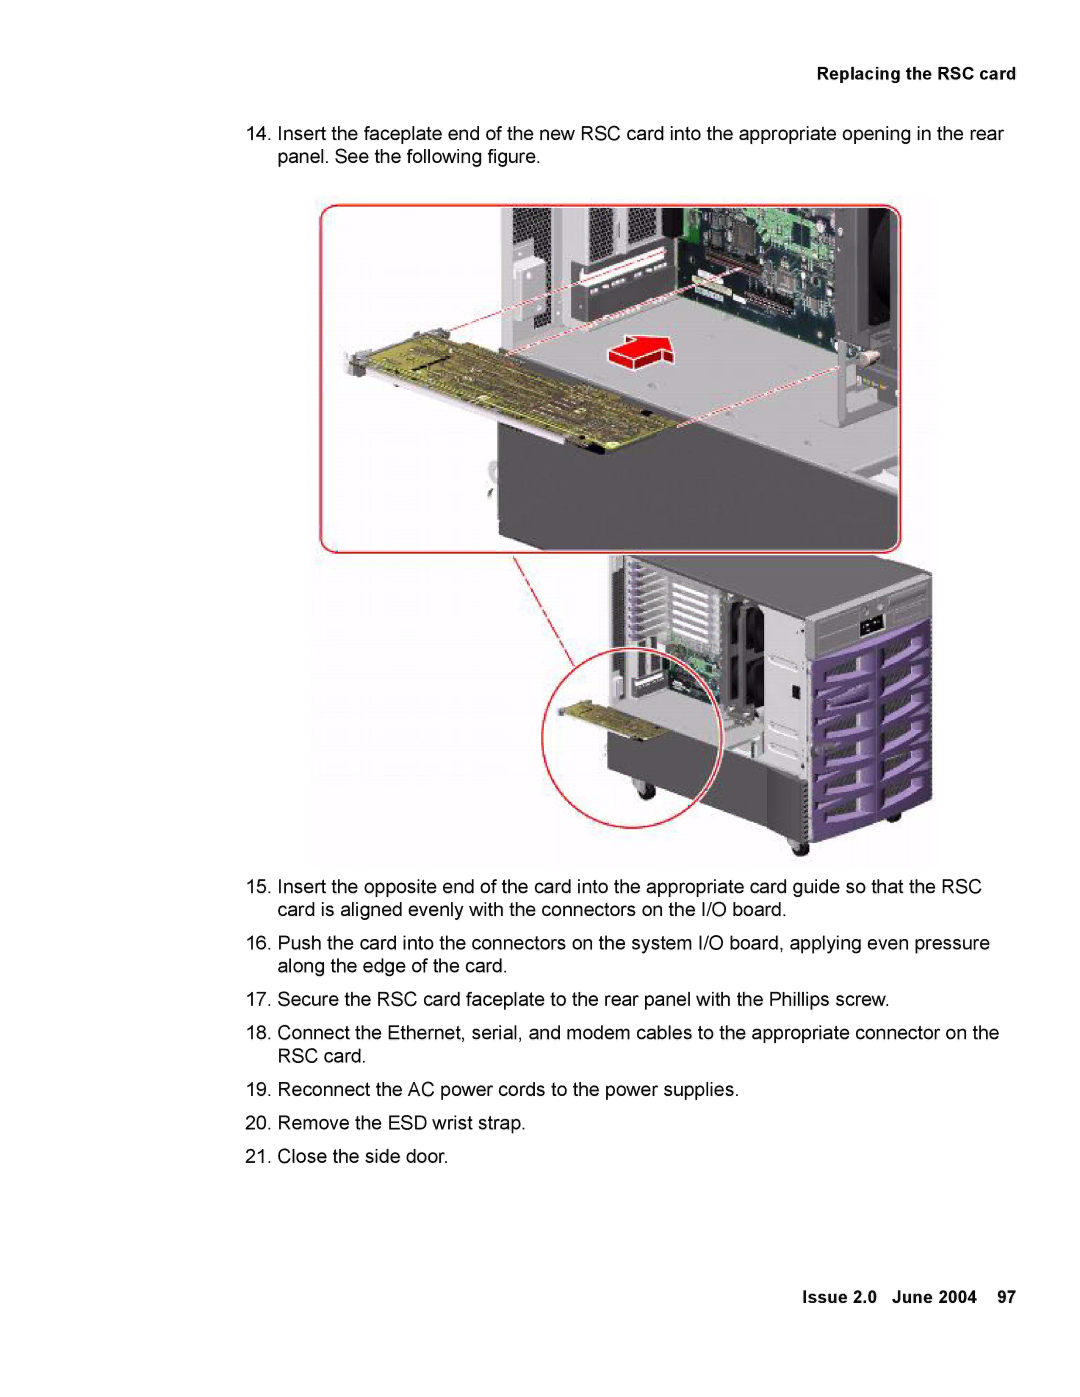
14.Insert the faceplate end of the new RSC card into the appropriate opening in the rear panel. See the following figure.
15.Insert the opposite end of the card into the appropriate card guide so that the RSC card is aligned evenly with the connectors on the I/O board.
16.Push the card into the connectors on the system I/O board, applying even pressure along the edge of the card.
17.Secure the RSC card faceplate to the rear panel with the Phillips screw.
18.Connect the Ethernet, serial, and modem cables to the appropriate connector on the RSC card.
19.Reconnect the AC power cords to the power supplies.
20.Remove the ESD wrist strap.
21.Close the side door.
Issue 2.0 June 2004 97
