Maintenance
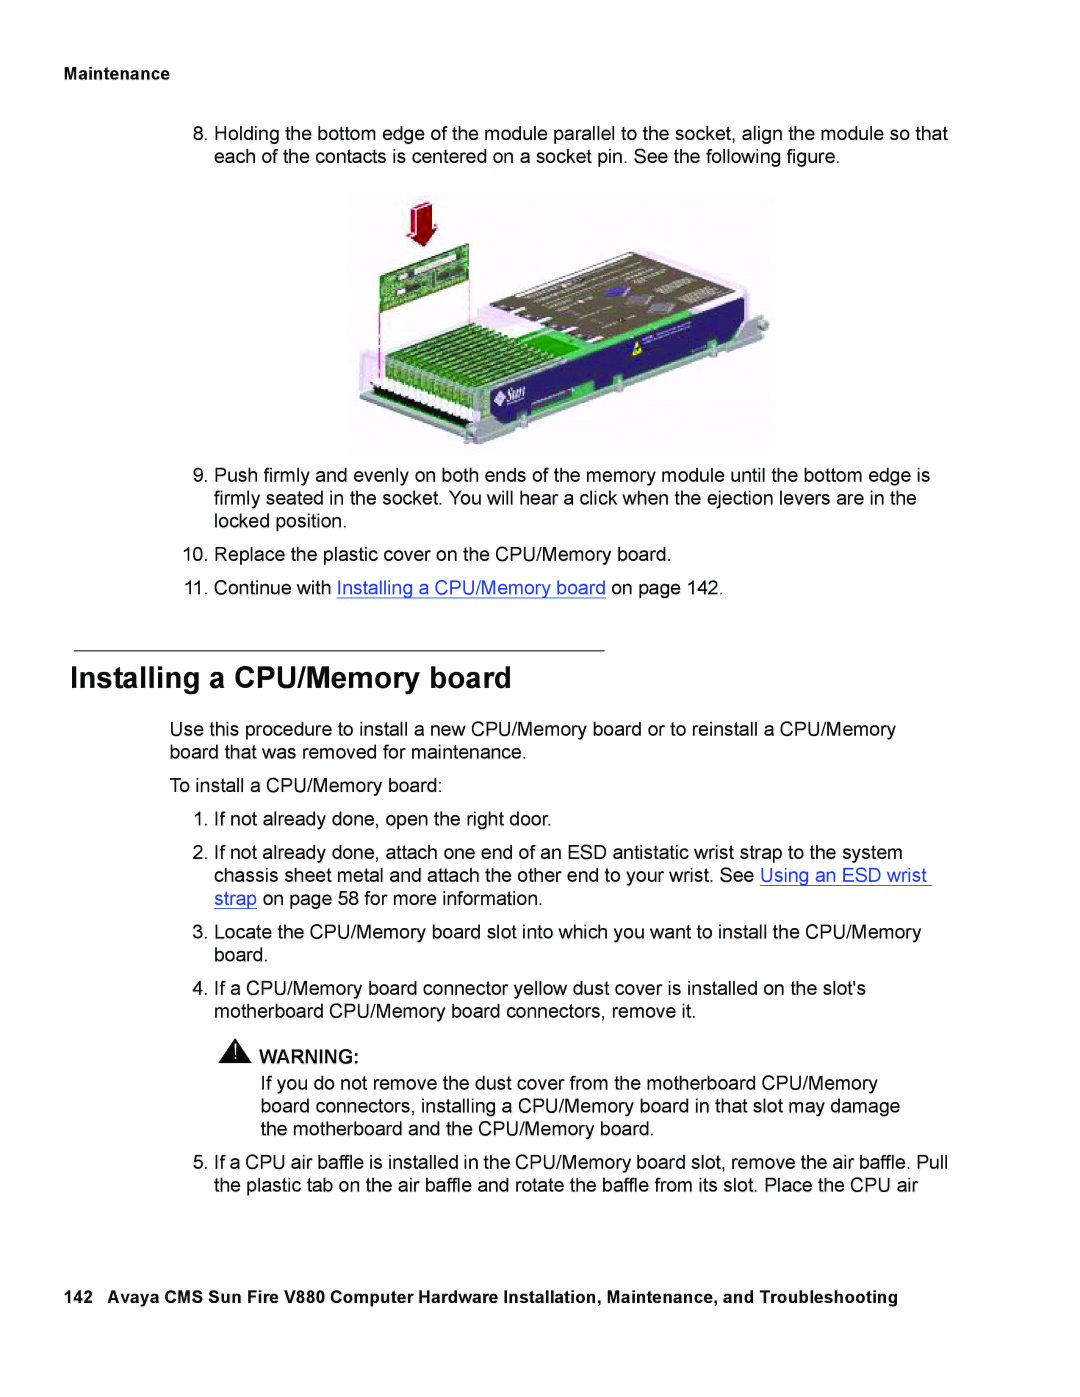
8.Holding the bottom edge of the module parallel to the socket, align the module so that each of the contacts is centered on a socket pin. See the following figure.
9.Push firmly and evenly on both ends of the memory module until the bottom edge is firmly seated in the socket. You will hear a click when the ejection levers are in the locked position.
10.Replace the plastic cover on the CPU/Memory board.
11.Continue with Installing a CPU/Memory board on page 142.
Installing a CPU/Memory board
Use this procedure to install a new CPU/Memory board or to reinstall a CPU/Memory board that was removed for maintenance.
To install a CPU/Memory board:
1.If not already done, open the right door.
2.If not already done, attach one end of an ESD antistatic wrist strap to the system chassis sheet metal and attach the other end to your wrist. See Using an ESD wrist strap on page 58 for more information.
3.Locate the CPU/Memory board slot into which you want to install the CPU/Memory board.
4.If a CPU/Memory board connector yellow dust cover is installed on the slot's motherboard CPU/Memory board connectors, remove it.
![]() !
!![]() WARNING:
WARNING:
If you do not remove the dust cover from the motherboard CPU/Memory board connectors, installing a CPU/Memory board in that slot may damage the motherboard and the CPU/Memory board.
5.If a CPU air baffle is installed in the CPU/Memory board slot, remove the air baffle. Pull the plastic tab on the air baffle and rotate the baffle from its slot. Place the CPU air
142 Avaya CMS Sun Fire V880 Computer Hardware Installation, Maintenance, and Troubleshooting