Installing Optional Modules | Page 1 of 48 |
Installing Optional Modules
You can make the multifunction printer more functional by installing the options. This chapter describes how to install the printer's options such as the duplexer and optional
![]() Installing the Optional
Installing the Optional
![]() Installing a Duplexer
Installing a Duplexer
![]() Installing a Memory Card
Installing a Memory Card
![]() Installing the Dell
Installing the Dell
![]() Installing the Dell Wireless Printer Adapter 3310 USB
Installing the Dell Wireless Printer Adapter 3310 USB
Installing the Optional 550-Sheet Paper Feeder
![]() CAUTION: If you are adding an optional
CAUTION: If you are adding an optional
![]() CAUTION: Do not move the multifunction printer with the optional
CAUTION: Do not move the multifunction printer with the optional
1.Place the optional
2.Ensure that the multifunction printer is turned off.
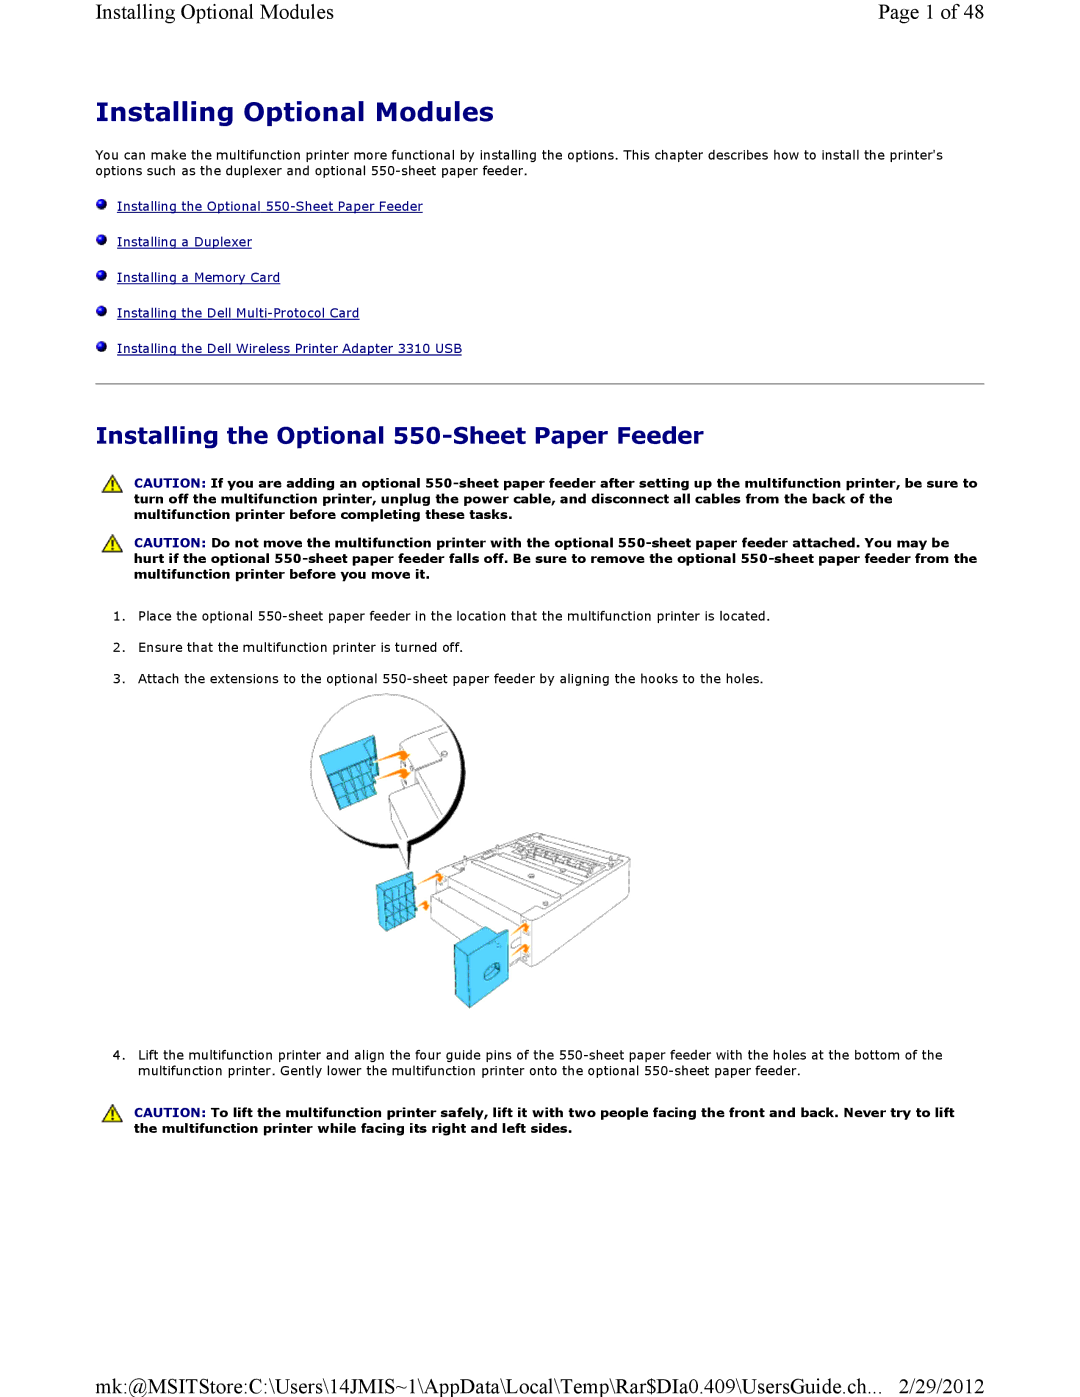
3.Attach the extensions to the optional
4.Lift the multifunction printer and align the four guide pins of the
![]() CAUTION: To lift the multifunction printer safely, lift it with two people facing the front and back. Never try to lift the multifunction printer while facing its right and left sides.
CAUTION: To lift the multifunction printer safely, lift it with two people facing the front and back. Never try to lift the multifunction printer while facing its right and left sides.
mk:@MSITStore:C:\Users\14JMIS~1\AppData\Local\Temp\Rar$DIa0.409\UsersGuide.ch... 2/29/2012