The Device View
Configuring Priority Queuing Based on Receive Port
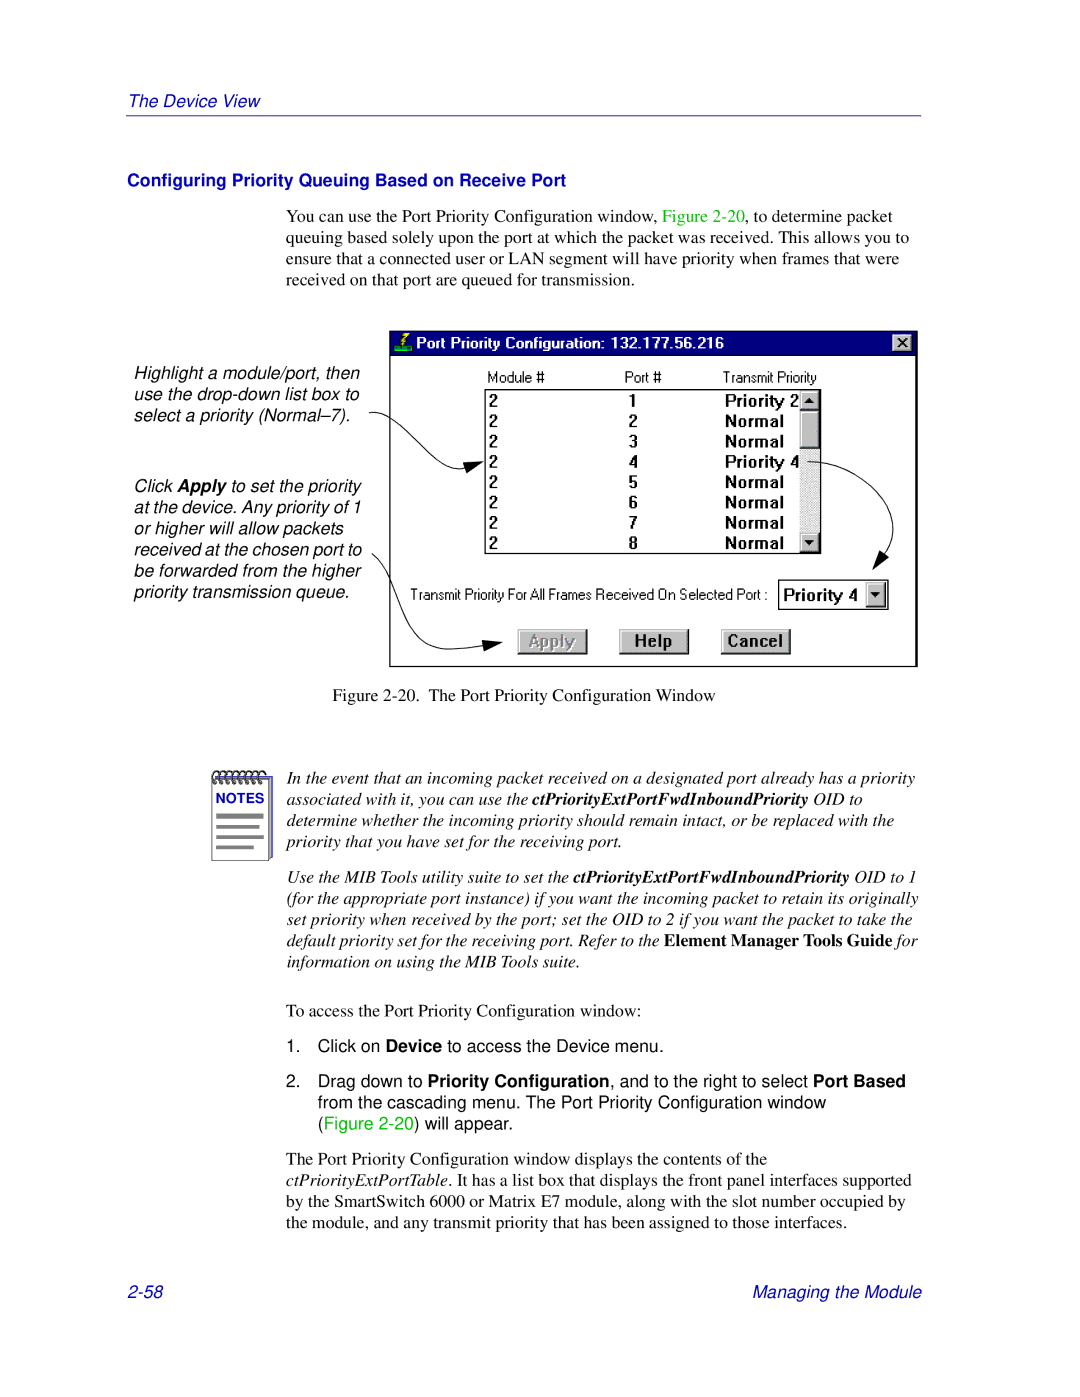
You can use the Port Priority Configuration window, Figure
Highlight a module/port, then use the
Click Apply to set the priority at the device. Any priority of 1 or higher will allow packets received at the chosen port to be forwarded from the higher priority transmission queue.
Figure 2-20. The Port Priority Configuration Window
NOTES |
In the event that an incoming packet received on a designated port already has a priority associated with it, you can use the ctPriorityExtPortFwdInboundPriority OID to determine whether the incoming priority should remain intact, or be replaced with the priority that you have set for the receiving port.
Use the MIB Tools utility suite to set the ctPriorityExtPortFwdInboundPriority OID to 1 (for the appropriate port instance) if you want the incoming packet to retain its originally set priority when received by the port; set the OID to 2 if you want the packet to take the default priority set for the receiving port. Refer to the Element Manager Tools Guide for information on using the MIB Tools suite.
To access the Port Priority Configuration window:
1.Click on Device to access the Device menu.
2.Drag down to Priority Configuration, and to the right to select Port Based from the cascading menu. The Port Priority Configuration window (Figure
The Port Priority Configuration window displays the contents of the ctPriorityExtPortTable. It has a list box that displays the front panel interfaces supported by the SmartSwitch 6000 or Matrix E7 module, along with the slot number occupied by the module, and any transmit priority that has been assigned to those interfaces.
Managing the Module |