The Device View
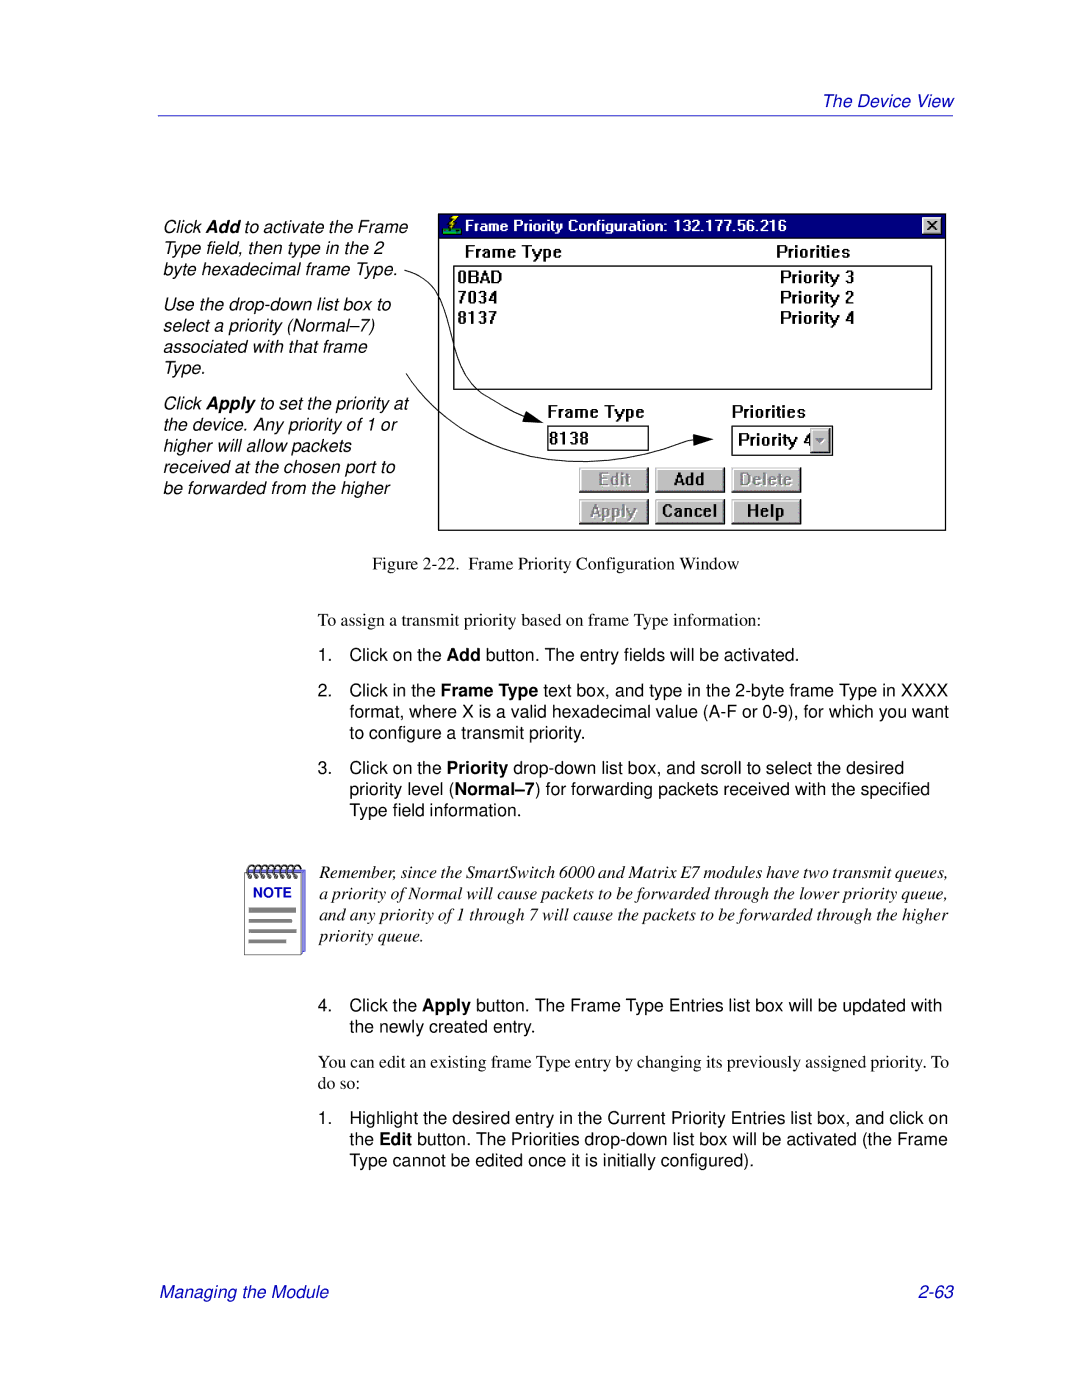
Click Add to activate the Frame Type field, then type in the 2 byte hexadecimal frame Type.
Use the
Click Apply to set the priority at the device. Any priority of 1 or higher will allow packets received at the chosen port to be forwarded from the higher
Figure 2-22. Frame Priority Configuration Window
To assign a transmit priority based on frame Type information:
1.Click on the Add button. The entry fields will be activated.
2.Click in the Frame Type text box, and type in the
3.Click on the Priority
NOTE |
Remember, since the SmartSwitch 6000 and Matrix E7 modules have two transmit queues, a priority of Normal will cause packets to be forwarded through the lower priority queue, and any priority of 1 through 7 will cause the packets to be forwarded through the higher priority queue.
4.Click the Apply button. The Frame Type Entries list box will be updated with the newly created entry.
You can edit an existing frame Type entry by changing its previously assigned priority. To do so:
1.Highlight the desired entry in the Current Priority Entries list box, and click on the Edit button. The Priorities
Managing the Module |