5 |
1.Connect a powered AP radio to a PC.
2.At the PC, open a connection with the Access Point radio using a terminal, Telnet, or Web browser session.
3.Press G to display the Main Menu.
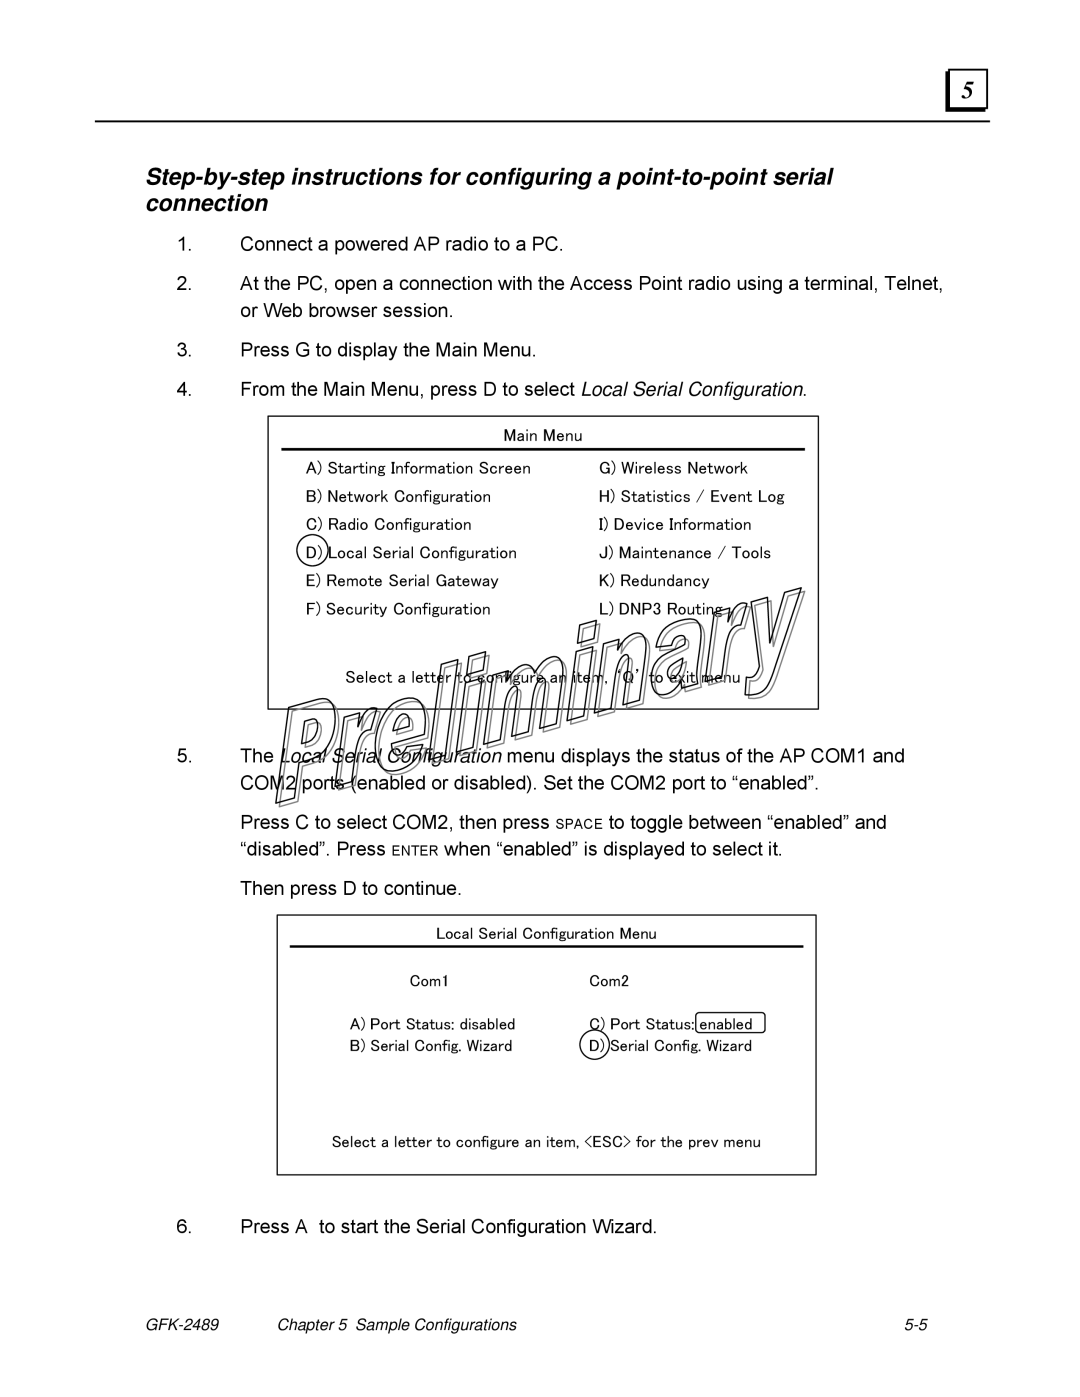
4.From the Main Menu, press D to select Local Serial Configuration.
Main Menu
A) Starting Information Screen | G) Wireless Network |
B) Network Configuration | H) Statistics / Event Log |
C) Radio Configuration | I) Device Information |
D) Local Serial Configuration | J) Maintenance / Tools |
E) Remote Serial Gateway | K) Redundancy |
F) Security Configuration | L) DNP3 Routing |
Select a letter to configure an item, ‘Q’ to exit menu
5.The Local Serial Configuration menu displays the status of the AP COM1 and COM2 ports (enabled or disabled). Set the COM2 port to “enabled”.
Press C to select COM2, then press SPACE to toggle between “enabled” and “disabled”. Press ENTER when “enabled” is displayed to select it.
Then press D to continue.
Local Serial Configuration Menu
Com1 | Com2 |
A) Port Status: disabled | C) Port Status: enabled |
B) Serial Config. Wizard | D) Serial Config. Wizard |
Select a letter to configure an item, <ESC> for the prev menu
6.Press A to start the Serial Configuration Wizard.
Chapter 5 Sample Configurations |