1 |
Quick Start Instructions
Listed below are the basic steps for installing TranSphere TS Wireless transceivers. Refer to the appropriate sections in the manual for detailed information.
1.Initial Checkout
▪Set the equipment up in a tabletop arrangement as described in Chapter 2: Tabletop Setup and Evaluation.
▪Follow all steps to ensure proper cable connections and unit configuration. As a minimum, Access Points must have the following programmed: IP Address, IP Network identifier, and Radio Network Address. (RF output power and Password should also be reviewed and set if necessary.) Remote radios normally require only a Radio Network Address to be set. (Note: The Remote Radio Network Address must match that of the AP.)
▪Connect data equipment to the transceivers. Use LAN/ETH ports for Ethernet systems, or COM2 ports for Serial data systems.
▪Verify proper exchange of data communications by viewing the LEDs. The following indications should be seen on the LED panel within 30 seconds of startup:
2.Endpoint Connectivity (PING) Test—for Ethernet Systems Only
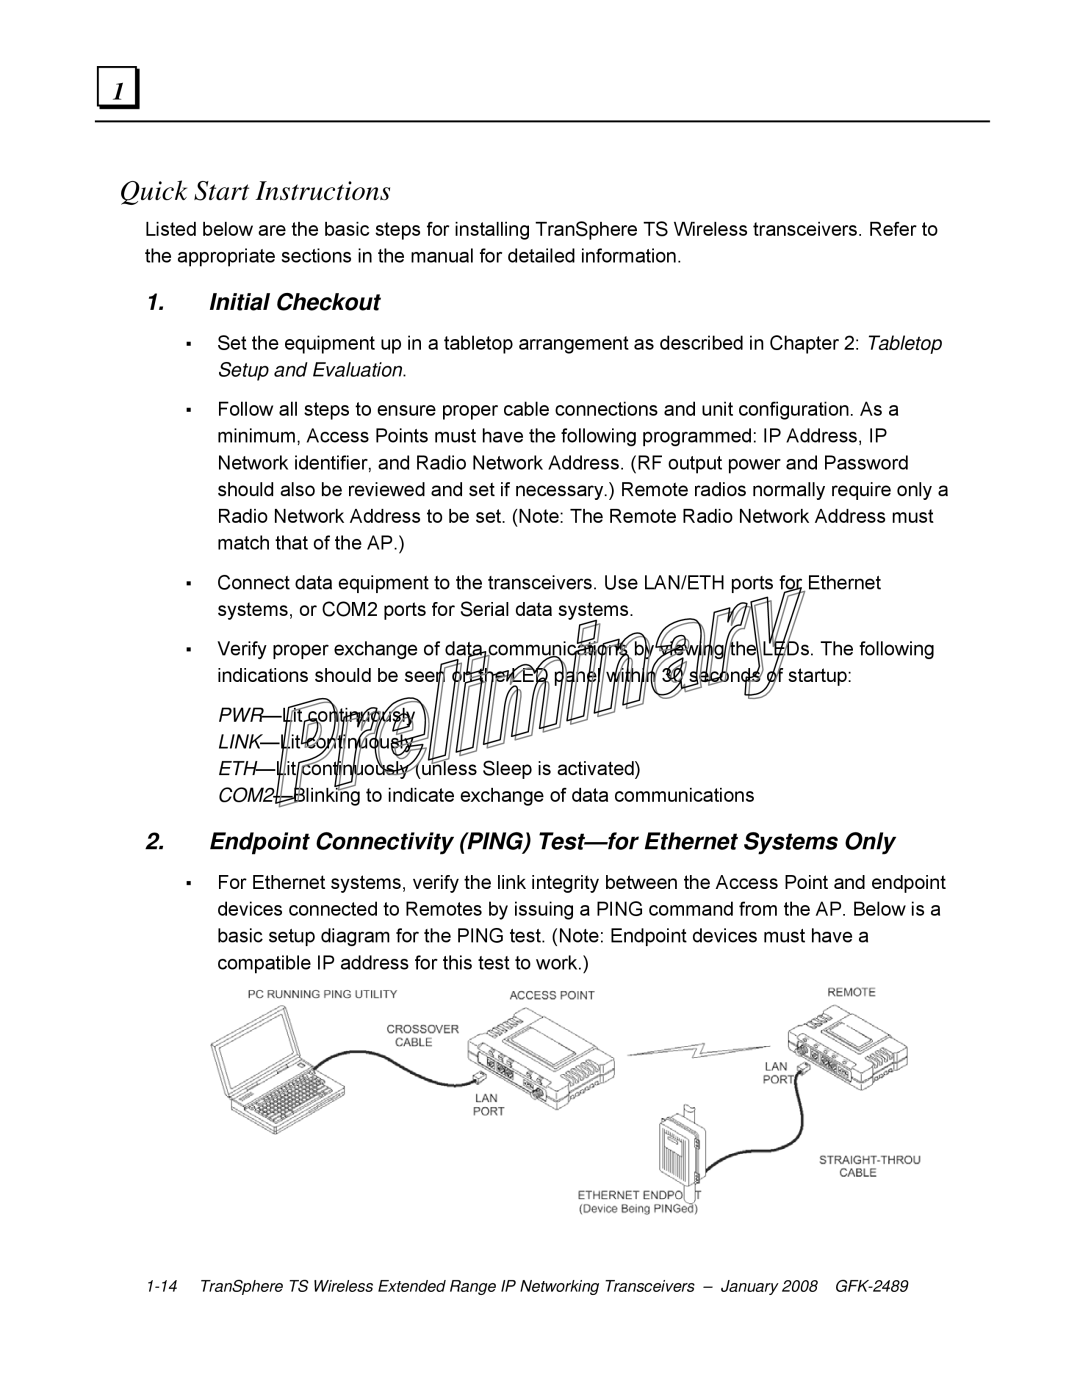
▪For Ethernet systems, verify the link integrity between the Access Point and endpoint devices connected to Remotes by issuing a PING command from the AP. Below is a basic setup diagram for the PING test. (Note: Endpoint devices must have a compatible IP address for this test to work.)
