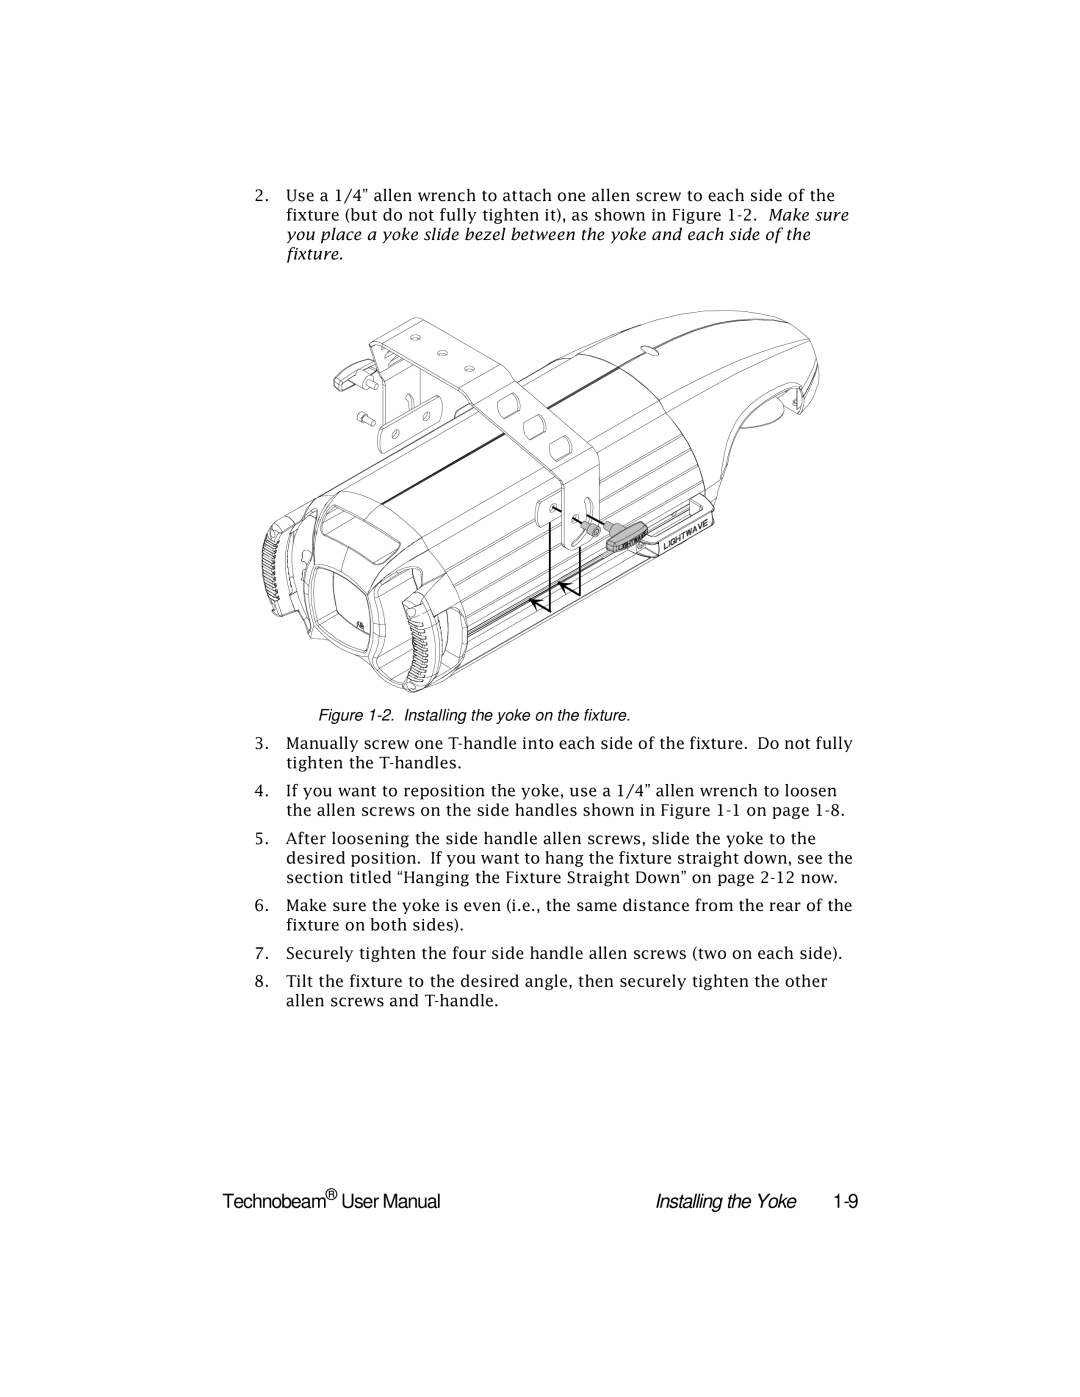
2.Use a 1/4” allen wrench to attach one allen screw to each side of the fixture (but do not fully tighten it), as shown in Figure
Figure 1-2. Installing the yoke on the fixture.
3.Manually screw one
4.If you want to reposition the yoke, use a 1/4” allen wrench to loosen the allen screws on the side handles shown in Figure
5.After loosening the side handle allen screws, slide the yoke to the desired position. If you want to hang the fixture straight down, see the section titled “Hanging the Fixture Straight Down” on page
6.Make sure the yoke is even (i.e., the same distance from the rear of the fixture on both sides).
7.Securely tighten the four side handle allen screws (two on each side).
8.Tilt the fixture to the desired angle, then securely tighten the other allen screws and
Technobeam® User Manual | Installing the Yoke |