Data Out
Data In
Data In
Data Out
Data Out
Controller
Data In
Data In
Data Out
Terminate the
l t fi t
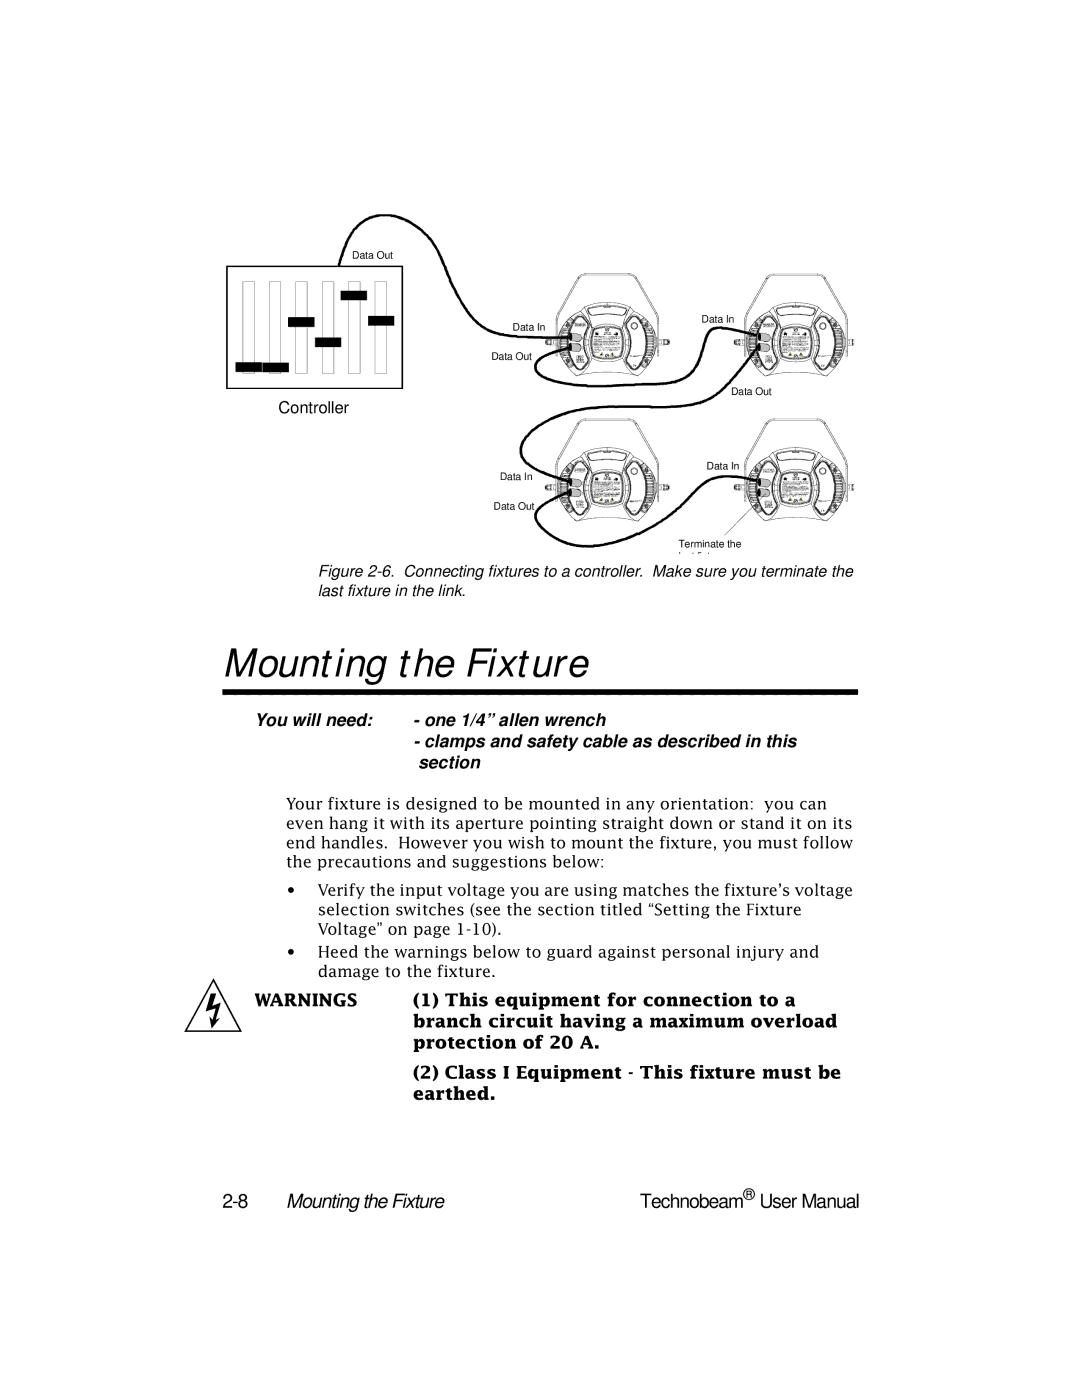
Figure 2-6. Connecting fixtures to a controller. Make sure you terminate the last fixture in the link.
Mounting the Fixture
You will need: | - one 1/4” allen wrench |
| - clamps and safety cable as described in this |
| section |
Your fixture is designed to be mounted in any orientation: you can even hang it with its aperture pointing straight down or stand it on its end handles. However you wish to mount the fixture, you must follow the precautions and suggestions below:
•Verify the input voltage you are using matches the fixture’s voltage selection switches (see the section titled “Setting the Fixture Voltage” on page
•Heed the warnings below to guard against personal injury and damage to the fixture.
WARNINGS | (1) | This equipment for connection to a |
| branch circuit having a maximum overload | |
| protection of 20 A. | |
| (2) | Class I Equipment - This fixture must be |
earthed.
Mounting the Fixture | Technobeam® User Manual |